
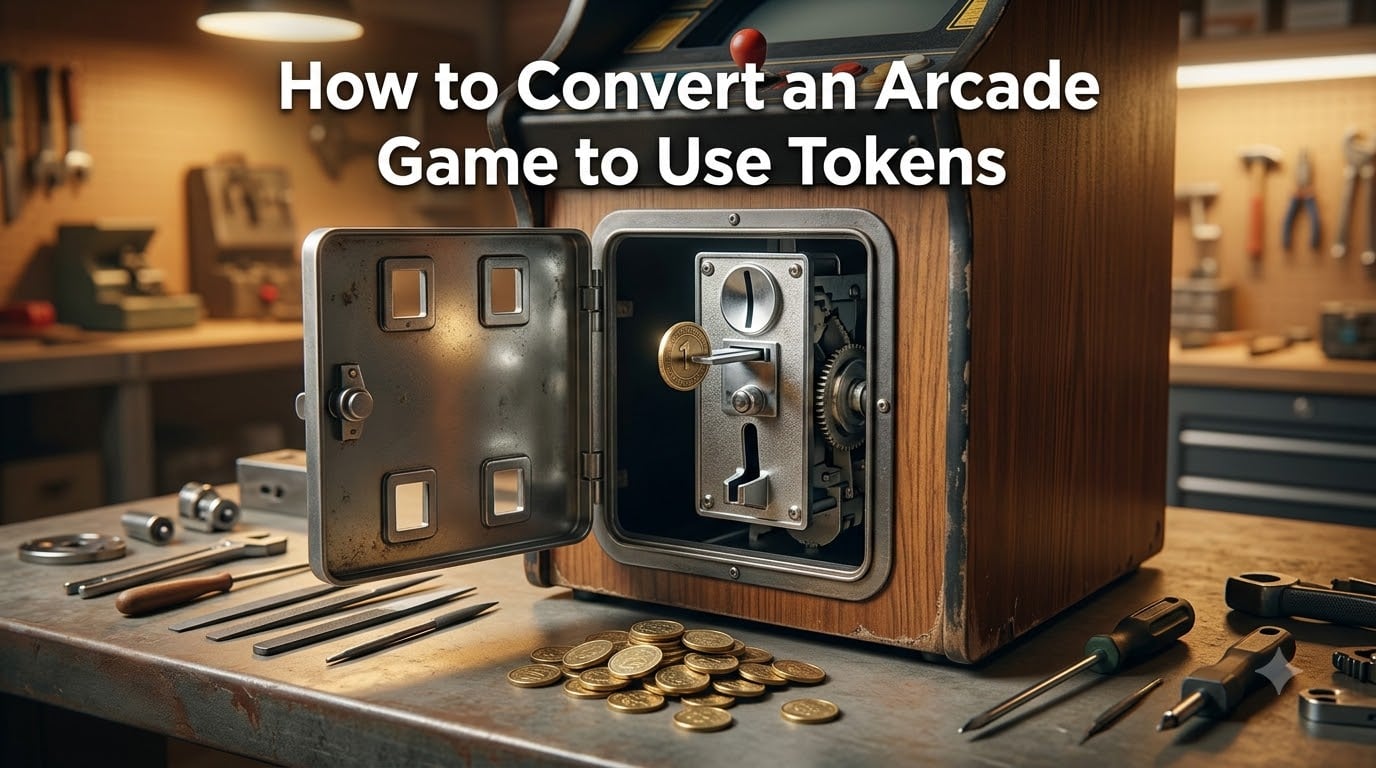
Converting an arcade game to use tokens is one of the most rewarding upgrades for any home game room, MAME cabinet, or pinball collection. I have walked through this exact process on my own Street Fighter II cabinet, a Donkey Kong PCB, and three MAME builds, and the result always feels like stepping back into the golden age of arcades. Tokens drop with that satisfying weight, the cabinet looks the part, and you never have to fumble with quarters again.
In this guide, I will walk you through everything you need to know to convert an arcade game to use tokens. We will cover token sizes, the two main conversion methods, the tools you will need, a full step-by-step walkthrough, MAME cabinet wiring specifics, troubleshooting, and even modern cashless alternatives. By the end, you will know exactly which approach fits your cabinet and your budget.
Table of Contents
- What Is Arcade Token Conversion and Why Do It
- Understanding Arcade Coin Mechs and How They Work
- Choosing the Right Token Size for Your Cabinet
- Method 1: Swapping Coin Mechs for Token Mechs
- Method 2: Modifying Your Existing Coin Mechs
- Tools and Materials You Will Need
- Step-by-Step Conversion Process
- Wiring a MAME Cabinet for Token Operation
- Modifying the Coin Door Slot for Larger Tokens
- Troubleshooting Common Conversion Problems
- Reversing the Conversion: Back to Quarters
- Modern Cashless and RFID Alternatives
- Where to Buy Arcade Tokens
- Frequently Asked Questions
- Final Thoughts on Converting Your Arcade to Tokens
What Is Arcade Token Conversion and Why Do It
Arcade token conversion is the process of modifying a coin-operated game to accept tokens instead of quarters. You can do this either by swapping the existing quarter coin mech for a token-specific mech, or by modifying the existing mech to physically accept the larger diameter of a token. Both approaches deliver the same result: a more authentic arcade experience without needing real currency.
There are three real reasons collectors and operators choose to convert. First, tokens preserve the arcade aesthetic. A pile of tokens sitting in the coin return tray feels right in a way that loose quarters never will. Second, tokens eliminate theft. Strangers cannot fish quarters out of your home cabinet during a party. Third, tokens let you control game pricing. If a quarter feels too cheap for your vintage Galaga, you can stock tokens worth whatever you want without the game knowing the difference.
This guide is for home arcade enthusiasts, MAME cabinet builders, pinball machine owners, and small commercial operators. If you collect arcade hardware, run a game room, or just want a more authentic experience, converting your machines to token operation is worth the few hours of work.
Understanding Arcade Coin Mechs and How They Work
Before you touch a single file or screwdriver, you need to understand what is actually happening inside a coin mech. Every arcade coin mech is a mechanical comparator. It uses a series of precision parts to decide whether the coin or token dropping through it is the right size, weight, and metal composition. If the coin passes every test, a microswitch closes and the game credits up.
The key components you will encounter include the cradle (where the coin rests), the reject rod (pushes invalid coins back out), the brass hook (also called the slug grabber), and the slug rejector magnet (which detects ferrous metals). Together, these parts measure the diameter of the coin as it sits in the cradle. If the coin is too small, it slips past the brass hook and falls into the reject tray. If it is too large, the reject rod pushes it back out.
The most common mech types you will find in arcade cabinets are Happ mechs (metal body, the classic American standard), Coin Controls mechs (used in many import and Japanese cabinets), Simonex plastic mechs (found in newer and budget cabinets), and Mars mechs. Each of these uses the same basic principle, but the exact location of the brass hook and the size of the cradle vary slightly. Knowing which mech you have will determine which modification steps apply to you.
The coin door itself also matters. Most American cabinets use a Happ-style coin door with thumbscrew latches and metal coin slots. Japanese and some Midway cabinets use a slightly different mounting system with flap latches. The slot in the coin door is sized for a quarter (about 0.835 inches wide), which means larger tokens often require widening the slot itself.
Choosing the Right Token Size for Your Cabinet
Token size is the single most important decision you will make in this whole process. Pick the wrong size and your mechs will jam constantly. Pick the right size and the conversion becomes almost effortless.
There are three common arcade token diameters you will encounter. The smallest, at 0.882 inches, is a common size for many amusement tokens and works well with lightly modified mechs. The middle option, at 0.900 inches (about 23mm), is the most popular size for modern arcade operations. The largest, at 0.984 inches (25mm), is the classic Chuck E. Cheese standard and the size used by most classic American arcades from the 1980s and 1990s.
Here is a quick comparison of the three sizes:
0.882 inch tokens: Easiest to fit, requires minimal filing of standard quarter mechs, but they can occasionally slip past the brass hook because they are closer to quarter size. Best for cabinets where you want a low-effort conversion.
0.900 inch tokens: A solid middle ground. Slightly larger than a quarter but still fits most mechs with moderate modification. This is the size I recommend for most first-time converters.
0.984 inch tokens: The classic arcade standard. Requires the most filing and brass hook work, but produces the most reliable results and the most authentic feel. Chuck E. Cheese tokens are this size, and many collectors target this exact diameter.
Weight matters too. Some cheap tokens from online sellers are noticeably lighter than standard brass tokens, and that lighter weight can cause rejection issues because the mech relies on momentum to seat the coin in the cradle. Stick to tokens weighing at least 4 grams, with 5 to 6 grams being ideal.
Method 1: Swapping Coin Mechs for Token Mechs
Swapping is the easier of the two conversion methods. You remove the existing quarter mech from your coin door, install a pre-built token mech in its place, reconnect the wiring, and you are done. No filing, no adjustment, no risk of ruining a mech.
Token mechs are sold online by specialty retailers. Prices typically range from $14 to $30 per mech depending on the size and brand. For a standard two-player cabinet, plan on $30 to $60 in parts. The mechs arrive calibrated for your chosen token size and usually accept a narrower size range than quarter mechs accept for quarters, which actually makes them more reliable for token operation.
The swap itself takes about 10 minutes per mech. Pop the thumbscrew or flap latch on the front of the coin door, slide the quarter mech out, disconnect the wiring harness (most use a simple two-pin or three-pin connector), and reverse the process with the token mech. If you buy from a reputable seller, the new mechs will use the same mounting holes and connector style as your originals.
Swapping makes the most sense when you are doing a fresh build, when your existing mechs are already worn or unreliable, or when you simply want the easiest possible conversion. The downside is cost. If you have a four-player cabinet or several machines to convert, the price adds up quickly.
Method 2: Modifying Your Existing Coin Mechs
Modification is the budget-friendly alternative to swapping. Instead of buying new mechs, you adjust your existing quarter mechs to accept larger tokens. This takes more time and a bit of practice, but the parts cost drops to essentially zero.
I have modified dozens of mechs this way, and the process follows the same general sequence regardless of brand. You file down the guides inside the cradle to widen the path, file down or remove the brass hook that catches under-sized coins, and file the reject rod so it does not push valid tokens back out. Plastic mechs are noticeably easier to modify than metal ones because the material files away faster and more cleanly.
For metal Happ and Coin Controls mechs, the modification typically takes 20 to 30 minutes on your first mech. By the third mech, you will be down to about 10 minutes each. The trick is going slowly and testing frequently. Drop a token through after every few file strokes and see how it behaves. If the token lands in the reject tray, you need more filing on the brass hook. If the token jams in the cradle, you went too far on the guides.
The magnet adjustment is the part most beginners skip, and it causes most of the jamming problems. The slug rejector magnet detects ferrous metals and rejects anything magnetic. Standard brass tokens are not magnetic, so the magnet should not interfere. However, if you are using a token with any steel content, you may need to physically remove the magnet or reposition it. Some collectors simply bend the magnet out of the path entirely.
For plastic mechs, the modification is faster but requires more care because the plastic can crack if you apply too much pressure. Use light, even strokes with a fine file and never force anything.
Tools and Materials You Will Need
You will not need a specialized toolkit for this conversion, but having the right tools makes the difference between a clean job and a frustrating one. Here is the complete list I keep in my conversion toolbox.
You will need a set of small precision screwdrivers (Phillips #1 and #2 plus a couple of flat blades), a set of needle files (round, half-round, and flat in fine cut), a pair of needle-nose pliers, a small adjustable wrench, a multimeter for testing microswitch continuity, and a crimping tool if you are wiring a MAME cabinet.
For MAME cabinet wiring specifically, add an IPAC2 or IPAC4 encoder (the standard input device for arcade controls), quick-disconnect terminals (0.110 inch and 0.187 inch are the most common mech sizes), 22 AWG stranded wire in red, black, and white, and a soldering iron if your mechs do not already have quick-disconnects attached.
Replacement parts worth keeping on hand include spare e-clips (the small rings that hold the brass hook in place), an extra microswitch, and a couple of spare mechs in case you damage one during modification. A can of compressed air helps clear metal shavings from the mech after filing.
Step-by-Step Conversion Process
Follow these steps in order for a clean conversion. I recommend doing one mech fully, testing it, and only then moving on to the next. This way, if you make a mistake, you only have one mech to redo.
Step 1: Power off and unplug the cabinet. Open the coin door using the key or thumbscrew latch. Remove the coin box if present to give yourself working room.
Step 2: Identify your mech type. Look at the brand stamp on the side or front. Happ mechs have a metal body with the brand name embossed. Coin Controls mechs are similar in appearance but slightly different in internal layout. Simonex and plastic mechs are obvious from their molded plastic shells.
Step 3: Disconnect the wiring harness. Most mechs use a two-pin connector carrying the microswitch signal and ground. Squeeze the connector tab and pull straight out. Never pull on the wires themselves.
Step 4: Remove the mech from the coin door. Most mechs slide out after loosening a single screw or releasing a spring clip. Set the mech on a clean, well-lit work surface.
Step 5: Open the mech by removing the back plate or cover. You will see the cradle, reject rod, and brass hook assembly. Take a photo before you start modifying so you have a reference for reassembly.
Step 6: File the cradle guides. Using a fine round or half-round file, remove a small amount of material from each guide where the token is binding. Test with your token frequently. Stop as soon as the token slides through without binding.
Step 7: File or remove the brass hook. This is the most important modification. The brass hook is what catches under-sized coins and rejects them. File the inside edge so the token can pass over it. Do not bend the guides on either side of the hook because those maintain alignment.
Step 8: File the reject rod if needed. Drop a token through the mech and watch what happens. If the token is being pushed back out, file a small amount off the end of the reject rod until the token passes cleanly.
Step 9: Reassemble the mech, reinstall it in the coin door, reconnect the wiring, and test by dropping tokens through. Each token should drop, hit the cradle, get measured, pass the brass hook, and trigger the microswitch with an audible click.
Step 10: Repeat for the second player mech if your cabinet has one. Then close up the coin door and enjoy your token-operated cabinet.
Wiring a MAME Cabinet for Token Operation
If you are building a MAME cabinet, the wiring is slightly more involved than a real arcade board because you are connecting physical mechs to a software emulator running on a PC. The standard solution is an IPAC encoder, which converts switch closures into keyboard keystrokes that MAME recognizes as coin insertions.
Wire one leg of the microswitch to the IPAC input for that player, and the other leg to the IPAC ground. Most IPAC encoders label these inputs clearly (for example, “1P START,” “1P COIN”). The COIN input is what you want for the mech wiring. Use quick-disconnect terminals on the mech side so you can swap mechs without re-soldering.
For multi-player cabinets, daisy-chain the ground wire between all mechs and run a single ground back to the IPAC. This keeps the wiring tidy and reduces the chance of ground loops. Keep your coin mech wiring physically separated from the high-voltage power wiring inside the cabinet to avoid electrical noise that can cause phantom coin credits.
Configure MAME to recognize the coin input by mapping the IPAC keystroke to the COIN button in your MAME input configuration. The default mapping for player 1 coin is usually the “5” key on the keyboard, but you can change it to anything you prefer.
Modifying the Coin Door Slot for Larger Tokens
If you are using 0.984 inch tokens, the slot in the coin door itself will likely be too narrow. The standard Happ coin slot is sized for a quarter at about 0.835 inches wide. A 0.984 inch token simply will not fit through.
The fix is straightforward but requires care. Remove the coin return bezel and the metal slot plate behind it. Use a small round file to widen the slot opening, working slowly and testing the token frequently. File equally from both sides to keep the slot centered.
Midway-style coin doors use a different slot construction with a pressed metal insert that is easier to swap out. Specialty vendors sell replacement slot plates pre-sized for specific token diameters, which is the cleanest option if you can find one that matches your door.
After widening the slot, deburr the edges with fine sandpaper so the token does not catch on a sharp edge when it drops. A clean, smooth slot will prevent jams at the entry point.
Troubleshooting Common Conversion Problems
Even careful conversions sometimes produce issues. Here are the most common problems I have seen and how to fix them.
If your mech is jamming frequently, the most likely cause is over-filing. The cradle guides may have been widened too much, allowing the token to twist sideways. Reassemble the mech and file less aggressively, testing with each pass.
If tokens keep ending up in the reject tray, the brass hook is still catching them. File the inside edge of the hook more aggressively, or in extreme cases, remove the hook entirely and bend a small piece of brass wire into a replacement.
If tokens stick in the cradle without triggering the microswitch, the reject rod is too long or angled incorrectly. File a small amount off the tip and check the angle. The rod should let the token fall forward into the microswitch position.
If lightweight tokens keep getting rejected, the problem is the token itself, not the mech. Replace your tokens with heavier brass or nickel-plated steel versions weighing at least 5 grams. Many cheap tokens from online marketplaces are undersized in both diameter and weight.
If the mech accepts tokens but the game does not credit, the problem is wiring. Check the microswitch with a multimeter in continuity mode. With no token inserted, the switch should be open. With a token inserted, it should close and complete the circuit. If the switch is working but the game still does not credit, check the wiring harness for breaks or loose connectors.
Reversing the Conversion: Back to Quarters
Sometimes you need to convert back to quarter operation. If you sell a cabinet, move it to a commercial location, or simply change your mind, the reversal is possible but harder than the original conversion.
If you swapped mechs, the reversal is simple. Buy replacement quarter mechs of the same model and reinstall them. The wiring is identical, so no rewiring is needed.
If you modified the existing mechs, you will need to either replace them with new quarter mechs or attempt to reverse the modifications. Reversing filed parts is essentially impossible because you cannot add material back. For heavily modified mechs, replacement is the only realistic option.
For this reason alone, many serious collectors buy dedicated quarter mechs and token mechs for each cabinet and swap between them as needed. The cost is higher upfront but the flexibility is worth it.
Modern Cashless and RFID Alternatives
Token conversion is the traditional approach, but modern cashless systems are worth considering if you are building new or doing a major overhaul. RFID and NFC readers can replace mechanical coin mechs entirely and accept tap cards, fobs, or even smartphone-based payments.
Cashless systems offer several advantages. They eliminate mechanical wear entirely. They allow variable pricing without reconfiguration. They provide detailed analytics on play patterns. And they integrate with loyalty programs and mobile apps for commercial operations.
The tradeoffs are cost and complexity. A quality RFID reader runs more than a token mech, and the integration with your cabinet’s existing coin input requires either a hardware interface board or a software shim that translates the RFID tap into a coin credit signal. For most home users, tokens still offer the best balance of authenticity, cost, and simplicity. Cashless makes the most sense for commercial arcades and high-traffic game rooms.
Some hybrid systems let you keep the token mech in place while adding an RFID reader alongside it, giving players the choice between physical tokens or a tap-to-pay option. These are increasingly popular in modern bar arcades and family entertainment centers.
Where to Buy Arcade Tokens
Quality tokens make a measurable difference in how reliably your converted mechs operate. Stick to reputable sellers that publish the exact diameter and weight of their tokens, and avoid the cheapest generic options on large marketplaces.
Specialty retailers that cater to the home arcade market sell tokens in standard sizes and can often produce custom designs in small quantities. For custom tokens, look for sellers that use brass or nickel-plated steel rather than thin aluminum, which wears down quickly and tends to jam.
Bulk orders typically start at 100 tokens, with discounts for larger quantities. If you have multiple cabinets, a single bulk order makes sense. For a single two-player cabinet, 50 tokens is usually plenty for casual play.
Frequently Asked Questions
What are arcade tokens made of?
Most arcade tokens are made of brass or nickel-plated steel, with brass being the most common choice for standard 0.984 inch tokens. Brass offers the right weight (5 to 6 grams typically), resists corrosion, and is not magnetic, which means it works cleanly with standard coin mech slug rejector magnets. Higher-end tokens may use copper-nickel alloys for a more premium feel.
Why did arcades get rid of tokens?
Many arcades shifted away from tokens during the late 1990s and early 2000s because dollar bill acceptors and electronic card systems reduced the operational overhead of handling tokens. Tokens required counting, refilling hoppers, and managing inventory of physical currency equivalents. Modern cashless systems also enable variable pricing and analytics that tokens could not. However, many boutique and retro arcades have brought tokens back as part of the nostalgic experience.
How do arcade coin slots work?
An arcade coin slot channels the coin or token into a coin mech, which is a mechanical comparator. The coin drops into a cradle where it is measured against preset dimensions. A brass hook catches under-sized coins and rejects them, a magnet rejects ferrous metals, and a reject rod pushes oversized coins back out. Only coins that pass all three tests fall through and trigger a microswitch that sends a credit signal to the game.
Do arcade tokens have value?
Old arcade tokens can have collector value, especially tokens from defunct arcades, closed amusement parks, or limited-run events. Some rare tokens from the 1980s have sold for hundreds of dollars among collectors. Modern tokens that you purchase in bulk have face value only in the sense that they work in your own cabinet, but they have no monetary value outside that context.
Can a mech accept both tokens and quarters?
It is technically possible to modify a mech to accept both, but it requires careful adjustment of the brass hook and reject rod. In practice, most collectors choose one or the other because dual acceptance introduces reliability issues. If you want to switch between tokens and quarters, the cleanest approach is to keep two sets of mechs and swap them as needed.
Are Nintendo cabinets different for token conversion?
Nintendo cabinets like Donkey Kong, Popeye, and the Mario Bros. games use coin mechs that are mechanically similar to Happ and Coin Controls units, so the modification process is essentially the same. The main difference is that many Nintendo cabinets use a Japanese-style coin door with a different mounting system, which may require sourcing an American-style door or modifying the existing one to fit Happ or Coin Controls mechs.
Final Thoughts on Converting Your Arcade to Tokens
Converting an arcade game to use tokens is one of those projects that delivers a lot of satisfaction for a small investment of time. Whether you choose the swap method for its simplicity or the modification method for its budget-friendly nature, the end result is the same: a more authentic, theft-resistant, and enjoyable arcade experience.
Start by identifying your mech type and choosing your token size. Decide whether to swap or modify based on your budget and how many cabinets you need to convert. Gather your tools, follow the step-by-step process, and test thoroughly before closing everything back up. If you hit a snag, the troubleshooting section above covers the issues I have seen most often. Now grab your files and your tokens, and enjoy the process of bringing your arcade back to its golden-age glory.