
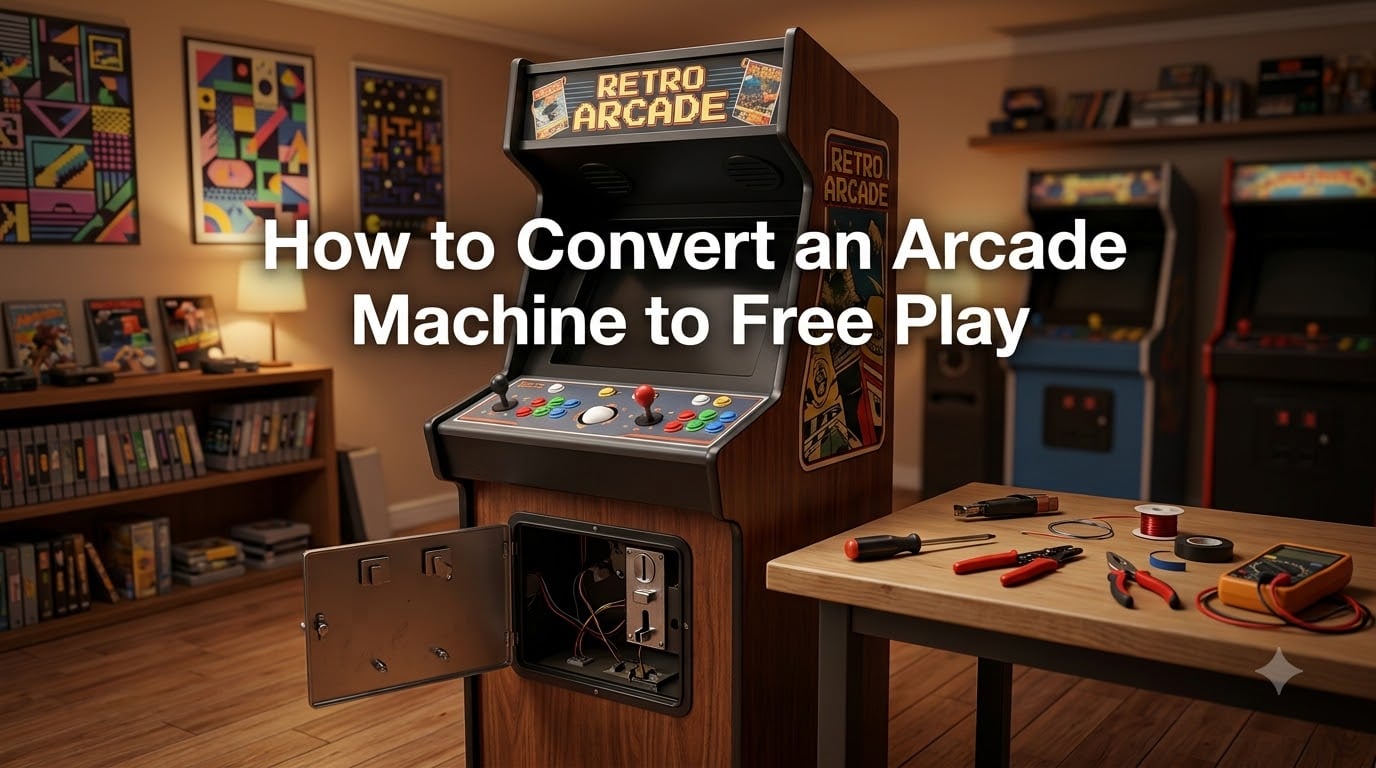
If you just brought home a classic arcade cabinet and want to skip the coin slot, learning how to convert an arcade machine to free play is the first thing you should tackle. Free play mode lets you and your guests start games with a single button press, no quarters or tokens required.
The good news is that most arcade machines built from the mid-1980s onward already have a free play setting built in. You just need to know where to find it. The process varies depending on your machine’s hardware, but four methods cover virtually every arcade system in existence:
- Service/Test Mode Menu – Access the built-in software menu to toggle free play (works on most systems).
- Dip Switch Settings – Flip a physical switch on the game board (common on Neo Geo, CPS1, and other classic PCBs).
- Hardware Modification – Run a jumper wire or install a credit board for machines without software free play.
- MAME Configuration – Wire coin door microswitches to an encoder for custom and emulation cabinets.
Our team has spent years collecting, restoring, and modding arcade cabinets. In this guide, I’ll walk you through each method step by step, with model-specific tips pulled from arcade communities like Aussie Arcade, KLOV, and arcade-collecting forums.
Table of Contents
- What Is Free Play Mode on an Arcade Machine?
- How to Convert an Arcade Machine to Free Play: 4 Methods
- Method 1: Using the Service/Test Mode Menu
- Method 2: Dip Switch Settings for Classic PCBs
- Method 3: Hardware Modification (Jumper Wire / Credit Board)
- Method 4: MAME Cabinet Free Play Configuration
- Arcade1Up Free Play Modding
- Safety Notes Before Modifying Your Arcade Machine
- Troubleshooting Common Free Play Issues
- Free Play vs Coin Drop: Which Is Right for Your Setup?
- Frequently Asked Questions
- Conclusion
What Is Free Play Mode on an Arcade Machine?
Free play mode is a built-in setting that removes the coin requirement from an arcade machine. Instead of inserting quarters or tokens to start a game, the machine grants unlimited credits automatically. You just press Start and play.
Most arcade manufacturers included a free play option because operators needed it for testing, demos at trade shows, and tournament setups. Capcom, SNK, Sega, Atari, and Konami all built this feature into their game boards. The setting is almost always there, you just have to find the right toggle.
Free play works through one of three mechanisms depending on the system. Software-based free play changes a menu setting that the game reads on boot. Dip switch free play physically changes the board’s configuration through a small toggle switch. Hardware modification forces continuous credit signals when the board itself does not support a free play mode at all.
The experience difference is night and day. With coin operation, you stop every few minutes to feed the machine. With free play mode, your arcade cabinet feels like a home console with authentic arcade controls. That is why nearly every home arcade collector makes this conversion.
How to Convert an Arcade Machine to Free Play: 4 Methods
Below I cover four proven methods for setting an arcade machine to free play. Start with Method 1 (service mode) since it is the easiest and works on most machines. If your cabinet does not have a software menu, move to the dip switch or hardware methods.
Quick Comparison of Free Play Methods
Here is a fast overview so you can identify which approach fits your machine:
- Service Mode Menu: Software-based. Universal across most JAMMA, CPS2, CPS3, and Sega systems. No tools required.
- Dip Switch Settings: Hardware toggle on the PCB. Common on Neo Geo, CPS1, Atari, and pre-1990 boards. Requires opening the cabinet.
- Jumper Wire / Credit Board: Physical wiring mod. Used when a game has no free play setting at all. No-solder options available.
- MAME Configuration: Software and wiring setup for emulation cabinets. Coin door switches connect to an IPAC or similar encoder.
Method 1: Using the Service/Test Mode Menu
The service or test mode is a built-in menu that nearly every arcade machine has. This is the first method I try on any cabinet because it requires no tools, no opening the machine, and no risk of damage. If your machine was made after roughly 1987 and uses a JAMMA board, CPS2, CPS3, or similar system, this method will almost certainly work.
Step 1: Locate the Service Button
Open the coin door or remove the front access panel. Look inside for a small push-button switch, usually mounted near the coin mechanism or on a small bracket. Some machines label it “Service,” “Test,” or “Menu.” On others, it is an unlabeled black button next to the volume control.
If you cannot find a button, check the cabinet’s harness for a two-wire connector that is not plugged into anything. That dangling connector is often the service switch, waiting for you to momentarily touch the two wires together to activate it.
Step 2: Enter the Service Menu
Turn the machine on. Once the game has booted to the attract screen, press and hold the service button for two to three seconds. The screen should switch to a menu. On Capcom CPS2 and CPS3 boards, you will see a menu with options like “Game Settings,” “System Settings,” and “Bookkeeping.”
If the button does not respond, try pressing it quickly two or three times instead of holding it. Some systems use multiple quick presses rather than a long hold to enter the menu.
Step 3: Navigate to the Free Play Setting
Use the player 1 joystick to move up and down through the menu. Use the player 1 button 1 to select an option. Navigate to “Game Settings,” “Coin Settings,” or “System Settings.” Look for an option called “Coinage,” “Free Play,” “Freeplay,” or “Credit Setting.”
Change the setting from its default (usually “1 Coin 1 Play”) to “Free Play.” On some systems, you scroll through a list of coin options until “Free Play” appears at the end.
Step 4: Save and Exit
Most service menus save automatically when you exit. Navigate to “Exit” or press the service button again to return to the game. On some older boards, you need to select “Save and Exit” explicitly. Power-cycle the machine to make sure the setting sticks.
When the attract screen returns, you should see “Free Play” or “Press Start” instead of “Insert Coin.” If you do, you are done.
Common Service Menu Variations by System
Capcom CPS2 and CPS3 boards use a straightforward menu system accessible through the test switch. Sega Naomi and Lindbergh systems have a similar menu accessed through the test button on the control panel or inside the coin door. SNK Neo Geo MVS uses a hardware settings menu (covered in Method 2) because it relies on dip switches rather than a software coinage menu.
Konami systems from the late 1990s onward use a standard JAMMA service menu. Atari System 1 and System 2 boards have a test mode accessible through a dedicated test switch on the door. If your machine is a multicade running a 60-in-1 or similar multi-game board, the service menu almost always has a free play toggle.
Method 2: Dip Switch Settings for Classic PCBs
If your arcade machine was built before the early 1990s, or if it uses a Neo Geo MVS, Capcom CPS1, or other classic game board, the free play setting is controlled by a physical dip switch on the PCB. A dip switch (dual in-line package switch) is a small bank of toggle switches on the circuit board. Each switch controls one setting, and manufacturers documented which switch does what in the game’s manual.
This method requires opening the cabinet and finding the game board, but the actual change takes seconds. Here is how to do it.
Step 1: Find the Correct Dip Switch Setting
Every game has a unique dip switch layout. You need the manual or a reliable reference for your specific game board. The trusted source in the arcade community is KLOV (Killer List of Video Games), which hosts manuals and dip switch documentation for thousands of arcade titles.
Look up your game at KLOV or find the original manual PDF. Search for the “DIP Switch Settings” section, then find the “Coinage” or “Free Play” entry. The manual will tell you exactly which switch on which bank controls free play.
Step 2: Open the Cabinet and Locate the PCB
Power off the machine and unplug it from the wall. Open the back panel or remove the marquee to access the game board. The PCB is the main circuit board, usually mounted on a metal bracket or in a plastic case for cartridge-based systems like the Neo Geo.
Look for a bank of small sliding switches, typically in groups of four or eight. They will be labeled DSWA, DSWB, DSW1, DSW2, or similar. Some boards have the switch bank right on the PCB, while others route it to an external panel for easier access.
Step 3: Flip the Dip Switch and Power Cycle
Use a small flathead screwdriver or your fingernail to flip the correct switch to the position indicated by the manual. Dip switch positions are labeled “On” and “Off” (sometimes shown as “Closed” and “Open”). Make the change, close up the cabinet, and power the machine back on.
The free play setting takes effect on the next boot. You should see “Free Play” on the attract screen instead of the coin prompt.
Dip Switch Free Play Settings by System
Here are known free play dip switch settings for the most common classic arcade systems. Always verify against the manual for your specific game, as regional variants and ROM revisions can change the layout.
- Neo Geo MVS: DIP Bank 1, Switch 1 ON for free play. This is one of the simplest and most well-known settings in arcade collecting.
- Capcom CPS1 (Final Fight, Street Fighter II, etc.): DIP Switch Set C, Switch 3 ON. CPS1 boards use physical dip switches unlike the later CPS2 which uses a software menu.
- Capcom CPS2/CPS3: No dip switch needed. Free play is set through the service menu (see Method 1).
- Atari Games (Paperboy, Gauntlet, etc.): DIP Bank varies by game. Check the manual at KLOV. Atari boards typically have one dedicated free play switch on the option bank.
- Konami (Contra, TMNT, etc.): DIP Bank varies by title. Most Konami boards from the late 1980s have a free play option on the first dip switch bank.
- JAMMA Multicade (60-in-1, 412-in-1): Access the service menu rather than dip switches. Most multicade boards auto-detect settings through the test menu.
Method 3: Hardware Modification (Jumper Wire / Credit Board)
Some arcade games simply do not have a free play option. Older boards from the early 1980s, certain bootleg boards, and some dedicated cabinets were designed strictly for coin operation. In these cases, you need a hardware modification that tricks the machine into thinking coins are constantly being inserted.
Two popular no-solder methods handle this: the jumper wire technique and the credit board approach. Both are well-documented in the Aussie Arcade community and among JAMMA collectors.
The Jumper Wire Method
The jumper wire method connects the coin switch signal to ground, which creates a continuous credit pulse that the game board reads as a coin insertion. This works because arcade coin mechanisms use a simple microswitch that closes a circuit when a coin passes through.
To do this, you need a short piece of wire with quick-disconnect terminals on each end. Disconnect the machine from power first. Locate the coin switch on the coin door assembly and identify the two wires connected to it. One wire is the signal line and the other is ground.
Connect a jumper wire from the coin switch signal terminal to any ground point on the cabinet. When you power the machine on, it will read a constant stream of credits. Press Start whenever you want to play.
Some collectors prefer a variation where they wire the player 2 start button to also trigger a credit. This way, pressing the player 2 button adds a coin and pressing player 1 start begins the game. It gives you the feel of inserting a coin without actually needing one.
The Sunrise Credit Board Method
The Sunrise credit board is a small aftermarket board that sits between the JAMMA harness and the coin switch. It has a service switch that, when pressed momentarily, adds credits to the game. This is a cleaner solution than the jumper wire because it gives you a dedicated free credit button instead of unlimited credits flooding in constantly.
Installation is straightforward. Connect the credit board’s input to the coin switch wires on the JAMMA harness. Connect the output to the game board’s coin input. Mount the service switch in a convenient location on the cabinet. When you press the button, the board sends a single credit pulse to the game.
This approach is popular with collectors who want to preserve the feeling of adding credits while still playing for free. It is also cleaner than a bare jumper wire and less likely to cause issues with games that behave oddly when they receive too many credits at once.
Tools You Will Need for Hardware Mods
For either hardware method, gather these tools before you start: a set of quick-disconnect terminals (female 0.187-inch for most arcade applications), a crimping tool, wire strippers, 18 to 22 AWG stranded wire, and a multimeter for testing connections. For the Sunrise credit board, you also need the board itself and a mounting location.
Method 4: MAME Cabinet Free Play Configuration
If you are running a MAME cabinet (Multiple Arcade Machine Emulator), the free play setup is different from a real arcade board. MAME cabinets use a PC or single-board computer running emulation software, with arcade controls wired to a keyboard encoder like the IPAC from Ultimarc.
The coin door on a MAME cabinet is cosmetic unless you wire it up. To make it functional, you need to connect the coin door microswitches to the encoder so the software registers coin insertions. Here is how.
Wiring the Coin Door to an IPAC Encoder
Open the coin door and locate the microswitch behind the coin slot. This is the same type of microswitch used on arcade buttons and joysticks. Each microswitch has three terminals: NO (normally open), NC (normally closed), and COM (common).
Run a wire from the NO terminal of the coin microswitch to an open input on your IPAC encoder. Then run a ground wire from the COM terminal to the ground daisy-chain that connects all your other controls. The IPAC already has a shared ground bus that every button and joystick connects to, so you just add the coin switch to that chain.
Once wired, configure your front-end software to map the IPAC input for the coin switch to the MAME “Coin 1” key. In MAME, the default coin key is the number 5 for player 1 and 6 for player 2. Assign the IPAC input accordingly, and your coin door will now register credits in MAME.
If you want true free play without pressing the coin button at all, most MAME front-ends like Attract-Mode or LaunchBox support auto-credit scripts that automatically insert coins when you start a game. Check your front-end documentation for this feature.
A Note on MAME Legality
The MAME emulator software itself is legal to own and use. What is not legal is using ROM files for games you do not own. The general rule followed by the arcade community is that you should only use ROMs for games where you own the original PCB or have purchased a legitimate license. Owning MAME as a piece of software is perfectly fine.
Arcade1Up Free Play Modding
Arcade1Up machines are a different animal from classic arcade cabinets. They run custom Linux-based software on ARM hardware, not original arcade boards. Out of the box, Arcade1Up cabinets do not need coins to play since they are designed for home use. But the modding community has developed ways to expand what these machines can do.
Can Arcade1Up be modded? Yes, and the community around it is very active. The most common mod is installing third-party firmware or replacing the stock board entirely with a Raspberry Pi or PC running MAME. This gives you access to hundreds more games and full control over the free play experience.
For basic free play without a full board swap, some Arcade1Up models allow access to a hidden service menu through a button combination during boot. This varies by model and firmware version. Check the Arcade1Up subreddit and modding forums for your specific model number.
If you go the board-swap route, the process involves removing the stock PCB, installing a Raspberry Pi or mini PC, and connecting the existing controls to an IPAC or similar encoder. The cabinet’s coin door on most Arcade1Up models is decorative, so free play is the default once you have a new board installed.
Forum users report that the most satisfying Arcade1Up mod is adding a functional coin door with a real microswitch wired to the encoder. This gives you the tactile satisfaction of dropping a coin while still playing for free. It is a weekend project that transforms the feel of the machine.
Safety Notes Before Modifying Your Arcade Machine
Before you open any arcade cabinet, safety comes first. These machines contain high-voltage components that can deliver a serious shock if mishandled. No competitor guide I have found covers this, and it is critical.
Unplug the machine. Never work inside an arcade cabinet with the power connected. Pull the plug from the wall, not just the power switch. Power switches only cut one leg of the AC line in many cabinets, meaning live voltage can still be present on the internal wiring.
Discharge the monitor. If your cabinet has a CRT monitor, the tube holds a dangerous electrical charge even after the machine is unplugged. The anode voltage on a CRT can be 20,000 volts or more. If you are only working on the game board or coin door, you do not need to discharge the tube, but never touch the back of the CRT or the red high-voltage anode wire and suction cup connector.
Avoid the power supply. The power supply section of the cabinet, including the isolation transformer and line filter, carries mains voltage. Keep your hands away from this area unless you are specifically servicing it with proper training.
Ground yourself for PCB work. Static electricity can damage arcade game boards. Touch a grounded metal surface before handling the PCB, and work on a non-static surface. Avoid carpeted areas.
Use insulated tools. When adjusting dip switches or making wiring changes, use tools with insulated handles. A metal screwdriver that slips and bridges two contacts on a powered board can destroy it.
Troubleshooting Common Free Play Issues
Sometimes the free play conversion does not go smoothly. Here are the most common problems forum users report and how to fix them.
The Machine Still Shows “Insert Coin”
If you changed the setting but the attract screen still asks for coins, you likely need to power-cycle the machine. Turn it fully off, wait ten seconds, and turn it back on. The free play setting only takes effect on a fresh boot, not mid-game.
If that does not work, double-check the setting in the service menu. Some systems have multiple coin-related settings, and you may have changed the wrong one. Look for a setting specifically called “Free Play” rather than changing the coin-to-credit ratio.
The Game Crashes or Glitches in Free Play
Some older games were never designed for free play mode and behave oddly when it is enabled. You might see garbled graphics on the attract screen, infinite credits that overflow the display, or even crashes when the credit counter reaches its maximum value.
This is rare but does happen with certain bootleg boards and very early titles. If you encounter this, switch back to coin operation and use the jumper wire method (Method 3) instead. The jumper wire feeds credits gradually, which avoids the overflow problem that some boards experience with true free play mode.
The Service Button Does Nothing
If pressing the service button does not bring up the menu, the button itself may be faulty. Test it with a multimeter set to continuity mode. Disconnect the two wires from the button and touch the probes to the terminals. Press the button. If the meter does not beep, the switch is dead and needs replacement.
Another possibility is that the button works but the game board does not respond to it. This happens on some non-standard boards or when the service button wiring has come loose from the JAMMA harness. Trace the wires from the button to the board connector and make sure everything is seated properly.
Dip Switch Changes Have No Effect
If flipping the dip switch did not change anything, you may have the wrong switch for your game version. Arcade boards often went through multiple revisions, and the dip switch layout can differ between versions. Look up your specific ROM version on KLOV rather than relying on a generic guide.
Also check that the dip switch is actually moving. Old dip switches can become stiff or stuck. Press firmly with a small screwdriver and verify the switch clicks into the correct position. The switch should have a distinct snap when it moves between On and Off.
Free Play vs Coin Drop: Which Is Right for Your Setup?
For most home arcade owners, free play is the obvious choice. But there are situations where keeping coin operation makes more sense. Let me break down the trade-offs.
Free play is ideal for home use where you want immediate, unlimited gaming without managing coins. It is perfect for parties, family game rooms, and casual play sessions. The downside is that some people miss the tactile ritual of inserting a coin to start a game, which is part of the authentic arcade experience.
Coin operation with real quarters works for collectors who want full authenticity. You are not paying yourself, so the cost is zero, but you need a supply of quarters and you need to empty the coin box periodically. This is the setup most purists prefer for a showroom-quality restoration.
Token operation is a middle ground. Many home arcade owners convert their coin mechs to accept tokens instead of quarters. You buy a bag of tokens, hand them out to guests, and the machine feels like a real arcade without the expense of using real money. RetroBlast has an excellent guide on swapping coin mechs for token operation. This preserves the arcade feel while keeping things free in practice.
For commercial arcades, the calculation is different. Free play arcades charge a flat entry fee and set every machine to free play. This business model has become increasingly popular because it simplifies operations and appeals to customers who want predictable pricing. If you are running a commercial venue, free play eliminates coin jams, reduces wear on coin mechanisms, and creates a better customer experience.
Frequently Asked Questions
How to set an arcade machine to free play?
To set an arcade machine to free play, open the coin door and press the service button to enter the test menu. Navigate to Game Settings or Coinage and change the setting to Free Play. Save and exit, then power-cycle the machine. If your machine uses dip switches instead of a service menu, look up the free play dip switch setting for your specific game board on KLOV and flip the indicated switch.
What does free play mean in arcade?
Free play means the arcade machine does not require coins or tokens to start a game. The machine grants unlimited credits automatically, so players just press Start. Most arcade manufacturers built this feature in for testing, demos, and tournaments.
Can Arcade1Up be modded?
Yes, Arcade1Up machines can be modded. The most common modification is replacing the stock board with a Raspberry Pi or mini PC running MAME, which gives full control over the free play experience. Some models also have hidden service menus accessible through button combinations during boot. The Arcade1Up modding community is very active and shares detailed tutorials online.
Is the MAME emulator legal?
The MAME emulator software itself is legal to own and use. However, using ROM files for games you do not own the original board for is not legal. The widely accepted practice is to only use ROMs for arcade games where you own the original PCB or have purchased a legitimate license.
How does freeplay arcade work?
Free play arcade works by changing the machine’s coinage setting so it no longer requires coin insertion to start a game. This is done through the service menu, a dip switch on the game board, or a hardware modification that simulates coin insertion. The machine then grants unlimited credits automatically.
How to activate free play mode or dev mode?
To activate free play mode, press and hold the service or test button inside the coin door to access the settings menu. Navigate to the coinage or system settings and select Free Play. On classic boards, activate free play by flipping the correct dip switch as documented in the game manual. Dev mode is a separate feature found on some machines that allows access to debug settings, which is different from free play mode.
Conclusion
Learning how to convert an arcade machine to free play transforms a coin-operated relic into a home entertainment centerpiece. Whether you use the service menu, flip a dip switch, run a jumper wire, or configure a MAME cabinet, the process is straightforward once you identify your machine’s hardware type.
Start with the service menu method, consult KLOV for your dip switch settings if needed, and always unplug before opening the cabinet. Your home arcade is waiting, and unlimited credits are just a few steps away.