
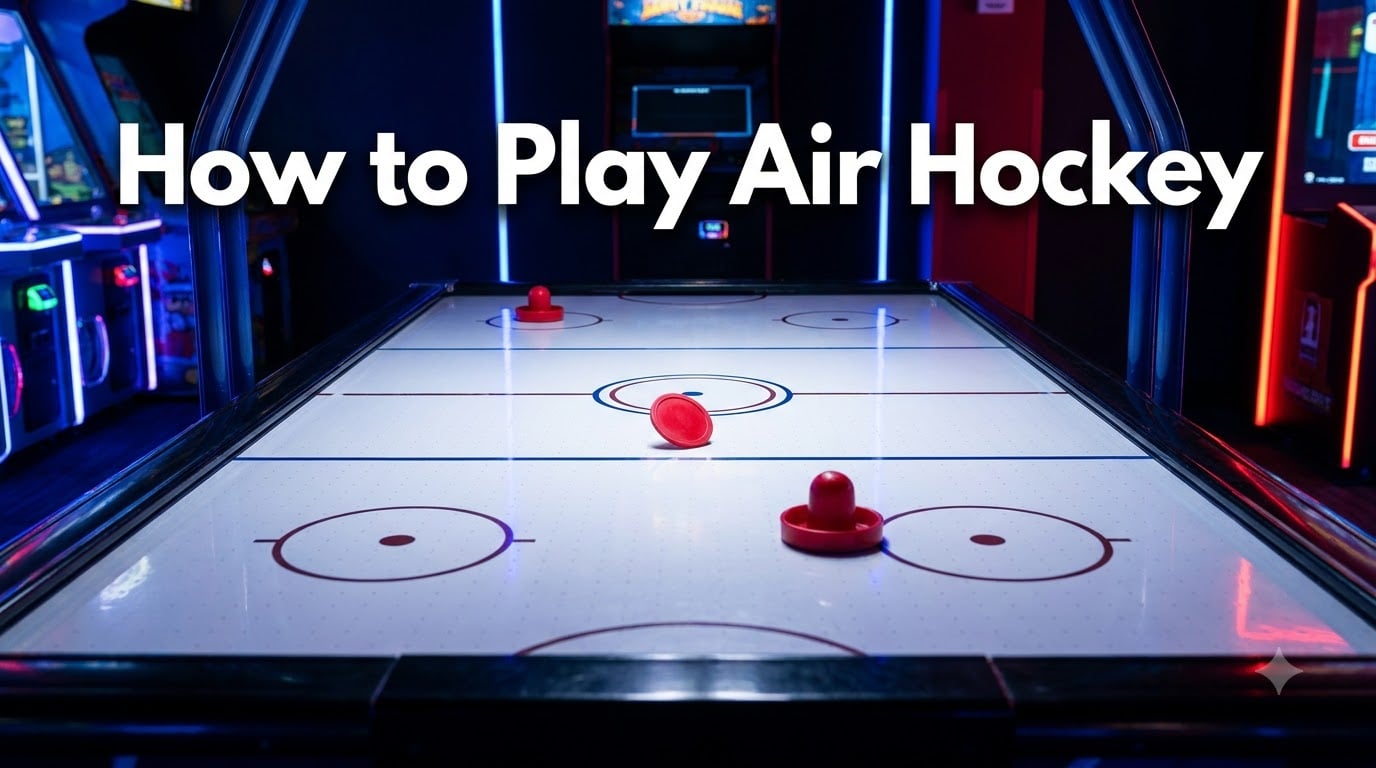
Air hockey is a two-player tabletop game where opponents use handheld mallets to strike a lightweight puck across a low-friction table, trying to score goals in the opponent’s net while defending their own. The first player to reach 7 points wins the game. Whether you are standing at an arcade table for the first time or setting up a game room at home, learning how to play air hockey comes down to understanding a handful of rules, proper grip technique, and a few strategic habits.
Our team has spent years playing in arcades, home game rooms, and even watching competitive USAA tournament footage to put together this guide. I will walk you through everything from the basic rules to pro-level defensive strategies. You will also learn about equipment, table anatomy, fouls, solo practice drills, and the most common mistakes that hold beginners back.
This guide covers official USAA rules alongside casual play conventions, so you can apply what you learn whether you are at a birthday party or preparing for a local tournament. By the end, you will have a complete picture of how to play air hockey with confidence and skill.
Table of Contents
- The Basic Rules of Air Hockey
- What You Need to Play Air Hockey (Equipment)
- Understanding the Air Hockey Table
- How to Hold an Air Hockey Mallet?
- How to Play Air Hockey: Step by Step
- Air Hockey Scoring Rules
- Serving Rules and the Face-Off
- Fouls and Penalties in Air Hockey
- Pro Tips: How to Play Air Hockey Like a Pro
- Common Beginner Mistakes to Avoid
- How to Play Air Hockey Solo (Practice Mode)
- Casual vs Tournament Rules: What’s Different
- Game Variations and House Rules
- FAQs
- Conclusion
The Basic Rules of Air Hockey
The basic rules of air hockey are simple: two players stand on opposite sides of a table, each armed with a mallet, and they take turns trying to hit a puck into the opponent’s goal slot. The first player to score 7 goals wins. Players cannot cross the centerline with their mallet, and the puck must stay in motion during play.
Here is a quick breakdown of the core rules every player should know:
First to 7 wins. The game ends when one player reaches 7 goals. Some casual games play to a different number, but 7 is the official standard.
Stay on your side. Your mallet cannot cross the centerline into your opponent’s half of the table. Doing so is a foul.
Do not touch the puck with your hand. Only the mallet can contact the puck during play.
Do not top the puck. Placing your mallet on top of the puck (called “topping”) is a foul.
Keep the puck moving. You have roughly 7 seconds to hit the puck once it is on your side in tournament play. Stalling results in a foul.
Scored player serves next. After a goal is scored, the player who was scored on gets to serve the puck back into play.
One point per goal. Each goal is worth exactly one point, regardless of how the puck goes in.
These rules form the foundation of how to play air hockey at any level. Once you have these memorized, the rest of the game becomes about technique and strategy rather than rule-keeping.
What You Need to Play Air Hockey (Equipment)
To play air hockey, you need three pieces of equipment: an air hockey table, a mallet (also called a striker or paddle), and a puck. That is it. No additional gear is required for a standard game.
Here is what each item does and what to look for:
Air hockey table: A smooth playing surface with tiny holes that blow air upward, creating a cushion that makes the puck glide with minimal friction. Regulation tables are 8 feet long, but home and arcade tables come in various sizes.
Mallet (striker): A handheld disc with a handle that you use to strike the puck. Tournament mallets meet specific size and weight standards, but any standard mallet works for casual play.
Puck: A flat, lightweight disc (often made of Lexan plastic in competitive play) that slides across the table surface. Most tables come with a compatible puck.
For casual home play, the mallet and puck that come with your table are perfectly fine. Tournament players use USAA-approved equipment, which includes specific mallet weights and sanctioned pucks. The difference matters only if you plan to compete at an organized level.
One thing to check before playing: make sure the table’s air blower is turned on. Without airflow, the puck will not slide properly and the game becomes frustrating rather than fun. This is the most common reason arcade tables feel sluggish, as forum users on Reddit frequently point out.
Understanding the Air Hockey Table
An air hockey table has several markings and features that affect gameplay. Understanding these helps you use the table to your advantage rather than just reacting to the puck randomly.
The most important elements of the table surface are:
Centerline: The line that divides the table into two halves. Your mallet cannot cross this line into your opponent’s side. The centerline is the most important marking on the table.
Face-off circles: The circular markings near the center of the table indicate where the puck is placed for a face-off at the start of a game or after certain stoppages. Not all casual tables have these, but tournament tables do.
Goal slots: The openings at each end of the table where the puck drops through to score a point. These are typically about 12 inches wide.
Rails: The raised edges around the table that keep the puck in play. Pucks bounce off rails, making bank shots possible.
Airflow holes: Thousands of tiny holes across the playing surface that release air from an internal blower motor, creating the low-friction cushion the puck rides on.
Many people ask what the circles on an air hockey table are for. They are face-off markings used in competitive play to standardize where the puck is placed when starting or restarting a game. In casual play, they are mostly decorative, but they do give you a visual reference for centering the puck.
How to Hold an Air Hockey Mallet?
The proper way to hold an air hockey mallet is using the three-finger grip: place your index, middle, and ring fingers behind the mallet’s knob, with your thumb and pinky on the sides for stability. Your knuckles should face the direction you want the puck to go. This grip gives you maximum control and speed.
Most beginners make the mistake of gripping the mallet handle with a full fist, similar to holding a drumstick or a hammer. This fist grip feels natural but severely limits your reaction speed and accuracy. Your wrist stays locked, so you end up swinging with your whole arm rather than flicking the mallet with precision.
Here is why the three-finger grip works better:
Faster reaction time. A loose wrist flicks faster than an arm swing, letting you respond to quick shots.
Better control. Three fingers behind the knob let you direct the puck precisely rather than just smashing it.
Less fatigue. The grip uses smaller muscle groups, so your arm does not tire out during long games.
Improved defense. Quick lateral movements come from the wrist, not shoulder rotation.
When you position your hand behind the mallet, keep the mallet roughly 12 to 18 inches in front of your goal when playing defense. This gives you enough reaction distance to block incoming shots without being caught off guard by deflections.
How to Play Air Hockey: Step by Step
Here is a complete step-by-step walkthrough of how to play air hockey from start to finish, designed for absolute beginners who want to understand the full flow of a game.
Step 1: Set Up the Table
Turn on the table’s air blower and confirm the puck slides freely across the surface. Place the puck at the center of the table on or near the face-off circle. Each player stands at opposite ends with their mallet ready.
Step 2: Determine Who Serves First
In casual play, you can flip a coin, play rock-paper-scissors, or simply agree on who starts. In tournament play, a face-off determines the first server. The puck is placed at center and both players count to three before attempting to gain possession.
Step 3: Serve the Puck
The serving player places the puck on their side of the centerline and strikes it toward the opponent’s goal. The serve must be a genuine attempt to score, not just a tap to start play. In USAA rules, a false start (serving before the opponent is ready) results in a re-serve.
Step 4: Rally and Play
Once the puck is in play, both players hit it back and forth trying to score. You can hit the puck at any angle, use the rails for bank shots, and switch between offensive and defensive positioning. The puck remains live until a goal is scored or a foul is called.
Step 5: Score a Goal
A goal counts when the puck drops fully into the goal slot at the opponent’s end of the table. If the puck bounces back out without fully dropping through, it is still in play and no point is awarded. Each goal is worth one point.
Step 6: Serve After a Goal
After a goal is scored, the player who was scored on takes the puck and serves it back into play. They have about 10 seconds to retrieve the puck from the goal tray and put it back on the table. This keeps the game moving at a steady pace.
Step 7: Play to 7 Points
The game continues with players alternating serves after each goal. The first player to reach 7 points wins the game. In casual settings, players sometimes play to 5 or 11 instead, but 7 is the standard match length in competitive play.
Air Hockey Scoring Rules
Scoring in air hockey is straightforward: every time the puck drops fully into your opponent’s goal slot, you earn one point. The first player to reach 7 points wins the game. There are no multi-point shots and no bonus scoring mechanics.
A few scoring details to keep in mind:
The puck must fully enter the goal. If the puck sits on the edge of the goal slot or bounces back out, play continues. Only a puck that drops below the playing surface counts as a goal.
The scored-on player serves next. After conceding a goal, you take the puck from the goal tray and put it back into play within 10 seconds.
Own goals count. If you accidentally hit the puck into your own goal, your opponent gets the point. Be careful with deflections and over-aggressive shots near your own net.
No points on fouls. A foul does not directly result in a goal. Instead, it results in a free shot or puck turnover depending on the violation.
In USAA tournament play, scoring follows the same structure but with referees confirming each goal. At home, the honor system works fine for most games.
Serving Rules and the Face-Off
Serving in air hockey means placing the puck on your side of the centerline and hitting it toward your opponent to start or resume play. The player who was scored on always gets to serve next, which gives them a chance to regain momentum after conceding a point.
Here are the key serving rules:
Serve from your side only. The puck must start on your half of the table, behind the centerline.
Wait for readiness. In competitive play, you should wait until your opponent is ready. A false start means re-serving.
Genuine attempt. The serve should be a real attempt to score, not just a soft tap to begin a rally.
10-second window. After being scored on, you have about 10 seconds to retrieve the puck and serve. Stalling beyond this is a foul in tournament play.
At the start of a game, the first serve is determined by a face-off or mutual agreement. The puck is placed at center, both players count to three, and the puck goes to whoever gains control. After that, serving alternates based on who was scored on.
Fouls and Penalties in Air Hockey
Fouls in air hockey are rule violations that result in puck turnover or a free shot for your opponent. Understanding fouls helps you avoid giving away easy points and keeps the game fair. The most common fouls involve crossing the centerline, touching the puck illegally, and time violations.
Here are the main fouls every player should know:
Palming: When any part of your hand, wrist, or arm touches the puck during play. Only the mallet may contact the puck. Palming gives your opponent possession of the puck.
Topping: When you place your mallet on top of the puck to stop or control it. The puck must always be struck, not trapped. Topping results in a free shot for your opponent.
Crossing the centerline: When any part of your mallet crosses into your opponent’s half of the table. This is the most frequently called foul in casual games. The puck goes to your opponent.
Stalling: In tournament play, you have approximately 7 seconds to hit the puck once it enters your side. Holding the puck longer than this without attempting a shot is a foul.
False start: Serving before the opponent is ready during a face-off. This results in a re-serve rather than a penalty.
When a foul is called in tournament play, the referee awards either puck possession to the fouled player or a free shot (an undefended attempt on goal). In casual play, simply giving the puck to the wronged player is the standard resolution. Repeated fouls can result in technical fouls and conduct warnings in competitive settings.
Pro Tips: How to Play Air Hockey Like a Pro
Playing air hockey like a pro means mastering three things: defensive positioning, puck control, and shot selection. Raw power alone does not win games at higher levels. The best players combine quick reflexes with deliberate strategy to outmaneuver their opponents.
Here are the techniques that separate casual players from skilled ones:
Triangle Defense
Triangle defense is the most effective defensive positioning in air hockey. Hold your mallet about 12 to 18 inches in front of your goal and move it laterally to track the puck. This creates a triangular blocking zone between your mallet and both goal posts, covering the widest possible area. Your mallet acts as a moving wall that redirects incoming shots rather than just stopping them.
Out Defense
Out defense is an advanced technique where you position your mallet farther from your goal, closer to the centerline. This lets you intercept shots earlier and turn defense into offense faster. The risk is that a well-placed shot can slip behind you. Use out defense when you are confident in your reaction speed and want to apply pressure.
Controlled Offense
Beginners tend to smash the puck as hard as possible, but pros play with control. Controlled offense means hitting the puck with purpose, aiming for specific spots in the goal, and using angles rather than brute force. A well-placed medium-speed shot beats a wild power shot every time because it is harder to read and block.
The Bank Shot
A bank shot is when you hit the puck off one or both rails before it reaches the goal. Bank shots change the angle of approach, making it harder for the defender to predict where the puck will end up. Practice hitting the puck into the rail at different points to learn how angles affect the rebound direction.
Shot Patterns and Conditioning
Competitive air hockey players use deliberate shot patterns to condition their opponents. As Reddit users in r/theocho have noted from watching world champions, pros intentionally repeat the same power shot multiple times to train their opponent to defend that spot. Then they switch to a different target, catching the defender out of position. This psychological layer is what makes high-level air hockey genuinely competitive.
Use Your Time-Outs
Each player typically gets one time-out per game in competitive play. Use it to break your opponent’s momentum when they are on a scoring run, or to reset your own focus after a bad streak. Time-outs are underused in casual play but can swing a close game.
Common Beginner Mistakes to Avoid
Most beginners make the same handful of mistakes when learning how to play air hockey. Recognizing these early saves you from developing bad habits that are hard to unlearn later. Here are the most common errors and how to fix them.
Smashing instead of controlling. The instinct to hit the puck as hard as possible backfires at any level above absolute beginner. Power without accuracy just sends the puck into the rail or your opponent’s mallet. Focus on placement over force.
Using the fist grip. A full-fist grip on the mallet handle locks your wrist and slows your reaction time. Switch to the three-finger grip immediately, even if it feels awkward at first.
Standing too close to the goal. If your mallet is right at the goal line, you have no reaction time. Back up 12 to 18 inches to give yourself room to track incoming shots.
Crossing the centerline. Beginners chase the puck into the opponent’s half, forgetting the centerline rule. Keep your mallet on your side and let the puck come to you.
Ignoring defense. Many new players focus entirely on offense and forget that defense wins games. Spend as much time on positioning as you do on shooting.
Not watching the puck. It sounds obvious, but players often look at their opponent’s mallet or the goal instead of tracking the puck itself. Follow the puck with your eyes at all times.
Fixing even two or three of these mistakes will noticeably improve your game. I remember when I first switched from the fist grip to the three-finger grip, my reaction speed nearly doubled within a single session.
How to Play Air Hockey Solo (Practice Mode)
Yes, you can play air hockey alone, and solo practice is one of the best ways to improve your skills. Practicing by yourself lets you focus on technique without the pressure of an opponent, building muscle memory for shots, angles, and reflexes. Many people do not realize solo practice is even possible, which is why this topic is one of the most searched questions about air hockey.
Here are effective solo drills you can do on any air hockey table:
Bank shot practice: Hit the puck off one rail toward the opposite goal, then off both rails for a double bank. Focus on controlling the angle rather than speed.
Wall bounce reflex drill: Hit the puck gently against one rail and try to catch it as it bounces back, then immediately hit it to the other rail. This trains your reaction time and puck tracking.
Target shooting: Pick a specific spot in the goal (left corner, right corner, dead center) and try to hit it consistently. This builds shot accuracy.
Defensive sliding: Hit the puck toward your own goal at various angles and practice blocking it with your mallet. This sharpens your defensive reflexes.
Speed control: Practice hitting the puck at different speeds, from soft taps to hard strikes, while maintaining accuracy. Pro players control pace as much as direction.
Solo practice is especially valuable for beginners who want to build confidence before playing against others. Even 15 minutes of focused drills between games makes a measurable difference in your overall skill level.
Casual vs Tournament Rules: What’s Different
Casual air hockey and tournament air hockey share the same core rules but differ in enforcement, timing, and equipment. Understanding the differences helps you transition from friendly home games to competitive play if you choose to.
Here is how casual and USAA tournament rules compare:
Referees: Tournament games have referees who call fouls, confirm goals, and manage time. Casual games rely on the honor system.
Shot clock: USAA rules enforce a roughly 7-second time limit to hit the puck once it enters your side. Casual play has no shot clock.
Equipment: Tournaments require USAA-sanctioned tables, approved mallets, and specific puck types (typically Lexan). Casual play uses whatever comes with the table.
Time-outs: Tournament players get a set number of time-outs per game. Casual players rarely use them.
Conduct rules: USAA has formal conduct warnings and technical fouls for unsportsmanlike behavior. Casual games handle disputes informally.
False starts: Tournaments strictly enforce ready signals before serving. Casual play is more relaxed about timing.
For most players, casual rules are all you need. But if you ever want to test your skills in a local tournament, knowing the USAA rulebook in advance prevents surprises on game day.
Game Variations and House Rules
Air hockey is flexible enough to support several game variations beyond the standard 1-on-1 format. House rules are common at parties and family gatherings, where players modify the game to suit the group. These variations keep air hockey fresh and accessible to players of different skill levels.
Here are some popular variations you can try:
Rotation mode: Three or more players take turns. The winner stays on the table, and the next challenger steps in. The first player to win a set number of games (usually 3) wins the rotation.
First to 11: A longer format where players compete to 11 points instead of 7. This rewards consistency over quick bursts.
No bank shots: A beginner-friendly rule where pucks must travel directly to the goal without hitting rails. This simplifies defense for newer players.
Handicap scoring: Stronger players start at a deficit (for example, the weaker player begins at 3-0). This levels the playing field when skill levels are mismatched.
Kids mode: Play to 3 or 5 points and allow younger players to use both hands on the mallet if needed. The goal is fun, not strict competition.
House rules are perfectly fine as long as both players agree before the game starts. The beauty of air hockey at the casual level is that you can adapt it to any group and any setting.
FAQs
What are the rules of air hockey?
The basic rules of air hockey are: two players stand on opposite sides of a table and use mallets to hit a puck into the opponent’s goal. The first player to score 7 points wins. Players cannot cross the centerline with their mallet, cannot touch the puck with their hand (palming), and cannot place the mallet on top of the puck (topping). After each goal, the scored-on player serves the puck back into play.
What do you use to play air hockey?
You need three things to play air hockey: an air hockey table (a smooth surface with tiny holes that blow air to reduce friction), a mallet (also called a striker or paddle) to hit the puck, and a puck (a flat lightweight disc that slides across the table). No other equipment is required.
What are the circles on an air hockey table for?
The circles on an air hockey table are face-off markings. They indicate where the puck should be placed when starting or restarting a game, such as at the beginning of a match or after a stoppage. In casual play, the circles are mostly decorative, but in tournament play they standardize the puck placement position.
How do you hold an air hockey mallet?
The proper grip is the three-finger grip: place your index, middle, and ring fingers behind the mallet knob with your thumb and pinky on the sides for stability. Your knuckles should face the direction you want to hit the puck. Avoid using a full fist grip, as it locks your wrist and slows your reaction time.
Can you play air hockey professionally?
Yes, air hockey has an organized competitive scene governed by the USAA (United States Air Hockey Association). Professional players compete in sanctioned tournaments with rankings, referees, and standardized equipment. Top players are known for advanced techniques like triangle defense, out defense, and deliberate shot patterns. Professional air hockey is a real competitive sport with world championships.
How do you serve in air hockey?
To serve, place the puck on your side of the centerline and hit it toward your opponent’s goal. The serve should be a genuine attempt to score. After a goal is scored, the player who was scored on serves next. In tournament play, you have about 10 seconds to retrieve the puck and serve it back into play.
Conclusion
Learning how to play air hockey is a straightforward process once you know the core rules, proper grip technique, and basic strategy. The game itself is simple to understand but takes real practice to master. Start with the fundamentals: first to 7 points wins, stay on your side of the centerline, use the three-finger grip, and focus on controlled shots rather than raw power.
From there, layer in the pro techniques like triangle defense, bank shots, and shot patterns to take your game to the next level. Practice solo when you can, avoid the common beginner mistakes, and do not be afraid to adjust the rules for casual fun when the situation calls for it.
Air hockey is one of the most accessible and replayable arcade games out there. Whether you are playing at home, in an arcade, or dreaming of a local tournament, the skills you build now will serve you for years of competitive fun. Grab a mallet, turn on the air, and start playing.