
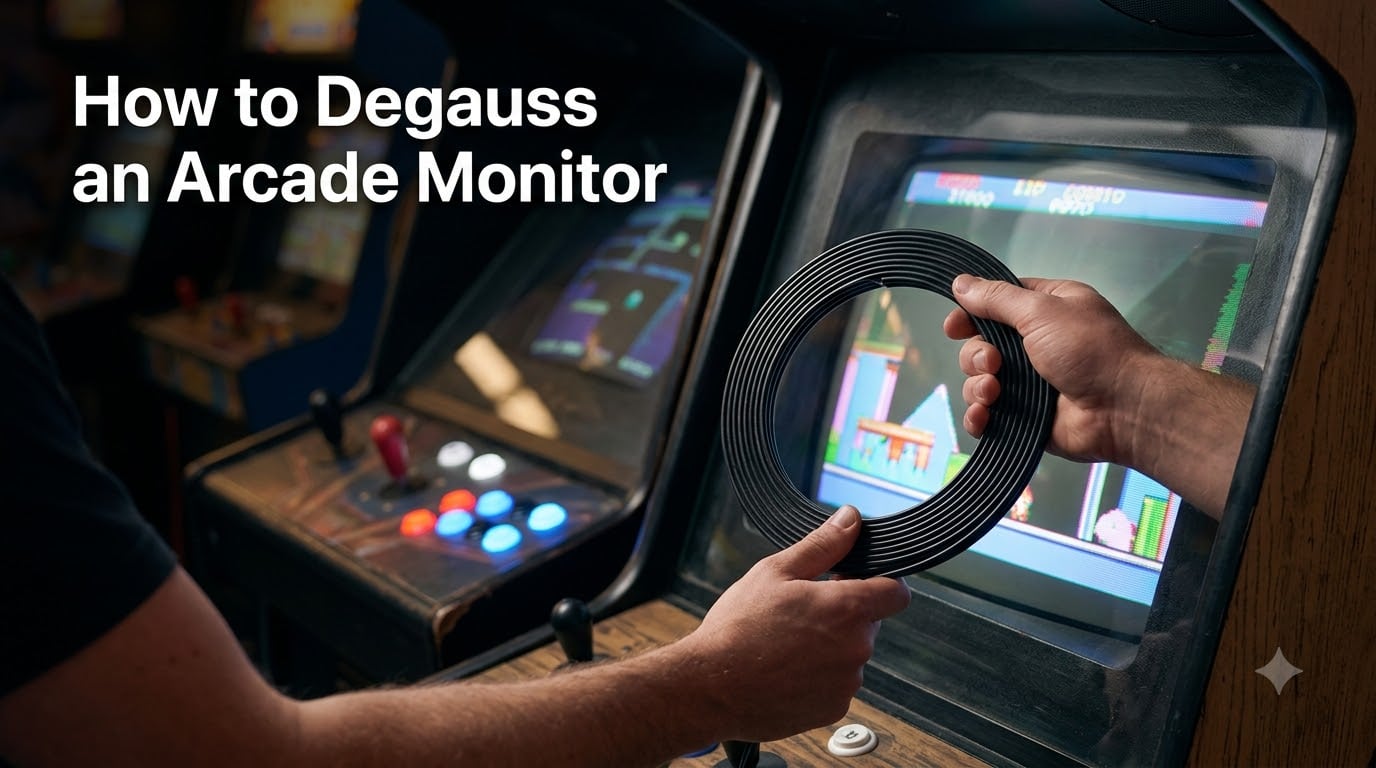
If you have ever powered up a classic arcade cabinet and noticed ugly purple or green splotches on the screen, you are dealing with a magnetized tube. Learning how to degauss an arcade monitor is one of the most useful skills for any arcade collector, restoration hobbyist, or retro gaming enthusiast. The good news is that the fix is usually straightforward once you understand what is happening inside that CRT.
I have spent years restoring arcade cabinets, and color distortion from magnetization is one of the most common issues I encounter. Whether a cabinet was moved across the room, stored near speakers, or simply sat unused for months, the shadow mask inside the picture tube can pick up stray magnetic fields. Those fields bend the electron beams just enough to ruin color purity.
This guide covers everything from the science behind degaussing to a detailed step-by-step process you can follow at home. I will walk you through using built-in degaussing circuits, external degaussing wands, and even DIY alternatives when you do not have the right tool on hand. I will also cover safety precautions, because CRT monitors carry dangerous voltages that demand respect.
By the end of this article, you will know exactly how to diagnose, treat, and prevent magnetic discoloration on your arcade monitors. You will also understand when degaussing will not fix the problem and what to try instead.
Table of Contents
- What Is Degaussing and Why It Matters?
- Signs Your Arcade Monitor Needs Degaussing
- Built-in Degaussing Circuits Explained
- Using an External Degaussing Wand
- How to Degauss an Arcade Monitor Step by Step
- DIY Degaussing Methods When You Do Not Have a Wand
- When Degaussing Will Not Fix the Problem
- Safety Precautions for CRT Monitor Work
- FAQs
- Conclusion
What Is Degaussing and Why It Matters?
Degaussing is the process of removing unwanted magnetic fields from a CRT monitor’s picture tube to restore proper color reproduction. The term comes from Carl Friedrich Gauss, a mathematician whose name became the unit of magnetic measurement. In practical terms, degaussing erases the residual magnetism that builds up on internal metal components of the tube.
Inside every CRT arcade monitor, a component called the shadow mask sits just behind the phosphor coating on the inside of the screen. This thin metal sheet has thousands of tiny holes that ensure each electron beam hits only the correct red, green, or blue phosphor dots. When the shadow mask becomes magnetized, even slightly, it deflects the electron beams away from their intended targets.
That deflection is what creates the visible symptoms. You see purple patches where green should appear, green tints in corners, or rainbow-like bands across sections of the screen. The discoloration happens because the three electron beams (red, green, and blue) are landing on the wrong phosphor stripes, mixing colors incorrectly.
A degaussing coil solves this by generating a strong alternating magnetic field that randomly scrambles and then progressively erases the magnetization on the shadow mask. Think of it as hitting the reset button on the magnetic state of the tube. Once the field is cleanly removed, the electron beams travel straight again and colors return to normal.
What happens if you do not degauss a CRT? The short answer is that color distortion will persist and can worsen over time. A mildly magnetized tube might show faint patches that are only visible on solid color screens. A heavily magnetized tube can display dramatic color swings that make games nearly unplayable. In rare cases, severe magnetization can also stress the convergence and purity adjustments, making the tube harder to calibrate even after degaussing.
This is why every arcade monitor has some form of degaussing built in, and why external degaussing tools exist for stubborn cases. Magnetization is a normal part of CRT behavior, not a sign of a defective tube.
Signs Your Arcade Monitor Needs Degaussing
Recognizing the symptoms of a magnetized CRT is the first step before you reach for a degaussing tool. The signs are usually visual, and they follow predictable patterns. Here is what to look for on your arcade monitor.
Purple or green patches on areas of the screen that should display solid colors. These are the most common warning signs of magnetization.
Color distortion in screen corners that radiates inward. The corners are most vulnerable because they are farthest from the center of the magnetic field.
Discoloration after moving the arcade cabinet to a new location. Transport shakes up the internal components and can shift magnetic fields.
Rainbow bands across the screen after placing unshielded speakers or other magnetic sources near the cabinet.
Persistent tint changes that do not respond to brightness, contrast, or color adjustment settings on the monitor chassis.
Uneven color on test patterns. Display a pure white or solid red screen and look for patches where the color shifts.
A simple diagnostic trick I use is to pull up a solid white screen. If you see clean, uniform white across the entire display, your tube is properly demagnetized. Any color tinting, blotches, or bands means it is time to degauss.
Built-in Degaussing Circuits Explained
Most CRT arcade monitors manufactured from the mid-1980s onward include an automatic degaussing circuit built into the chassis. This circuit is designed to handle mild, everyday magnetization that accumulates during normal operation. Understanding how it works helps you use it effectively and know when it is not enough.
The built-in system consists of three main components. A degaussing coil is wrapped around the front of the picture tube, positioned around the bell of the CRT. A thermistor (a temperature-sensitive resistor) controls the current flow through that coil. A posistor or voltage-dependent resistor manages the timing of the degauss cycle.
When you power on a cold monitor, the thermistor is at room temperature and has low resistance. This allows a surge of alternating current to flow through the degaussing coil, creating a strong magnetic field. As the thermistor heats up over a few seconds, its resistance increases, gradually reducing the current to near zero. That gradual reduction is what makes degaussing work, the field must fade away smoothly rather than cutting off abruptly.
This is why the degauss cycle only fires on a cold start. If you turn the monitor off and immediately back on, the thermistor is still hot and the circuit will not activate. You need to let the monitor cool down for at least 15 to 20 minutes before power cycling to trigger another degauss pass.
To use the built-in degaussing circuit effectively, follow this approach. Power off the monitor completely and let it sit for 20 minutes. Unplug it from the wall for good measure. Plug it back in and power it on. You should hear a brief buzzing or humming sound from the coil, accompanied by a visible wobble or shift in the picture that settles within a few seconds.
If you hear no buzz and see no picture wobble on startup, the built-in degauss circuit may be faulty. Common failures include a blown thermistor, a broken degaussing coil wire, or a failed posistor. These are inexpensive parts, but they require chassis-level repair to replace. This is one situation where an external degaussing wand becomes essential.
Forum communities I follow, including Arcade-Museum and Aussie Arcade, consistently report that some monitors have weaker built-in circuits than others. Wells-Gardner K7000 series monitors and some Hantarex models are known for relatively gentle degauss strength. If your built-in pass does not fully clear the discoloration after two or three cold-start cycles, it is time to move to an external tool.
Using an External Degaussing Wand
An external degaussing wand, also called a degaussing coil, is a handheld tool that delivers a much stronger magnetic field than any built-in circuit. It is the standard tool for serious CRT repair work and is what professional arcade technicians reach for when a built-in pass is insufficient.
The wand is essentially a large coil of copper wire housed in a plastic or metal casing. When plugged into a wall outlet and activated, it draws alternating current through the coil, generating a fluctuating magnetic field. You physically move this field across the face of the CRT to neutralize magnetization on the shadow mask.
A quality degaussing wand makes quick work of even severe discoloration. The larger the coil diameter, the more surface area it covers in a single pass. Professional-grade wands typically have coils between 6 and 12 inches in diameter and generate enough field strength to handle arcade tubes of any size.
What should you look for in a degaussing wand? A momentary switch is essential so the coil only energizes while you hold the button. This prevents overheating and gives you precise control. A wall-powered design is preferable to battery-operated units, which often lack sufficient field strength. Look for a coil rated for continuous use of at least 30 seconds, since cheap units can overheat quickly.
One warning I see repeated across arcade forums: cheap degaussing wands sold on auction sites for bargain prices often underperform. Community members on Arcade-Museum have tested budget coils that barely affected discoloration compared to a proper tool. If you plan to restore multiple cabinets, invest in a wand from a reputable arcade parts supplier rather than gambling on the cheapest listing.
How to Degauss an Arcade Monitor Step by Step
This is the core process for degaussing an arcade monitor using an external wand. Follow these steps carefully, and you will clear color distortion in under five minutes of actual work. The keyword here is patience, rushing the wand movement produces worse results.
Before you start, gather the following tools and prepare your workspace.
External degaussing wand (wall-powered)
Screwdriver or cabinet keys to access the monitor
Clean, dry workspace with room to move around the front of the cabinet
No magnetic media nearby (keep hard drives, tapes, and credit cards at least 3 feet away)
The arcade monitor powered on and displaying content
Now follow each step in order. Do not skip the safety check in Step 1.
Step 1: Safety check and preparation. Make sure the monitor bezel and any protective glass are clean so you can clearly see color changes. Ensure the wand cord reaches an outlet without stretching. Confirm the wand’s momentary switch works by briefly pressing it away from the monitor (you will hear a hum). Never open the monitor chassis or touch internal components for this process.
Step 2: Position yourself at the correct distance. Stand directly in front of the powered-on monitor. Hold the degaussing wand flat against or about 1 inch from the screen surface, centered on the tube face. The monitor must stay on the entire time so you can see the results in real time.
Step 3: Activate the wand and begin circular motions. Press and hold the wand’s button. Immediately start moving the wand in slow, overlapping circles starting from the center of the screen. Each circle should be about 4 to 6 inches in diameter. Gradually expand the circles outward in a spiral pattern until you reach the edges and corners of the screen.
Step 4: Cover the corners thoroughly. Corners are the most magnetized areas and need extra attention. Spend a few seconds making small circles around each corner. You should see the color distortion visibly shift and clear as the wand passes over affected areas.
Step 5: Slowly back away from the screen. While still holding the button, continue making circular motions as you step backward. Move slowly and steadily, about 1 foot every two seconds. This gradual retreat is what allows the magnetic field to taper off smoothly rather than cutting off abruptly.
Step 6: Release the button at a safe distance. When you are at least 4 to 5 feet from the screen, release the wand button. Do not release it while close to the monitor, as the sudden field collapse can re-magnetize the tube.
Step 7: Check the results. Display a solid white or solid color test screen and inspect for remaining discoloration. If patches persist, repeat the entire process. Stubborn cases may require two or three passes.
Step 8: Let the wand cool. Most wands are rated for about 30 to 60 seconds of continuous use before needing a cooldown period. Wait at least two minutes between passes to prevent the coil from overheating.
That is the full process. In my experience, about 80 percent of color distortion cases clear up completely after one or two proper passes with a quality wand. The key mistakes beginners make are moving the wand too fast, releasing the button too close to the screen, or skipping the corner work.
DIY Degaussing Methods When You Do Not Have a Wand
What if your monitor needs degaussing right now and you do not own a wand? Several DIY methods can work in a pinch, though they come with caveats. I will cover the most reliable alternatives and be honest about their limitations based on community experience.
The corded drill method. A corded (not cordless) electric drill generates a fluctuating magnetic field from its AC motor. Forum users on Arcade-Museum have used this technique successfully for years. Remove the drill bit, power on the drill, and move it in circular motions across the screen just like a wand. Back away slowly and release the trigger at distance. The AC motor’s field is weaker than a purpose-built coil, so expect to make more passes. Never touch the running drill chuck to the screen glass.
The bulk tape eraser. If you have access to a vintage bulk audio or video tape eraser, it functions identically to a degaussing wand. These devices were designed to erase magnetic media and produce a strong alternating field. Use the same circular motion technique described above.
The unshielded speaker method. Some people use a large, unshielded speaker (like an old guitar amp speaker) by moving it near the screen. This is the least reliable method because speakers produce static magnetic fields, not the alternating field needed for proper degaussing. I consider this a last resort only, and forum veterans consistently warn against it. It can make the problem worse if the static field re-magnetizes the shadow mask.
The power-cycle method for built-in circuits. If your monitor has a working built-in degauss circuit, you can force multiple degauss passes by power cycling. Turn the monitor off, wait at least 20 minutes for the thermistor to cool completely, then power back on. Repeat this cycle two or three times. Each cold start fires one degauss pass, and cumulative passes can clear mild magnetization. This is the safest DIY method since it uses the monitor’s own designed system.
Building your own degaussing coil. For advanced hobbyists, it is possible to wind a degaussing coil using enameled magnet wire wrapped around a wooden or plastic frame. Connect it through a momentary switch and an appropriately rated power cord. This requires solid knowledge of electrical safety, since you are building a device that draws significant AC current. I only recommend this route if you have experience with mains-voltage electronics. A poorly constructed coil can overheat, short circuit, or create a fire hazard.
Across all DIY methods, the principle is the same: you need a strong alternating magnetic field that you can gradually reduce by moving away from the screen. Any method that cuts the field off abruptly while close to the tube will make the problem worse.
When Degaussing Will Not Fix the Problem
One of the biggest sources of frustration I see in arcade forums is people degaussing repeatedly with no improvement. In many of these cases, the problem is not magnetization at all. Here is how to tell the difference and what to try instead.
Purity issues versus magnetization. Color purity refers to whether each electron beam hits only its intended phosphor color. Magnetization is one cause of poor purity, but mechanical misalignment is another. The purity rings on the neck of the CRT are small magnetic rings that adjust beam landing. If these rings have been bumped or rotated, no amount of degaussing will fix the resulting color errors. You need to physically adjust the purity ring assembly.
Convergence problems. Convergence is about whether the red, green, and blue beams align on top of each other to produce sharp edges and text. Poor convergence shows up as color fringing around text or white lines separating into red, green, and blue edges. This is adjusted through convergence magnets and yoke positioning, not degaussing. If your colors are individually clean but misaligned with each other, you have a convergence issue.
Damaged shadow mask. If an arcade cabinet was dropped, violently shaken, or subjected to extreme temperature changes, the shadow mask inside the tube can warp permanently. A warped mask produces localized color errors that look exactly like magnetization but cannot be fixed by degaussing. Unfortunately, the only fix for a warped shadow mask is replacing the entire tube.
Yoke assembly problems. The deflection yoke sits around the neck of the CRT and steers the electron beams. If it has shifted position or if its rubber wedges have deteriorated, you can see color errors, geometry distortion, or both. Check that the yoke is firmly seated against the bell of the tube and has not rotated.
How to test whether degaussing will help. Before investing time in repeated degaussing, try this diagnostic. Use an external wand and watch the screen closely during the pass. If the color distortion visibly shifts, moves, or temporarily improves during degaussing, the problem is magnetization and you are on the right track. If the distortion does not budge at all during the pass, you are likely dealing with a mechanical or alignment issue that degaussing cannot address.
When degaussing clearly is not working after three thorough passes with a quality wand, stop and investigate purity, convergence, and mechanical issues. Continuing to degauss will not help and can risk overheating your equipment.
Safety Precautions for CRT Monitor Work
Working around CRT arcade monitors involves real hazards that you must take seriously. A CRT picture tube can retain a charge of 25,000 volts or more even after being unplugged. The following precautions apply whenever you are working on or near an arcade monitor.
For the degaussing process described in this guide, you never need to open the monitor chassis or touch internal components. The wand works entirely from the front of the screen while the monitor is assembled. However, if you plan to repair a faulty degauss circuit or adjust purity rings, these safety rules become critical.
Never open the monitor chassis while it is plugged in. The high-voltage anode cap retains a lethal charge even after disconnection from power.
Discharge the tube properly using a properly rated high-voltage discharge tool before touching any internal components.
Work in a dry environment. Moisture increases the risk of electrical shock.
Remove all magnetic media from the area, including hard drives, floppy disks, credit cards with magnetic stripes, and analog tapes. Degaussing coils will erase them.
Wear safety glasses if you are removing a monitor from a cabinet. A cracked CRT can implode.
Do not work alone when performing internal monitor repairs. Have someone nearby who can help in an emergency.
If you are uncomfortable working around high voltage, there is no shame in taking your cabinet to a professional arcade technician for internal repairs. The degaussing process itself is safe to perform at home, but chassis-level work is not.
FAQs
What happens if you don’t degauss a CRT?
Without degaussing, a magnetized CRT will display persistent color distortion such as purple patches, green tinting, or rainbow bands that worsen over time. The discoloration can make games difficult to see and may stress convergence and purity adjustments. The problem will not self-correct and typically gets worse the longer it goes untreated.
How often should I degauss my arcade monitor?
For most arcade monitors, the built-in degauss circuit handles everyday needs automatically on each cold start. You only need manual degaussing with an external wand when you see visible discoloration, after moving a cabinet, or after placing magnetic items near the monitor. Under normal operation, external degaussing might be needed once every few months or not at all.
Can I degauss a CRT at home?
Yes, you can degauss a CRT at home. The built-in degauss circuit handles most cases automatically on startup. For stubborn discoloration, an external degaussing wand is an affordable tool that anyone can use safely from the front of the screen. DIY methods like a corded drill can also work in a pinch.
Is it safe to use a drill to degauss a monitor?
A corded electric drill can work as a DIY degausser because its AC motor generates an alternating magnetic field. However, it is weaker than a purpose-built degaussing coil and requires more passes. Never let the running drill chuck touch the screen. Cordless drills do not work because they use DC motors that produce a static field rather than an alternating one.
Why won’t my built-in degauss fix the discoloration?
If built-in degaussing does not clear discoloration after two or three cold-start cycles, the magnetization is too strong for the internal circuit, or the problem is not magnetization at all. Possible causes include a faulty degauss circuit (blown thermistor or broken coil), a mechanical purity issue, convergence misalignment, or a warped shadow mask from physical damage.
Conclusion
Learning how to degauss an arcade monitor is a straightforward skill that every cabinet owner should master. The process comes down to understanding what causes magnetization, recognizing the visual symptoms, and applying the right tool for the severity of the problem.
Start with the built-in degauss circuit by power cycling from a cold state. If that does not clear the discoloration, invest in a quality external degaussing wand and follow the step-by-step circular motion technique. Remember that the gradual retreat from the screen is what makes the process work, never release the wand button while close to the tube.
If degaussing does not improve the picture after several thorough passes, shift your focus to purity ring adjustment, convergence, or inspecting for physical tube damage. Degaussing only fixes magnetization, and diagnosing the real problem saves hours of frustration.
With the techniques in this guide, you can keep your arcade monitors looking sharp and color-accurate for years. Your classic cabinets deserve clean, vibrant displays, and a properly degaussed CRT is a beautiful thing to see.