
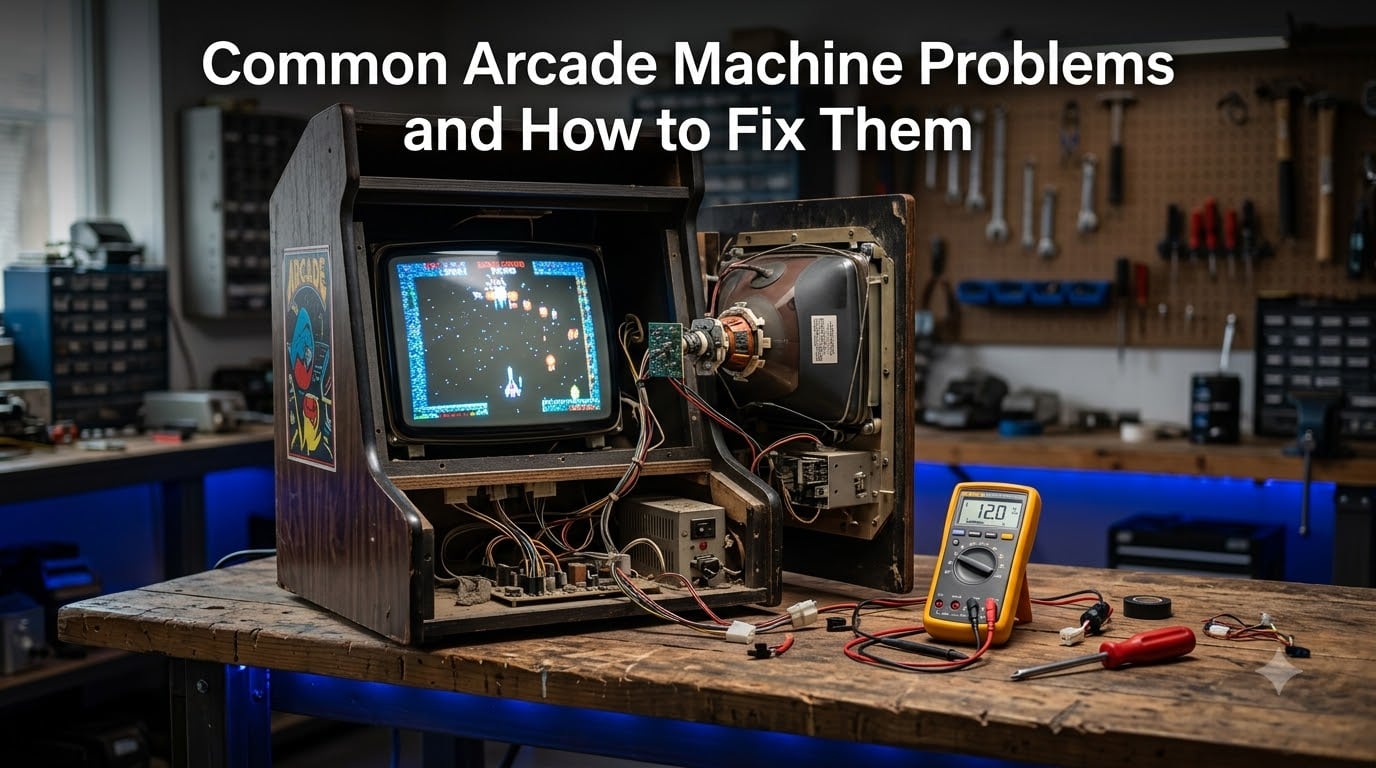
Arcade machines are built to take a beating, but even the toughest cabinets eventually develop issues. Whether you are running a home arcade with a handful of classics or managing a route of coin-operated games, knowing how to fix common arcade machine problems saves you time, money, and frustration.
In this guide, our team walks you through every major issue you are likely to encounter, from dead power supplies to sticky joysticks, coin mechanism jams, and blown speakers. We cover the same diagnostic process that experienced arcade technicians use, broken down so that beginners can follow along without getting lost in jargon.
By the end, you will know exactly how to troubleshoot your arcade cabinet step by step, which tools you need on hand, and when a repair crosses the line from DIY into professional territory.
Important: Before you open any cabinet, read the safety warning in the next section. Vintage CRT monitors can hold a lethal electrical charge even after being unplugged for years.
Table of Contents
Safety First: High-Voltage Warning
Arcade machines run on both standard household AC power and lower DC voltages. The power supply unit converts wall power into the +5V, +12V, and sometimes -5V that the game board, controls, and other components use. That conversion step involves a transformer and capacitors that can store dangerous amounts of energy.
The biggest danger in any classic arcade cabinet is the CRT monitor. A cathode ray tube builds up tens of thousands of volts to fire its electron beam, and the tube itself acts like a giant capacitor. Even weeks after being disconnected from power, a CRT can deliver a serious or fatal shock if you touch the wrong component.
Forum members on Arcade Museum consistently remind newcomers that CRT monitors can still carry lethal charge years after being unplugged. This is not an exaggeration. It is the single most important safety fact in this hobby.
Before working inside any cabinet with a CRT monitor, follow these precautions:
Unplug the machine completely from the wall outlet, not just the rear power switch
Do not touch the monitor chassis, flyback transformer, anode cap (the suction cup on the tube), or any large capacitors unless you have discharged the tube properly
Wear rubber-soled shoes and work on a dry floor
Remove metal jewelry, especially rings and watches
Keep one hand behind your back when probing live circuits to reduce current path across your chest
If you are not trained to discharge a CRT, leave monitor internal repairs to a professional
For modern LCD-based cabinets like Arcade1Up units, the high-voltage CRT risk does not apply. However, the AC power section and power supply still carry dangerous current. Always unplug before opening.
Essential Tools for Arcade Machine Repair
One of the biggest content gaps we found across competing guides is a practical tools checklist. Experienced arcade repair technicians on Reddit and the Arcade Museum forums consistently recommend the same basic kit. Having these tools ready before you start troubleshooting means you will not be running to the hardware store mid-repair.
Here is what you need for most arcade machine problems:
Digital multimeter: The single most important tool. Used to test AC voltage at the outlet, DC voltage at the power supply, continuity on wires, and resistance on fuses. Look for one that reads at least 0-20V DC and 0-250V AC.
Phillips and flathead screwdrivers: Multiple sizes. Arcade cabinets use a mix of screw types for panels, control decks, and monitor brackets.
Needle-nose pliers and wire strippers: For reconnecting loose wires, crimping quick-disconnect terminals, and working inside tight coin doors.
Allen wrench / hex key set: Many joystick mounts and control panel bolts use hex heads.
Compressed air: Canned air or a small electric blower for clearing dust from PCBs, vents, and coin mechanisms.
Isopropyl alcohol (90% or higher): The go-to cleaning solution for contacts, coin switches, and control panel components. It evaporates quickly and leaves no residue.
Cotton swabs and microfiber cloth: For detailed cleaning of connectors and screens.
Replacement fuses: Keep a variety pack. Arcade machines commonly use 3-amp, 4-amp, and 5-amp slow-blow fuses. Check your cabinet label for the exact ratings.
Soldering iron: Optional for beginners but necessary if you plan to replace capacitors or repair PCB traces.
With this kit, you can handle roughly 80% of the arcade machine problems covered in this guide.
Power Supply Problems
Power supply issues are the number one cause of arcade machine failure. Forum data and technician experience both point to the power supply unit as the most common root cause when a machine will not boot, produces garbled graphics, or resets randomly. If your arcade machine will not turn on at all, start here before looking anywhere else.
Step 1: Test the Wall Outlet
It sounds obvious, but the very first thing to check is whether the machine is getting power from the wall. Plug a known working lamp or phone charger into the same outlet the arcade uses. If the lamp does not work, you have a tripped breaker or blown outlet, not an arcade problem.
Step 2: Inspect the Power Cord and Plug
Examine the full length of the power cord for cuts, fraying, or melted sections. Check that the plug fits snugly in the outlet. A loose connection at the plug can cause intermittent power loss that mimics a failing power supply.
If the cord is damaged, replace it entirely. Do not attempt to repair a power cord with electrical tape. It is a fire hazard inside a cabinet that generates heat.
Step 3: Check the Fuses
Most arcade machines have a fuse holder near where the power cord enters the cabinet, and additional fuses on the power supply itself. Remove each fuse and inspect it visually. A blown fuse will have a dark or broken filament inside the glass.
For a more reliable test, set your multimeter to continuity mode (or the lowest resistance setting) and touch the probes to both ends of the fuse. A reading near zero ohms means the fuse is good. No reading or infinite resistance means it is blown.
Replace blown fuses with the exact same type and amperage rating. Using a higher-rated fuse to stop it from blowing again is extremely dangerous. The fuse is there to protect the circuit. Bypassing that protection can start a fire or destroy your game board.
Step 4: Test the Power Supply Output
If the outlet, cord, and fuses all check out, the next step is testing the power supply unit itself. Set your multimeter to DC voltage and place the black probe on a ground point (the metal cabinet frame or a black wire on the JAMMA connector). Touch the red probe to the +5V test point on the power supply.
A healthy arcade power supply should output between +4.95V and +5.15V. If the reading is below +4.8V, the game board may not boot or may crash randomly. Many power supplies have an adjustment screw (often labeled VR or ADJ) that lets you nudge the voltage up slightly.
If the +5V output reads zero or fluctuates wildly, the power supply unit has failed and needs replacement. Arcade switching power supplies are standardized and widely available for $25 to $40.
Also check the +12V line, which powers audio amplifiers and some fans. It should read between +11.5V and +12.5V.
Monitor and Screen Issues
Monitor problems are the second most common category of arcade machine problems. Symptoms range from a completely blank screen to flickering, rolled images, washed-out colors, or a single bright line across the display.
No Video at All
If the machine powers on (you hear the game sounds and the marquee light works) but the screen is completely black, first check the video connection. The video signal travels from the game board through a wiring harness to the monitor. Locate the connector where the video wires meet the monitor chassis board and make sure it is fully seated.
Next, check that the monitor itself is receiving power. Some cabinets have a separate power lead that plugs into an isolation transformer before reaching the monitor. If that connection is loose or the isolation transformer has failed, the monitor gets no power.
Flickering or Rolling Image
A picture that rolls vertically or tears horizontally usually indicates a problem with the sync signal or the monitor’s vertical/horizontal hold controls. On CRT monitors, these are small potentiometers (adjustable dials) on the monitor chassis board, typically labeled V-HOLD and H-HOLD.
Use a plastic alignment tool (never a metal screwdriver on a live monitor) to gently adjust these dials until the image stabilizes. If the image will not hold steady even after adjustment, the sync wire from the game board may be loose or the monitor chassis may need capacitor replacement.
Color and Brightness Problems
Dim colors, a green or blue tint, or a washed-out display often trace back to the video level controls on the monitor chassis. The RED, GREEN, and BLUE drive controls let you balance color output, while the SCREEN and BRIGHTNESS controls adjust overall intensity.
Make small adjustments and test. If colors are still off after adjustment, the issue may be a failing video amplifier chip or degraded capacitors on the neck board (the small circuit board attached directly to the back of the CRT tube).
Remember the safety warning: never remove the monitor chassis board or touch internal monitor components unless the CRT has been properly discharged.
Screen Burn-In
Burn-in appears as a faint ghost image permanently etched into the screen, usually showing game logos or score displays. This is caused by static images displayed for hundreds or thousands of hours. Burn-in cannot be reversed. The only fix is replacing the CRT tube or the entire monitor. Many arcade owners live with mild burn-in since it does not affect playability.
Joystick and Button Problems
Unresponsive or sticky controls ruin the arcade experience. Fortunately, joystick and button issues are among the easiest arcade machine problems to fix. Most come down to dirt buildup, worn microswitches, or loose wiring.
Cleaning Sticky Joysticks and Buttons
If a joystick feels gritty or a button does not spring back quickly, the mechanism is probably dirty rather than broken. Remove the control panel or access the underside of the controls. Spray compressed air around the joystick base and button shafts to clear dust and debris.
For buttons that feel sluggish, remove the button from the panel by twisting the plastic retaining nut. Clean the shaft and the inside of the button housing with isopropyl alcohol on a cotton swab. Let it dry completely before reassembling.
Testing and Replacing Microswitches
Every arcade button and joystick direction relies on a microswitch. These are small snap-action switches that click when you press a button or move the stick. Over time, the internal contacts wear out and the switch stops registering inputs.
To test a microswitch, set your multimeter to continuity mode. Press the button or move the joystick in the problem direction. The meter should show continuity (near zero ohms) when activated and open line when released. If the reading never changes, the switch is dead.
Replacing a microswitch takes about two minutes. Disconnect the two wires from the old switch, pop it out of its mounting tab, snap in a new one (Cherry or Sanwa switches are standard), and reconnect the wires. Microswitches cost about one dollar each.
Joystick Not Working in One Direction
If your joystick works in three directions but not the fourth, the problem is almost always a single failed microswitch or a disconnected wire on that specific direction. Trace the wiring from the non-working direction to the JAMMA connector or control board and check for loose quick-disconnect terminals. These slip off over time from vibration.
If the wiring is intact, swap the microswitch from the working direction with the non-working one. If the problem moves, you confirmed a bad switch. If the problem stays in the same direction, you have a broken wire or a fault on the control board.
Sound and Audio Malfunctions
Audio problems in arcade machines typically fall into three categories: no sound at all, distorted or buzzing audio, and low volume. The diagnostic path is straightforward once you know where the signal chain runs.
If the machine has no sound, start by checking the volume settings. Many classic arcade boards have software volume controls accessed through a test menu or physical potentiometer on the PCB. It sounds simple, but we have seen machines opened up and diagnosed for hours only to find the volume was turned all the way down.
Next, verify that the +12V line from the power supply is working. Audio amplifiers in arcade machines run on 12 volts. If that line is dead, the amplifier produces nothing. Use your multimeter to confirm +12V is present at the amplifier input.
If you hear a loud buzzing or humming sound, the most common cause is a ground loop or a loose ground wire between the amplifier and the speaker. Check that the speaker wires are securely connected and that the amplifier board is properly grounded to the cabinet chassis.
Distorted or crackling audio often points to failing capacitors on the amplifier board or a blown speaker. Tap the speaker cone gently with your finger. If you hear a scratching sound, the speaker voice coil is damaged and the speaker needs replacement.
Coin Mechanism Problems
Coin mechanisms are mechanical components that take a beating in any commercial setting. A coin acceptor that rejects valid coins, a jammed coin slot, or a game that does not register credits are all common coin mechanism problems.
The first step with any coin issue is cleaning. Coin paths accumulate dust, grease from fingers, and oxidation from metal coins passing through. Remove the coin acceptor mechanism from the coin door and clean the entire coin path with compressed air followed by isopropyl alcohol on a cotton swab.
Pay special attention to the optic sensors or microswitch at the bottom of the coin path. On electronic coin acceptors, an infrared sensor pair detects the coin falling through. If the sensor lenses are dusty, coins will fall through without registering a credit. Clean both the emitter and receiver lenses carefully.
For mechanical coin mechanisms (common on vintage machines), check the coin return lever and the cradle that sorts coins by size. If the cradle is bent or the spring tension has weakened, it will reject valid coins. You can carefully bend the cradle back into alignment, but replacement coin mechs are inexpensive and often the better fix.
For coin jams, never force a coin through the slot. Open the coin door, remove the coin acceptor assembly, and push the jammed coin out from the bottom. Inspect the path for burrs or bent metal that caused the jam.
Trackball Maintenance
Trackball games like Centipede, Marble Madness, and Golden Tee have their own maintenance needs that most guides overlook. Based on forum discussions, trackball-equipped games need specific care to stay responsive and accurate.
Over time, the rollers and bearings inside a trackball accumulate grime from player hands. The ball itself transfers skin oils and dust onto the three support rollers and the encoder shaft. This buildup causes the ball to feel sticky and the cursor to skip or stutter on screen.
To clean a trackball, first remove the ball by opening the retaining ring on top of the control panel. The ring typically twists counterclockwise. Set the ball aside and clean it with a microfiber cloth and a small amount of isopropyl alcohol.
Inside the housing, you will see three rollers. Use a cotton swab dipped in alcohol to scrub each roller clean. Spin each roller by hand while cleaning to reach the full circumference. For stubborn buildup, a plastic spudger or your fingernail works better than a swab alone.
The encoder wheels (the slotted discs that the optic sensors read) also collect dust. Clean the slots gently with compressed air. Do not use alcohol on the optic sensor housings themselves, as liquid can seep into the sensor and cause failure.
If the trackball still feels rough after cleaning, the bearings may need lubrication. Use a single drop of light machine oil on each bearing shaft. Do not over-lubricate. Excess oil attracts more dust and makes the problem worse over time.
Preventive Maintenance Schedule
None of the top competing guides include a preventive maintenance schedule, which is surprising because it is the single most effective way to prevent arcade machine problems before they happen. Based on recommendations from experienced route operators and collectors, here is a practical schedule for home and commercial arcade owners.
Monthly Tasks
Wipe down the control panel, buttons, and joystick shafts with a microfiber cloth lightly dampened with water
Blow compressed air through coin slots and vent openings
Check that all buttons and joystick directions respond correctly by playing each game for a few minutes
Inspect the cabinet exterior for any signs of swelling, especially on the bottom panel where moisture damage starts
Quarterly Tasks
Open the back panel and visually inspect wiring for fraying or loose connections
Check power supply voltage with a multimeter to confirm +5V and +12V are still in range
Clean trackball rollers and ball (if applicable)
Vacuum dust from the cabinet interior, especially around the power supply and monitor vents
Clean the monitor screen with a microfiber cloth and screen-safe cleaner
Annual Tasks
Inspect and clean all JAMMA connector edges with isopropyl alcohol
Remove and reseat all socketed chips on the game board to prevent pin oxidation
Test all fuses with a multimeter, even if they appear intact
Tighten all screws on the control panel, monitor bracket, and power supply mounting
Check coin mechanism operation and clean coin paths thoroughly
Following this schedule catches problems early, when they are cheap and easy to fix. Most catastrophic arcade failures start as minor issues that compound over months of neglect.
When to Call a Professional?
Most arcade machine problems can be handled at home with basic tools and patience. However, some repairs cross the line into territory best left to trained technicians. Knowing where that line sits keeps you safe and prevents costly damage.
Call a professional if any of the following apply:
The CRT monitor needs internal chassis repair or capacitor replacement and you have never been trained to discharge a tube
The game board (PCB) has visible burning, corroded traces, or damaged custom chips that require soldering
The power transformer is humming loudly, overheating, or showing signs of melting
You smell burning plastic or ozone when the machine runs
The machine trips your home circuit breaker every time it powers on
For everything else, the troubleshooting steps in this guide will get you back up and running.
FAQs
How to troubleshoot arcade machines?
Start at the power source and work inward. First test the wall outlet with a lamp. Then check the power cord for damage, inspect and test all fuses with a multimeter, and verify the power supply outputs +5V and +12V DC. If power checks out, move to the video connection, then test controls and audio. Always follow this outside-in sequence rather than guessing which component failed.
What are the common problems with Arcade1Up machines?
Arcade1Up cabinets most commonly experience loose wire connections on the control deck, sticky or unresponsive buttons, dead power adapters, and LCD screen backlight failures. Since Arcade1Up units use LCD screens instead of CRT tubes, they do not carry the same high-voltage danger. Most issues are fixable by reseating wire connectors, cleaning microswitches, or replacing the included power adapter.
Why won’t my arcade machine turn on?
The most likely cause is a power supply problem. Check the wall outlet first, then inspect the power cord, test all fuses with a multimeter, and measure the power supply output voltage. A dead power supply unit is the single most common reason an arcade machine will not power on. Replacements cost around $25 to $40.
How often should I perform maintenance on my arcade?
For home arcade owners, do a light cleaning and control test monthly. Every three months, open the cabinet and check wiring, power supply voltage, and internal dust buildup. Once a year, clean all edge connectors, reseat socketed chips, and test every fuse. Commercial operators should do quarterly deep cleans and monthly coin mechanism inspections.
Can I repair an arcade machine myself?
Yes. Roughly 80% of common arcade machine problems can be fixed at home with a digital multimeter, screwdrivers, isopropyl alcohol, and replacement microswitches or fuses. The main exceptions are CRT monitor internal repairs (which carry lethal voltage risk) and complex PCB soldering work. For those, call a professional.
What tools do I need to fix an arcade machine?
The essential toolkit includes a digital multimeter, Phillips and flathead screwdrivers, needle-nose pliers, wire strippers, Allen wrenches, compressed air, isopropyl alcohol (90% or higher), cotton swabs, microfiber cloths, and spare fuses. A soldering iron is optional for beginners but needed for capacitor or PCB repairs.
Conclusion
Most arcade machine problems trace back to power supply failures, dirty or worn controls, loose wiring, or neglected maintenance. By following a systematic outside-in diagnostic process and keeping up with a regular maintenance schedule, you can keep your cabinets running for decades.
The next step is simple: build your arcade repair toolkit, bookmark this troubleshooting guide, and tackle problems one at a time. Start with the easiest checks (outlet, fuses, connections) before moving to component-level diagnosis. You will be surprised how many issues a multimeter and some isopropyl alcohol can solve.