
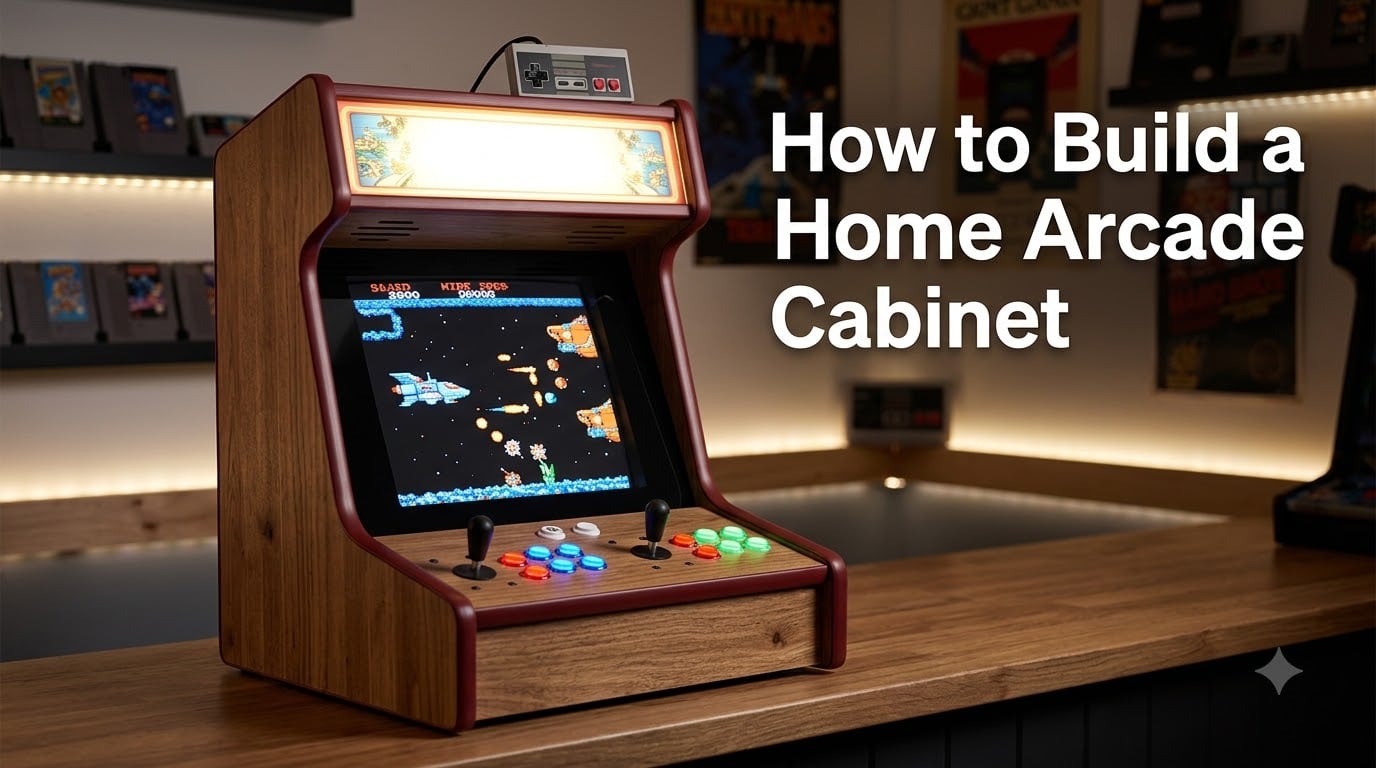
How to build a home arcade cabinet is a question I get asked at least once a week from fellow retro gaming fans. After helping my brother build two cabinets in our garage and watching our team complete six more builds over the past three years, I can tell you this: building your own arcade machine is one of the most rewarding DIY projects you can tackle. You get a custom piece of furniture, the satisfaction of craftsmanship, and unlimited access to classic games for decades to come.
In this guide, I’ll walk you through every step of building a home arcade cabinet, from choosing the right cabinet style to firing up your first game of Pac-Man. Our team spent roughly 120 combined hours researching techniques, testing components, and documenting what actually works versus what sounds good in theory. The result is a complete roadmap that saves you from the cost overruns and wiring headaches that plague first-time builders.
Here’s what you can expect: most first builds take between 2 and 4 weeks of part-time work. Budget builds start around $200 for a bartop, mid-range setups run $500 to $700, and premium full-size cabinets can exceed $1,000. The skills required are beginner-friendly woodworking and basic soldering. If you can measure twice and cut once, you can build an arcade cabinet.
Table of Contents
- Choose Your Cabinet Type: Bartop, Full-Size, or Pedestal
- Complete Tools and Materials List
- Step-by-Step Build Instructions
- Build the Control Panel
- Wire Your Electronics and Audio
- Set Up the Software: RetroPie or PC
- Finishing Touches: Marquee, Artwork, and Paint
- Common Mistakes to Avoid
- Frequently Asked Questions
- Start Your Home Arcade Cabinet Build Today
Choose Your Cabinet Type: Bartop, Full-Size, or Pedestal
Choosing the right cabinet style is the single most important decision you’ll make. Your choice affects the cost, build complexity, space requirements, and the overall gaming experience. Most first-time builders I know start with a bartop and graduate to a full-size cabinet once they’ve learned the basics.
Bartop cabinets are compact, table-top units that typically stand 18 to 24 inches tall. They fit in small apartments, sit on a desk or kitchen table, and cost the least to build. A bartop is the easiest arcade cabinet to build because the smaller size means fewer cuts, less wood, and simpler wiring. Expect to spend $150 to $300 on parts and 15 to 25 hours of build time.
Full-size cabinets replicate the classic upright arcade machines from the 1980s. They stand about 5.5 to 6 feet tall and require dedicated floor space. Full-size builds cost more ($500 to $1,000+) and take longer (40 to 80 hours), but the authentic experience is worth it for serious retro gaming enthusiasts. Our team’s full-size build used 4 sheets of MDF and took 60 hours over three weekends.
Pedestal or cocktail-style cabinets feature a horizontal screen mounted in a table. These work well for multiplayer titles like card games or fighting games. Pedestal builds are less common today but offer a unique aesthetic for game rooms with limited vertical space. The trade-off is lower screen visibility during gameplay.
Quick Comparison of Cabinet Styles
Bartop wins on portability, cost, and beginner-friendliness. Full-size wins on authentic feel and screen size. Pedestal wins on social gaming and unique aesthetics. For your first build, I recommend a bartop unless you already have a dedicated game room.
Complete Tools and Materials List
The materials list for your arcade cabinet depends on the style you choose, but the core components stay the same. Here’s everything our team uses on a typical bartop build, with notes for scaling up to a full-size cabinet.
Wood and Structural Materials
MDF (medium-density fiberboard) is the standard material for arcade cabinets because it cuts cleanly, holds screws well, and paints smoothly. Most bartop builds need 1 to 1.5 sheets of 3/4-inch MDF plus a quarter sheet of 1/2-inch MDF for the control panel and back panels. Full-size builds typically use 3 to 4 sheets of MDF.
You’ll also need wood screws (1.25-inch and 1.5-inch lengths), wood glue, and either edge banding or T-molding for finishing the exposed MDF edges. T-molding is the plastic trim that snaps into a routed groove around the cabinet edges. It’s the iconic finishing touch that makes a cabinet look professional. Budget $25 to $40 for enough T-molding for a bartop.
Electronics and Controls
For controls, you need arcade buttons, joysticks, and a way to connect them to your computer. Two player-grade joysticks (Sanwa, Seimitsu, or Happ) cost $15 to $25 each. Arcade buttons come in packs of 10 for $15 to $30. For a two-player setup, you’ll need 2 joysticks and 12 buttons (6 per player, including Start and Select buttons).
The magic component that simplifies wiring is a zero-delay USB encoder board. This little circuit board connects all your buttons and joysticks to your computer via USB. It translates button presses into keyboard or gamepad inputs. A standard zero-delay encoder costs $10 to $20 and handles 2 players with 12 buttons each.
Display Options
Most modern builds use a 17 to 19-inch LCD monitor with HDMI input. Used monitors from eBay or Facebook Marketplace run $30 to $80 and work perfectly for retro gaming at 1280×1024 or 1920×1080 resolution. Avoid old CRT monitors unless you specifically want the authentic scanline look. They’re heavy, fragile, and require extra mounting hardware.
For the computer brain, you have two main options: a Raspberry Pi 4 or 5 ($45 to $80) running RetroPie, or a used/refurbished PC ($100 to $300). Raspberry Pi is cheaper, smaller, and runs cooler. A PC is more powerful, easier to set up, and can handle more demanding games. Both work great for classic arcade titles.
Additional Hardware
You will also need speakers (basic computer speakers work fine, $15 to $30), speaker wire, a power strip with surge protection, an HDMI cable, and an extension for the USB encoder. LED button lights add visual flair and cost about $10 for a pack that covers 12 buttons. A coin door is optional but adds tremendous authenticity. Replica coin doors run $40 to $80, or you can skip it and use a free-play button.
Step-by-Step Build Instructions
Now for the main event: actually building your home arcade cabinet. I’ll walk through a bartop build since it’s the most accessible starting point. If you’re building a full-size cabinet, the same principles apply, just with larger panels and an extended lower body section.
Step 1: Cut Your Panels
Start by downloading or drafting cut plans for your cabinet. Free plans are available on sites like Instructables, Tiny Arcade Machines, and Reddit’s r/cade community. Standard bartop dimensions are roughly 24 inches wide, 18 inches deep, and 18 inches tall. Cut your MDF panels according to the plan using a circular saw with a straight edge guide or a table saw if you have access to one.
Pro tip from our team: cut slightly oversized and sand down to exact dimensions. It’s much easier to remove material than to add it back. Label each panel as you cut it so you don’t mix up the sides, top, bottom, and back pieces.
Step 2: Assemble the Cabinet Body
Pre-drill pilot holes to prevent the MDF from splitting, then assemble the box using wood screws and glue. Start with the bottom panel, attach the two side panels, then add the top. The back panel goes on last and is often removable for servicing the electronics inside. Clamp pieces together while the glue dries for tighter joints.
The cabinet should be square and level at this point. Measure diagonally from corner to corner in both directions. If the measurements match, your cabinet is square. If not, adjust before the glue fully sets.
Step 3: Mount the Monitor
Cut a hole in the cabinet’s top panel for the monitor screen. Many builders mount the monitor from underneath the panel so the bezel sits flush with the wood surface. Use the cardboard mockup method: trace the monitor’s screen area onto cardboard, cut it out, and test the fit before committing to your MDF panel.
Secure the monitor with screws through the bezel frame into the surrounding wood, or use mounting brackets if your monitor has VESA holes on the back. Leave slack in the cables so you can slide the monitor in and out for maintenance.
Step 4: Route the T-Molding Groove
T-molding snaps into a groove routed around the edges of the cabinet panels. Use a router with a T-molding bit (typically 1/16-inch radius) to cut this groove. Set the bit depth to match your T-molding’s center prong thickness. Route all exposed edges before final assembly if possible. It’s much easier to route flat panels than assembled boxes.
Build the Control Panel
The control panel is where players spend 100% of their time, so build it well. Most bartop control panels are 1/2-inch MDF and measure about 24 inches wide by 8 inches deep. The standard layout features two joysticks on the left, each surrounded by 6 buttons in a curved or row pattern.
Drill holes for your joystick and buttons using a hole saw kit. Buttons need 1-1/8 inch holes, and joysticks typically need a 24mm or 30mm hole depending on the model. Most button packs include a drill template. Mark your layout carefully. Two joysticks with mirrored button layouts look more professional than asymmetrical designs.
Attach the controls to the underside of the panel using the included nuts. Connect each button and joystick direction to the USB encoder using quick-disconnect wires or by soldering. The zero-delay encoder has clearly labeled pin headers for each input. Match your ground wires to the GND pins and signal wires to the numbered signal pins.
Test everything before mounting the panel to the cabinet. Connect the encoder to a computer, open a text editor, and press each button. You should see characters appear when buttons are pressed. If buttons trigger the wrong inputs, double-check your wiring against the encoder diagram.
Wire Your Electronics and Audio
Electronics wiring intimidates most beginners, but a zero-delay USB encoder makes it straightforward. Each button has two terminals. One wire goes to a ground pin on the encoder, and the other goes to a signal pin. Run your wires in bundles and label both ends with masking tape. Future-you will thank present-you when troubleshooting.
For LED buttons, you’ll need a separate 12V power supply. LEDs add about $10 in parts and create that glowing arcade feel. Wire all LED positive terminals to the 12V positive and all negatives to ground. Use a resistor if your LEDs are too bright, though most arcade LEDs come pre-resisted.
Audio wiring is simple: plug computer speakers into your Raspberry Pi or PC’s audio jack, and mount the speakers inside the cabinet with screws or hot glue. Some builders add a volume knob or headphone jack for late-night gaming. Both cost under $10 and make the experience significantly better.
Set Up the Software: RetroPie or PC
Software setup is where your arcade cabinet transforms from furniture into a gaming machine. RetroPie is the most popular choice because it’s free, lightweight, and supports thousands of classic games. It runs on Raspberry Pi and includes emulators for arcade systems, consoles, and home computers.
Install RetroPie by flashing the SD card image, then boot your Raspberry Pi and connect it to your network. Use a keyboard for initial configuration. The RetroPie setup menu walks you through Wi-Fi, audio, and controller mapping. Once configured, you can transfer ROM files over the network and the system organizes them automatically.
For a PC-based build, install a frontend like LaunchBox, Big Box, or Hyperspin on Windows. These programs create the iconic game-selection menu with marquee artwork and video previews. A PC handles more demanding games like Namco System 22 or Sega Model 3 emulators that would choke a Raspberry Pi.
Which should you choose? Raspberry Pi for budget builds under $300 and classic 8-bit and 16-bit games. PC for premium builds, modern indie games, or any games requiring more processing power. Most retro gaming enthusiasts eventually own both systems.
Finishing Touches: Marquee, Artwork, and Paint
The finishing touches transform a wooden box into an arcade cabinet. Start by filling all screw holes and seams with wood filler. Sand the entire cabinet with 120-grit then 220-grit sandpaper. Apply primer, then 2 to 3 coats of black satin or semi-gloss paint. Black is the classic arcade color and hides imperfections well.
For the marquee (the illuminated sign at the top), print custom artwork on transparency film or vinyl. Backlight it with an LED strip or a fluorescent fixture. Many builders use artwork featuring their favorite game franchises or create custom designs. The marquee is the focal point of any arcade cabinet, so spend time getting it right.
Add side art for an extra dose of authenticity. Side art is vinyl decals printed with game characters or themed designs. Custom-printed side art costs $30 to $60 from arcade art shops online. Apply it carefully using the soap-and-water method: spray the cabinet side with soapy water, position the decal, and squeegee out the water from beneath.
Common Mistakes to Avoid
Our team has made just about every mistake possible, so you don’t have to. Here are the five biggest pitfalls we see first-time builders fall into.
Skipping the cardboard mockup. Always test your monitor cutout with cardboard before cutting MDF. A ruined monitor panel costs $20 and a day of rework.
Buying the cheapest joysticks. Cheap joysticks wear out within months. Sanwa or Seimitsu joysticks cost more upfront but last 10+ years with regular play. Save money on wood, not on controls.
Forgetting ventilation. Electronics generate heat. Drill ventilation holes or add a small 80mm fan to your cabinet. A Raspberry Pi running hot will throttle and lag during gameplay.
Ignoring cable management. Bundle wires with zip ties and label everything. When a button stops working in 6 months, labeled cables save hours of debugging.
Underestimating finishing time. Most builders spend 40% of total time on sanding, painting, and artwork. Budget accordingly or you’ll have an unfinished cabinet sitting in your garage for months.
Frequently Asked Questions
What materials do I need to build a home arcade cabinet?
You need MDF sheets (3/4 inch for the body, 1/2 inch for the control panel), wood screws, wood glue, T-molding trim, arcade buttons, joysticks, a zero-delay USB encoder, an LCD monitor, speakers, and either a Raspberry Pi or a PC. Budget builds start around $200 in materials, while premium builds can exceed $1,000.
How much does it cost to build a DIY arcade cabinet?
A bartop arcade cabinet costs between $150 and $300 in parts. A mid-range full-size cabinet runs $500 to $700. Premium builds with high-end components, custom artwork, and LED lighting can exceed $1,000. The biggest variables are the monitor, controls quality, and whether you choose a Raspberry Pi or PC-based system.
What is the easiest arcade cabinet to build?
A bartop arcade cabinet is the easiest style for beginners. The smaller size means fewer cuts, less material, and simpler wiring. Most first-time builders complete a bartop in 15 to 25 hours of work. Start with a bartop to learn the basics, then graduate to a full-size cabinet once you’ve mastered the techniques.
Do I need a Raspberry Pi or PC for an arcade cabinet?
A Raspberry Pi 4 or 5 ($45 to $80) works perfectly for classic 8-bit and 16-bit games and is the budget-friendly choice. A PC ($100 to $300 used) handles more demanding emulators and modern games. Choose Raspberry Pi for cabinet builds under $300 focused on retro classics. Choose a PC for premium builds or if you want to play modern indie games.
How long does it take to build an arcade cabinet?
Most first-time builders complete a bartop cabinet in 2 to 4 weeks of part-time work, or roughly 15 to 25 total hours. A full-size cabinet takes 40 to 80 hours over 3 to 6 weekends. The finishing phase (sanding, painting, artwork) typically consumes 40% of total project time, so plan accordingly.
Start Your Home Arcade Cabinet Build Today
Learning how to build a home arcade cabinet is a journey that rewards patience and planning. From choosing your cabinet style to firing up your first game, every step teaches something new about woodworking, electronics, and software configuration. Our team’s biggest lesson after six builds: start simple, budget generously for finishing time, and don’t cheap out on the controls you’ll touch every day.
Pick up that MDF, order your zero-delay encoder and Sanwa joysticks, and start cutting. Six weekends from now, you’ll have a custom arcade cabinet that delivers thousands of hours of gaming joy. Welcome to the retro gaming community, and happy building.