
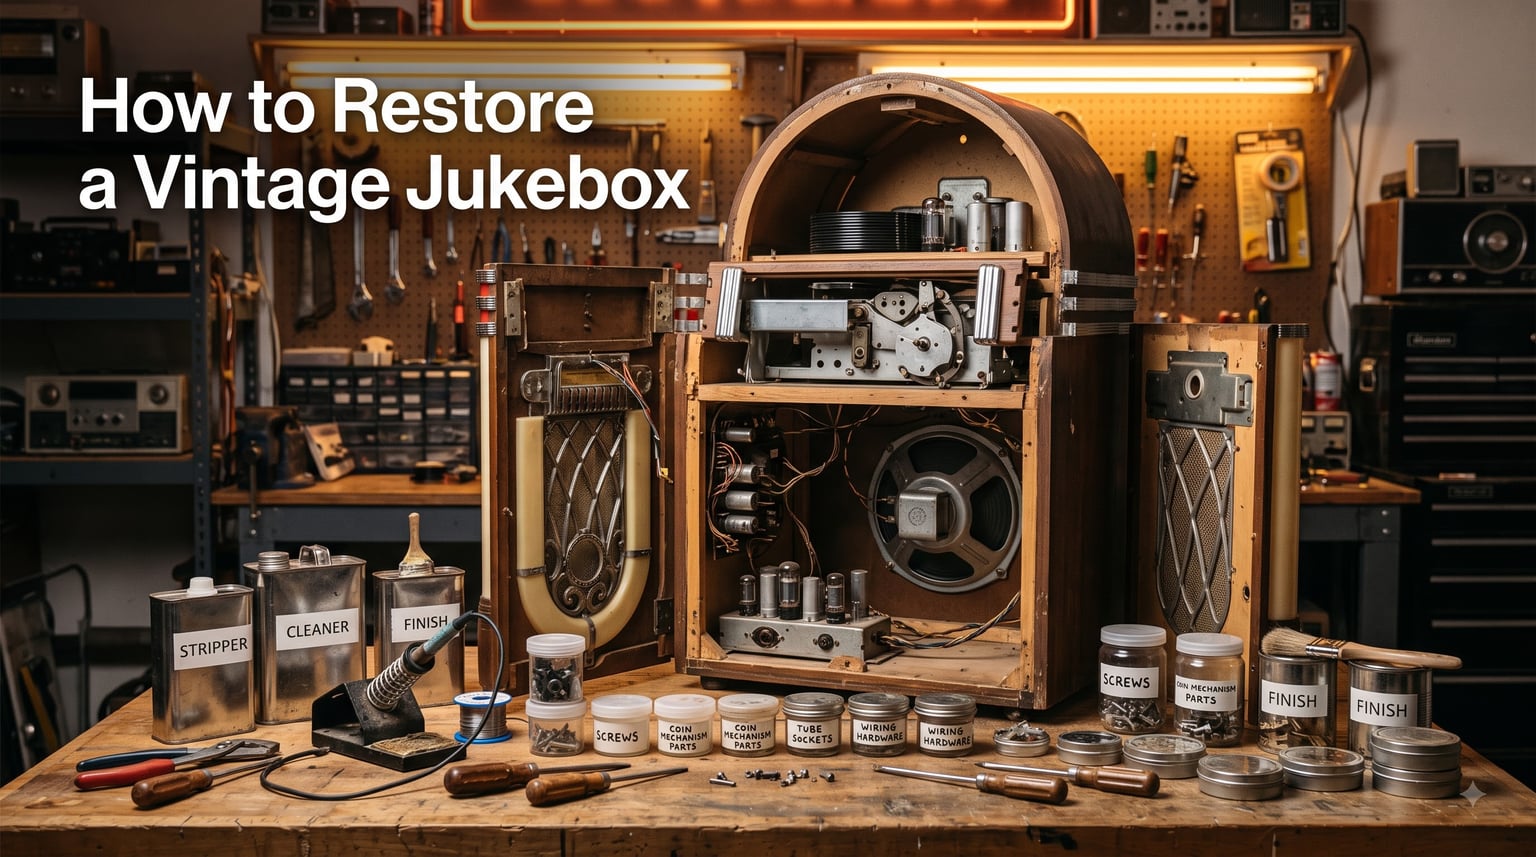
Learning how to restore a vintage jukebox is one of the most rewarding projects a coin-op enthusiast can take on. Our team has spent years working on machines from the golden age of jukeboxes, and I want to share everything I have learned in this guide.
Restoring a vintage jukebox means returning an aging or neglected machine to full working and visual condition. The process combines woodworking, mechanical repair, electronics work, and lighting restoration into one project.
A full vintage jukebox restoration follows a systematic sequence: assess the machine’s condition, fully disassemble and document every part, restore the cabinet, rebuild the mechanical record-changer system, repair the tube amplifier, restore the lighting, and carefully reassemble and test.
Whether you inherited a Wurlitzer from a family member or found a project Rock-Ola at an estate sale, this guide walks you through every step. I will cover costs, tools, safety, troubleshooting, and model-specific tips that no other guide covers in this depth.
Vintage jukeboxes are irreplaceable pieces of American cultural history. Proper restoration preserves their value, extends their working life by decades, and brings back the authentic mid-century music experience that makes them iconic. Let me show you exactly how to do it right.
Table of Contents
- What Does Restoring a Vintage Jukebox Actually Involve?
- Before You Start: Evaluating a Donor Machine
- How Much Does It Cost to Restore a Vintage Jukebox?
- Tools and Equipment You Will Need
- Safety Considerations Before You Begin
- Step 1: Full Disassembly and Documentation
- Step 2: Cabinet and Cosmetic Restoration
- Step 3: Mechanical and Mechanism Restoration
- Step 4: Electronics and Amplifier Rebuild
- Step 5: Lighting and Plastic Component Restoration
- Step 6: Turntable, Tonearm, and Record Mechanism
- Step 7: Reassembly and Testing
- Common Problems and Troubleshooting
- Popular Vintage Jukebox Models to Restore
- Sourcing Parts and Replacement Components
- FAQs
- How much does it cost to restore a vintage jukebox?
- What is the most sought after vintage jukebox?
- How do you clean an old jukebox?
- Is it worth restoring a vintage jukebox?
- How long does it take to restore a vintage jukebox?
- Can I restore a jukebox at home without professional help?
- Where can I buy vintage jukebox parts?
- Wrapping Up Your Vintage Jukebox Restoration
What Does Restoring a Vintage Jukebox Actually Involve?
Restoring a vintage jukebox is a multi-disciplinary project that touches four distinct skill areas. You need cabinet woodworking, mechanical repair of the record-changing system, electronics work on the tube amplifier, and cosmetic restoration of chrome, plastic, and lighting components.
Before diving in, you should understand the difference between renovation and restoration. Renovation means making the machine play music again, often with modern parts. Restoration means returning it to factory-original condition with period-correct components and finishes.
The restoration philosophy matters because it affects every decision you make. A full factory-correct restoration of a Wurlitzer 1015 can take 200 to 400 hours of work and requires authentic replacement parts. A renovation that simply makes the machine functional might take 40 to 80 hours.
Most DIYers land somewhere in between. You want the machine to look beautiful, play records reliably, and retain its vintage character without obsessing over every historically inaccurate screw. This guide focuses on that practical middle ground.
The skill requirements are real but manageable. Basic soldering, patience with mechanical linkages, and willingness to work carefully are the main prerequisites. I have seen complete beginners produce stunning results by following a methodical process and taking their time.
Before You Start: Evaluating a Donor Machine
Not every vintage jukebox is worth restoring. Before you invest time and money into a project, you need to evaluate whether the machine is a good candidate. This single step saves more people from expensive mistakes than anything else in the process.
Brand and Model Matters
The big four brands of the jukebox golden age are Wurlitzer, Rock-Ola, Seeburg, and AMI. These brands have the strongest collector demand, the best parts availability, and the highest resale values.
Working original machines from these desirable brands range from $2,000 to $20,000 or more depending on model and condition. Non-working project machines typically sell for $500 to $3,000 based on rarity and completeness.
The Wurlitzer 1015 One More Time is the single most collected and valuable vintage jukebox. If you have one, it is almost always worth restoring. The Rock-Ola Princess, AMI Continental 200, and Seeburg Select-O-Matic 200 are also excellent candidates.
Condition Checklist
When evaluating a donor machine, check these critical items before committing:
Cabinet structure: Look for water damage, delaminating veneer, broken corners, and wood rot. Surface damage is fixable. Structural damage can make a restoration uneconomical.
Completeness: Count the major components. Missing tonearms, record carousels, or amplifier chassis are expensive to replace. A complete but non-working machine is almost always better than a partial one.
Original electronics: Check whether the amplifier chassis and transformers are present. Even if the electronics do not work, having the original tube amplifier means it can be rebuilt.
Mechanism completeness: The record-changing mechanism is the heart of the machine. Verify the carousel, gripper arm, and selector assembly are all present and not cracked or bent.
Cosmetic chrome and trim: Heavy pitting on chrome trim adds cost because re-chroming is expensive. Light tarnish cleans up easily, but deep rust means plating work.
Plastics and glass: Check acrylic panels and glass domes for cracks. Reproduction panels are available for popular models but can cost $100 to $400 each.
Photo Documentation from Day One
Experienced restorers on forums like r/jukeboxes and Jukebox Addicts all recommend the same thing: photograph everything before you touch a single screw. Take wide shots of the full machine, then close-ups of every assembly, wiring connection, and mechanical linkage.
You will be glad you did three months later when you are trying to remember how the gripper arm spring routes around the cam. This documentation is your reference library throughout the project.
I also recommend shooting a slow video of the machine playing (if it runs) or at least of you manually cycling the mechanism. Seeing the motion helps enormously when you reassemble.
How Much Does It Cost to Restore a Vintage Jukebox?
This is the question forum users ask most often, and no competitor guide answers it. Let me break down the real costs based on what our team has seen across dozens of restoration projects.
DIY restoration typically costs between $500 and $3,000 in parts and materials. Professional restoration ranges from $5,000 to $25,000 or more. The difference comes down to labor, expertise, and the quality of finish work.
DIY Cost Breakdown
If you are doing the work yourself, here is where your money goes:
Cabinet refinishing: $200 to $800 for chemical strippers, wood filler, stain, lacquer, sandpaper, and grille cloth. This assumes you already own basic woodworking tools.
Amplifier rebuild: $100 to $400 for replacement capacitors, resistors, tubes (if needed), and a new grille cloth. A capacitor kit for most vintage amplifiers runs $40 to $80.
Mechanism overhaul: $50 to $300 for rubber parts, belts, lubricants, replacement springs, and possibly a new cartridge and stylus.
Chrome and metalwork: $0 if you polish yourself, or $200 to $1,000 for professional re-plating of heavily pitted parts.
Plastics and lighting: $50 to $300 for Novus polish, replacement bulbs, and any reproduction acrylic panels.
Miscellaneous: $50 to $200 for adhesives, solvents, fasteners, and consumables you will inevitably need.
Professional Restoration Costs
If you hire a professional shop, expect labor to dominate the cost. Professional jukebox restoration shops typically charge $100 to $280 per hour. A full restoration can take 100 to 300 hours of skilled labor.
Forum users have shared quotes ranging from $5,000 for a straightforward cosmetic refresh to $25,000 for a concours-quality frame-off restoration of a rare model. One Reddit user inherited a jukebox and faced a $400 move fee plus $280 per hour repair estimates, which made them seriously question whether the project was worth it.
DIY vs Professional Comparison
Here is how the two approaches compare:
DIY cost: $500 to $3,000 in materials
Professional cost: $5,000 to $25,000+ including parts and labor
DIY time: 3 to 12 months working evenings and weekends
Professional time: 2 to 6 months shop time
DIY result quality: Good to excellent, depending on your skills
Professional result quality: Excellent to concours-level
DIY learning value: Immense. You will know every bolt in the machine.
My recommendation: if you enjoy hands-on projects and have patience, do it yourself. The cost savings are dramatic, and the satisfaction is unmatched. If you just want a beautiful working jukebox and have the budget, hire a pro.
Tools and Equipment You Will Need
No top-ranking guide provides a comprehensive tools checklist, so I created one based on our restoration experience. Having the right tools before you start prevents frustrating mid-project hardware store runs.
Hand Tools
Most of what you need falls into standard hand tools. A good set of screwdrivers (both flathead and Phillips in multiple sizes) handles 80 percent of the disassembly work. Vintage jukeboxes use a mix of slotted and Phillips screws, sometimes on the same component.
You also need:
Needle-nose pliers and regular pliers for spring clips and retaining rings
Hex key set for set screws on pulleys and knobs
Socket set for larger fasteners on the cabinet and frame
Small adjustable wrench for nuts on posts and mounting hardware
Tweezers and picks for retrieving small parts from tight mechanisms
Magnifying glass or loupe for inspecting solder joints and tiny components
Electronics Tools
For the amplifier and wiring work, you need electronics-specific tools. A 40-watt soldering iron with replaceable tips handles most jukebox soldering tasks. Do not use a cheap iron. Temperature control matters for working on vintage circuit boards.
Essential electronics tools:
Soldering iron (40W minimum) with solder and flux
Desoldering pump or solder wick for removing old components
Digital multimeter for testing voltage, resistance, and continuity
Oscilloscope (optional but very helpful for amplifier troubleshooting)
Wire strippers and crimping tool
Heat shrink tubing assortment and a heat gun
Helping hands or third-hand tool for holding wires while soldering
Woodworking and Finishing Tools
Cabinet work requires its own tool set. You do not need a full woodworking shop, but quality finishing tools make a visible difference in the final result.
Orbital sander with assorted grit sandpaper (120 through 400)
Hand scrapers for tight corners the sander cannot reach
Brush assortment for applying stain, lacquer, and chemical strippers
Tack cloth for removing dust between finish coats
Respirator rated for organic vapors (for chemical stripping)
Drop cloths and masking tape for protecting finished surfaces
Consumables and Materials
Stock up on these consumables before starting. Running out mid-step on a finish coat or lubrication job is frustrating and can affect quality.
Isopropyl alcohol (91 percent or higher) for cleaning contacts and mechanical parts
Contact cleaner spray for switches and electrical connections
Machine oil (light grade) for bearings and moving parts
White lithium grease for gear teeth and heavy-load sliding surfaces
Graphite powder for locks and tight mechanical tolerances
Compressed air cans or an air compressor for dust removal
Labeled containers and zip-top bags for organizing small parts
Permanent marker and label tape for the labeling system
Safety Considerations Before You Begin
Safety is not an afterthought in jukebox restoration. These machines were built decades before modern safety standards, and several aspects of the work carry real risks. Forum users consistently identify fear of high voltage as the top reason they hesitate to start.
Tube Amplifier High Voltage Danger
Vintage jukebox tube amplifiers operate at 300 to 600 volts DC. That is enough voltage to cause serious injury or death. This is the single most dangerous part of the entire restoration project.
Before touching any amplifier component, you must discharge the capacitors. Here is the safe procedure:
Unplug the jukebox from all power sources. Never work on an amplifier that is connected to wall power.
Wait 5 minutes for tubes to cool and initial charge to dissipate naturally.
Using an insulated screwdriver with a resistor (10k ohm, 2 watt) clipped between the blade and ground, touch each large filter capacitor terminal to ground for at least 30 seconds.
Verify with your multimeter that voltage reads zero before proceeding.
Repeat this discharge process every time you return to the amplifier after it has been powered on for testing.
If you are not comfortable working with high voltage, outsource the amplifier rebuild to a professional. There is no shame in this. Many skilled restorers send their amplifiers to specialists.
Chemical Safety
Cabinet refinishing involves chemical strippers, solvents, and finishes that are toxic if inhaled or absorbed through skin. Always work in a well-ventilated area. Wear a respirator rated for organic vapors when applying or removing chemical strippers.
Wear nitrile gloves when handling all chemicals. Old lacquer and paint on vintage jukeboxes may also contain lead. Test with a lead testing kit before sanding painted surfaces.
Mechanical Safety
Jukebox mechanisms include springs under significant tension. When removing springs from the selector mechanism or gripper arm, wear eye protection. Released springs can travel across the room.
The machines are also heavy. A typical full-size vintage jukebox weighs 250 to 350 pounds. Always get help when moving one, and use a furniture dolly. Never attempt to move a jukebox solo.
Step 1: Full Disassembly and Documentation
The first hands-on step in vintage jukebox restoration is complete disassembly. This is where the photo documentation I mentioned earlier becomes critical. You are about to take apart hundreds of components, and you need to put them all back correctly.
Document Everything First
Before removing a single screw, photograph the machine from every angle. Then photograph each subsystem individually: the amplifier wiring, the mechanism linkages, the selector switches, the coin mechanism, and the lighting harness.
I use a two-camera approach: wide shots with my phone for context, then close-ups with a real camera for detail. Print or organize the photos into folders by subsystem so you can reference them during reassembly.
Disassembly Order
Follow a logical removal sequence to avoid damage and confusion:
Disconnect all power and remove the power cord from the chassis.
Remove all exterior trim, chrome strips, and decorative panels. Label each piece and its mounting hardware.
Remove acrylic and glass panels. Wrap them in protective material and store flat in a safe location.
Disconnect and remove the amplifier chassis. Photograph every wire connection before disconnecting.
Remove the lighting assembly, including neon tubes and bulb sockets. Label wires.
Remove the record carousel and turntable assembly as a unit if possible. Support it carefully.
Remove the selector mechanism and coin mechanism. These have many small parts, so work on a clean, well-lit surface.
Remove remaining hardware, hinges, and mechanical components from the cabinet.
You should now have a bare cabinet shell ready for refinishing.
Labeling System
Use labeled zip-top bags for all hardware. Each bag should note the component name, screw type, and where it goes. For wiring connections, use small numbered labels on each wire before disconnecting.
I cannot overstate how important this step is. Three months into a restoration, you will not remember which of the 15 similar-looking springs goes on the cam follower versus the gripper arm. Labels and photos are your safety net.
Step 2: Cabinet and Cosmetic Restoration
Cabinet restoration is the most visible part of the project. A beautifully refinished cabinet makes the difference between a good restoration and a stunning one. This step takes time, but the results are worth every hour.
Stripping Old Finish
Start by removing the old lacquer and finish. Apply chemical stripper generously with a brush, let it sit according to the manufacturer instructions (usually 10 to 15 minutes), and scrape the softened finish off with a plastic putty knife.
Work in small sections so the stripper does not dry before you can scrape. Use a hand scraper for tight corners and decorative molding. Avoid metal scrapers on wood surfaces because they can gouge the veneer.
Once the bulk of the old finish is off, wipe the surface with mineral spirits to remove residue. Let the wood dry completely before proceeding to repairs.
Wood Veneer Repair
Vintage jukeboxes typically use thin wood veneer over a plywood or particle board core. After decades, veneer can delaminate, crack, or chip. Address these issues before finishing.
For delaminating veneer, inject wood glue under the lifted area using a syringe, then clamp it flat with a caul and wax paper until the glue cures. For small chips, use colored wood filler that matches the veneer species.
For larger missing sections of veneer, you may need to patch with new veneer. This requires matching the wood species and grain direction. Walnut, mahogany, and birch are common jukebox veneers depending on the era and manufacturer.
How to Clean an Old Jukebox
Many people ask how to clean an old jukebox before deciding whether to do a full restoration. Here is the proper cleaning sequence:
Remove all loose items, records, and removable panels from the machine.
Use mild soap and warm water on a barely damp cloth for wood and metal surfaces. Wring the cloth out thoroughly so water does not drip into electronics.
Use Novus plastic polish (or equivalent) on acrylic and plastic panels. Start with Novus No. 2 for fine scratches, then Novus No. 1 for final polishing.
Clean chrome trim with chrome polish and a soft cloth. Avoid abrasive cleaners that can scratch plating.
Use compressed air on mechanical parts to blow out decades of dust and debris.
Never spray liquids directly onto or near electronics, switches, or the amplifier chassis.
Stain Matching and Lacquer Finishing
Match the stain to the original color as closely as possible. Test your stain on a hidden area first, like the inside of a door panel. Apply stain with a clean rag, working in the direction of the grain, and wipe off excess immediately.
For the clear coat, I prefer nitrocellulose lacquer because it is period-correct and ages beautifully. Apply three to five thin coats with adequate drying time between each. Sand lightly with 400-grit paper between coats for a smooth finish.
Allow the final coat to cure for at least 48 hours before handling the cabinet or reinstalling hardware. Lacquer continues to harden over several weeks, so treat the finish gently during reassembly.
Re-Chroming and Metal Restoration
Chrome trim pieces on vintage jukeboxes often show pitting, flaking, or tarnish after decades. Lightly tarnished chrome can be restored with chrome polish and fine steel wool (0000 grade).
Heavily pitted or flaking chrome requires professional re-plating. This involves stripping the old plating, polishing the base metal, and re-plating with copper, nickel, and chrome layers. Costs run $50 to $300 per piece depending on size and condition.
Grille Cloth Replacement
The grille cloth on the speaker opening is often faded, torn, or water-stained. Replacement grille cloth is available from jukebox parts suppliers in patterns that match original designs for popular models.
Remove the old cloth by carefully pulling out the retaining staples or tacks. Clean the frame, stretch the new cloth evenly, and re-secure with staples or tacks. Keep the cloth taut but not over-stretched, which can distort the weave.
Step 3: Mechanical and Mechanism Restoration
The record-changing mechanism is the heart of any vintage jukebox. This electromechanical system selects records, positions them on the turntable, plays them, and returns them to the carousel. Restoring it requires patience and careful observation.
Cleaning the Mechanism
Decades of dried grease, dust, and debris accumulate on every surface of the mechanism. Start by blowing out loose debris with compressed air. Then clean all metal surfaces with isopropyl alcohol and a parts cleaning brush.
Remove all old lubricant from gear teeth, cam surfaces, and bearings. Old grease hardens into a gummy residue that prevents smooth operation. A small brass brush helps remove stubborn deposits without damaging metal surfaces.
Work on the mechanism in sections so you do not lose track of component relationships. Clean and inspect one subsystem at a time, then move to the next.
Lubrication
Once everything is clean and dry, re-lubricate with the correct products for each application:
Light machine oil on motor bearings, turntable spindle bearings, and small pivots
White lithium grease on gear teeth, cam surfaces, and heavy-load sliding components
Graphite powder in locks and tight mechanical linkages where oil would attract dust
Silicone-based lubricant on rubber parts that slide or rotate
Avoid over-lubricating. Excess oil attracts dust and eventually turns into the same gummy residue you just cleaned off. A small drop on each bearing surface is sufficient.
Rubber Component Replacement
Rubber parts in vintage jukeboxes have a finite lifespan. After 40 to 70 years, rubber hardens, cracks, or turns to goo. Replace all rubber components including drive belts, idler wheels, bumpers, and grommets.
Rubber idler wheels on the turntable drive are particularly important. A hardened or flat-spotted idler wheel causes speed inconsistency and wow in the music. Replacement idler wheels are available for most popular models from specialized suppliers.
Drive belts, where present, should be replaced regardless of apparent condition. Old belts look fine until they snap during operation, which can damage other components.
Selector and Coin Mechanism
The selector mechanism lets users choose records by pressing letter and number buttons. The coin mechanism accepts and validates coins, then credits the machine for selections. Both systems rely on precise mechanical linkages.
Clean all contacts in the selector switches with contact cleaner. Check for bent or worn linkages in the coin mechanism. Test the coin acceptor with actual coins of the correct denomination to verify it still functions.
Many restorers convert their jukebox to free play mode, which bypasses the coin mechanism entirely. This is a personal choice. Free play conversion kits are available for most models and typically involve adding a switch or jumper to the control circuit.
Step 4: Electronics and Amplifier Rebuild
The tube amplifier produces the signature warm sound that makes vintage jukeboxes so appealing. But 60-year-old electronics need systematic rebuilding before they are safe to power on.
Capacitor Replacement
Capacitors are the single most failure-prone component in vintage tube amplifiers. Electrolytic capacitors dry out over time, and paper-wax capacitors degrade and leak. Plan to replace every electrolytic and paper capacitor in the amplifier.
Order a capacitor kit specific to your amplifier model if available. These kits include correctly rated replacements for every original capacitor. If no kit exists, match each capacitor’s capacitance (microfarads) and use a voltage rating equal to or higher than the original.
Replace capacitors one at a time, noting the polarity of electrolytics. Incorrect polarity on an electrolytic capacitor can cause it to explode when power is applied. Take photos of each original capacitor before removal so you can verify correct installation.
Resistor Inspection
Check carbon composition resistors for value drift. These resistors tend to increase in resistance as they age. Use your multimeter to measure each resistor and compare to its color-coded value.
Replace any resistor that has drifted more than 20 percent from its rated value. Also replace any resistor that shows signs of heat damage, such as cracked or scorched casing. Heat-damaged resistors often indicate an underlying circuit problem.
Wiring and Solder Joints
Inspect every wire in the amplifier chassis for cracked insulation, especially on wires connected to heat-producing components like tubes and power resistors. Replace any wire with damaged insulation using appropriately rated wire.
Re-flow any solder joints that look dull, cracked, or cold. A good solder joint should be shiny and concave. Use rosin-core solder (never acid-core) for all electronics work. Acid flux corrodes copper traces over time.
Check the wiring harness for continuity using your multimeter. Broken wires inside insulation are common in old equipment and cause intermittent faults that are difficult to trace.
Testing the Amplifier
Before installing the rebuilt amplifier, test it on the bench. Use a variac to slowly bring the voltage up from zero over several minutes. This process, called reforming the capacitors, allows new electrolytic capacitors to form their oxide layer gradually.
If you have access to an oscilloscope, check the output waveform for each amplifier stage. Look for clean sine waves without clipping or oscillation. If you do not have an oscilloscope, at minimum verify that the amplifier produces sound and does not overheat.
Tube Testing
Test tubes on a tube tester if you have access to one. Tubes with low emission or high grid leakage should be replaced. NOS (new old stock) tubes provide the most authentic sound but are increasingly expensive.
Quality new-production tubes from brands like JJ and Tung-Sol are perfectly acceptable for a player-grade restoration. They offer good sound and reliability at a fraction of NOS prices.
Step 5: Lighting and Plastic Component Restoration
The warm glow of a vintage jukebox is what makes it a conversation piece. Restoring the lighting and plastic components brings back that iconic mid-century ambiance.
Neon Lighting Restoration
Many premium vintage jukeboxes feature neon tube lighting for decorative effects. Neon tubes can dim, flicker, or stop working entirely over decades. Check the neon transformer first, as these fail more often than the tubes themselves.
If the transformer tests bad, replace it with an equivalent unit rated for the correct voltage and current. If the tubes themselves are dim or flickering, they may need re-gassing. This requires sending them to a neon shop that can re-pump the gas.
Handle neon tubes with extreme care. They are thin glass and break easily. Support them along their entire length when removing or installing.
Acrylic and Plastic Panels
Acrylic panels on vintage jukeboxes scratch and yellow with age. Restore clarity and shine using a three-step plastic polishing system like Novus:
Novus No. 3 (heavy scratch remover) for deep scratches. Use with a soft cotton cloth, polishing in a circular motion.
Novus No. 2 (fine scratch remover) for moderate scratches and to refine the No. 3 work.
Novus No. 1 (plastic clean and shine) for final polishing and ongoing maintenance.
For severely yellowed plastic, you may need wet sanding starting at 600 grit and working up to 2000 grit before polishing. This removes the yellowed surface layer and restores optical clarity.
Bulb Replacement
Replace all incandescent indicator and illumination bulbs. Use the correct wattage and base type for each socket. Over-wattage bulbs generate excess heat that can melt plastic panels or damage nearby wiring.
LED replacement bulbs are available for most jukebox applications. They run cooler and last longer than incandescent bulbs. However, some restorers prefer incandescent bulbs for their warmer color temperature, which is more period-correct.
Silk-Screened Artwork
Many vintage jukeboxes feature silk-screened artwork on interior panels and glass. Clean these carefully with a soft cloth and mild soap solution. Never use abrasive cleaners, which can scratch or remove the printed design.
If silk-screened artwork is damaged or missing, reproduction panels are available for popular models. These reproductions use original artwork files and modern printing techniques to recreate factory-accurate designs.
Step 6: Turntable, Tonearm, and Record Mechanism
The turntable assembly and tonearm are where the music actually happens. Precise setup of these components determines whether your jukebox sounds great or disappointing.
Turntable Assembly
Clean the turntable platter and spindle bearing thoroughly. Remove old oil from the spindle well, then re-lubricate with a few drops of light machine oil. Spin the platter by hand to verify it rotates freely without binding or wobble.
Check the drive mechanism between the motor and platter. Most vintage jukeboxes use either a belt drive or an idler wheel drive. Replace the belt or idler wheel as described in the mechanism section.
Verify turntable speed using a strobe disc. Correct speed for 45 RPM records is 45 revolutions per minute. Speed adjustment varies by model but usually involves a trim pot or mechanical governor adjustment on the motor.
Tonearm Restoration
The tonearm guides the stylus across the record groove. Clean the tonearm bearings and pivot points with isopropyl alcohol. Verify the tonearm moves freely throughout its range of motion without stiffness or binding.
Set the tracking force to the manufacturer specification for your cartridge. Too much force wears records prematurely. Too little force causes skipping and distortion. A tracking force gauge (stylus pressure gauge) is an inexpensive tool that ensures accurate setup.
Check anti-skate settings if your tonearm has this adjustment. Proper anti-skate prevents the tonearm from pulling toward the center of the record, which causes uneven groove wear.
Cartridge and Stylus
Replace the stylus at minimum, as old styli are worn and may damage records. If the cartridge itself is a ceramic type (common in older machines), consider upgrading to a magnetic cartridge for better sound quality.
Forum users on Jukebox Addicts recommend upgrading from ceramic to moving-magnet cartridges for a significant sound improvement. This may require a phono preamp, but the audio quality difference is substantial.
Verify that the cartridge and stylus are compatible with the record speeds your jukebox plays. Most vintage jukeboxes play 45 RPM records, but some older models also handle 78 RPM. The stylus tip radius differs between speeds.
Step 7: Reassembly and Testing
Reassembly is the reverse of disassembly, but with extra care. You are putting together a machine you took apart months ago. This is where your photos and labels pay off.
Reassembly Sequence
Reinstall components in roughly the reverse order of disassembly:
Start with the bare cabinet. Install any repaired structural components first.
Reinstall the selector mechanism and coin mechanism. Verify smooth operation of all linkages.
Install the turntable assembly and record carousel. Check for correct alignment and free rotation.
Reinstall the lighting assembly and connect all wiring. Test each lighting circuit.
Install the rebuilt amplifier. Reconnect all wiring using your labeled connections and photos.
Reinstall acrylic panels, glass, and decorative trim pieces.
Install exterior chrome strips and hardware last to avoid damaging them during assembly.
Free Play Conversion
If you want your jukebox to play without coins, this is the time to install a free play conversion. Most conversions involve either a toggle switch wired into the credit circuit or a jumper on the control board.
Free play kits are model-specific and come with instructions. The conversion typically takes 30 minutes to an hour. Some restorers leave the coin mechanism functional so the jukebox can accept coins for nostalgic effect while also playing on free play.
Testing Procedure
Before declaring victory, run through a complete testing sequence:
Power on using a variac for the first start to verify no shorts or component failures.
Check all lighting circuits for correct illumination.
Test the amplifier with no signal. You should hear only a slight hum, not loud buzzing.
Cycle the mechanism through several selections without records. Verify smooth operation.
Load records and test actual playback. Check for correct speed, tracking, and sound quality.
Test the coin mechanism if you have not converted to free play.
Verify the selector buttons correctly choose the intended records.
Run the machine for 30 minutes and check for overheating components or unusual sounds.
Address any issues before final cabinet closure. It is far easier to fix problems with the panels off than after everything is buttoned up.
Common Problems and Troubleshooting
Even after a careful restoration, issues can arise. Here are the most common problems forum users report, along with how to fix them. No other guide covers this troubleshooting territory.
Carousel Motor Running Slow
This is one of the most frequently reported issues on vintage jukebox forums. A carousel motor that runs slowly or stalls triggers safety cutoffs and prevents record selection.
The most common cause is dried lubrication in the motor bearings. Disassemble the motor, clean all bearing surfaces, and re-lubricate with light machine oil. If the motor has a capacitor, test and replace it if weak.
Another cause is a weak or stretched drive belt. Replace with a correctly sized new belt. If the motor itself is electrically faulty (burned windings), it may need professional rebuild or replacement.
One Steve Hoffman AV Forum user described dealing with a slow carousel motor over 15 years of ownership, requiring multiple service attempts. The root cause was eventually traced to a combination of bearing wear and a marginal motor capacitor.
Humming Amplifier
A loud hum from the amplifier usually indicates a grounding problem or a failed filter capacitor. Check all ground connections first. Loose or corroded ground connections are the most common cause of amplifier hum.
If grounds are solid, suspect the filter capacitors in the power supply. Even newly replaced capacitors can fail if installed with incorrect polarity. Verify polarity on all electrolytic capacitors.
Heater-cathode leakage in a tube can also cause hum. Tube-test each tube and replace any that show leakage. If the hum only appears when the phono input is connected, check the shielding and grounding of the tonearm cable.
Sticky Coin Mechanism
Coin mechanisms that reject valid coins or fail to credit usually have dirty or worn components. Clean all sliding surfaces with isopropyl alcohol. Check the coin acceptor cradle for wear or bent levers.
If you have converted to free play and the coin mechanism is not needed, you can leave it in place for cosmetic purposes without worrying about its function.
Records Not Selecting Properly
When the jukebox plays the wrong record or fails to select at all, the problem is usually in the selector mechanism or the positioning system. Check the selection switches for dirty contacts. Clean with contact cleaner.
Verify the gripper arm alignment. If the gripper does not pick up records squarely from the correct carousel slot, it will misselect or drop records. Adjust the gripper arm timing according to the service manual for your model.
Turntable Speed Issues
If the music sounds too fast or too slow, check the turntable drive. A worn idler wheel or stretched belt causes speed variations. Clean the inside of the platter rim and the idler wheel contact surface.
If speed is consistent but wrong, adjust the motor speed control. On some models this is a mechanical governor. On others it is an electronic trim pot. Small adjustments make a noticeable difference.
Popular Vintage Jukebox Models to Restore
Some models are better restoration candidates than others. Here are the most popular and sought-after vintage jukeboxes, each with its own character and restoration considerations.
Wurlitzer 1015 One More Time
The Wurlitzer 1015 is the most iconic and most collected vintage jukebox ever made. Originally produced from 1946 to 1947, the 1015 features the classic bubble tube lighting, arched top, and visible record changing mechanism that define the jukebox image in popular culture.
The 1015 plays 24 selections of 78 RPM records. Its popularity means parts are readily available and restoration knowledge is widespread. A fully restored Wurlitzer 1015 can sell for $8,000 to $15,000 or more.
This is the model I recommend for first-time restorers who want maximum community support and parts availability. The 1015 also has the strongest resale value of any vintage jukebox.
Rock-Ola Princess
The Rock-Ola Princess, produced in the early 1960s, is prized for its compact size and elegant design. It holds 100 selections of 45 RPM records and features a distinctive arched glass front.
The Princess is a good intermediate project. It is more complex mechanically than the Wurlitzer 1015 but smaller and lighter, making it easier to move and work on. Restored examples typically sell for $4,000 to $8,000.
AMI Continental 200
The AMI Continental 200, produced around 1960, is known for its futuristic space-age design. It holds 200 selections and features a distinctive grille pattern and front-loading mechanism.
Continental 200 restoration is more challenging because fewer reproduction parts are available compared to Wurlitzer or Rock-Ola models. However, the striking design makes it a standout piece. Restored values range from $5,000 to $10,000.
Seeburg Select-O-Matic 200
Seeburg revolutionized the jukebox industry with the Select-O-Matic mechanism, which held 100 or 200 selections of 45 RPM records. Models from the late 1950s through the 1960s are popular restoration candidates.
Seeburg mechanisms are well-engineered and well-documented in service manuals, making them approachable for DIY restorers. Restored Seeburg models typically sell for $3,000 to $7,000 depending on model and condition.
Sourcing Parts and Replacement Components
Finding parts for vintage jukeboxes is easier than many people fear, but it requires knowing where to look. Forum users consistently ask about parts sourcing, especially for less common models.
Specialized Jukebox Parts Suppliers
Several companies specialize in reproduction and NOS parts for vintage jukeboxes. These suppliers carry capacitor kits, rubber parts, grille cloth, reproduction trim, and model-specific components.
Look for suppliers that have been in business for many years and have good reputations in the jukebox community. Forum members on r/jukeboxes and Jukebox Addicts frequently recommend specific suppliers based on personal experience.
Donor Machines
For parts that are not available as reproductions, a donor machine of the same model can be invaluable. Damaged machines that are beyond restoration often sell cheaply at estate sales, auctions, and online marketplaces.
One donor machine can supply trim pieces, internal hardware, and mechanical components that would be impossible to find elsewhere. Keep the donor parts clearly labeled and organized.
Online Communities
Jukebox forums and Facebook groups are excellent resources for finding rare parts. Experienced community members often have stashes of NOS parts or know where to find them.
When asking for parts help on forums, include clear photos of what you need and the model number of your machine. The jukebox community is generally welcoming to new restorers and happy to help.
Universal Electronic Components
Capacitors, resistors, and tubes can be sourced from general electronics suppliers. You do not need a jukebox-specific vendor for standard electronic components. Match specifications exactly and use quality brands.
For model-specific parts like mechanism components, trim pieces, and decorative items, stick with jukebox specialists who understand the vintage market and carry correct reproductions.
FAQs
How much does it cost to restore a vintage jukebox?
DIY restoration typically costs $500 to $3,000 in parts and materials. Professional restoration ranges from $5,000 to $25,000 or more depending on the model, condition, and level of detail. Major cost drivers include cabinet refinishing ($200 to $800 DIY), amplifier rebuild ($100 to $400 DIY), mechanism overhaul ($50 to $300 DIY), and chrome re-plating ($200 to $1,000).
What is the most sought after vintage jukebox?
The Wurlitzer 1015 One More Time is the most collected and valuable vintage jukebox. Produced from 1946 to 1947, it features the iconic bubble tube lighting and arched top that define the classic jukebox image. Other highly sought-after models include the Rock-Ola Princess, AMI Continental 200, and Seeburg Select-O-Matic 200.
How do you clean an old jukebox?
Start by removing all loose items and records. Use mild soap and warm water on a barely damp cloth for wood and metal surfaces. Use Novus plastic polish on acrylic panels. Clean chrome with chrome polish and a soft cloth. Use compressed air on mechanical parts. Always avoid water near electronics, switches, and the amplifier chassis.
Is it worth restoring a vintage jukebox?
For desirable brands like Wurlitzer, Rock-Ola, Seeburg, and AMI, restoration is almost always worth it. Working original machines range from $2,000 to $20,000 in value. Even non-working project machines can become valuable once restored. Restoration also preserves an irreplaceable piece of American cultural history.
How long does it take to restore a vintage jukebox?
A DIY restoration working evenings and weekends typically takes 3 to 12 months. A professional shop can complete a restoration in 2 to 6 months. The time depends on the machine condition, parts availability, your skill level, and how much time you can dedicate per week.
Can I restore a jukebox at home without professional help?
Yes, many hobbyists successfully restore vintage jukeboxes at home. You need basic hand tools, a soldering iron, patience, and willingness to learn. The main exception is tube amplifier work, which involves dangerous high voltage. If you are not comfortable with electronics, you can outsource the amplifier rebuild while doing everything else yourself.
Where can I buy vintage jukebox parts?
Parts are available from specialized jukebox parts suppliers that carry reproduction and NOS components. Online communities like r/jukeboxes and Jukebox Addicts forums are excellent for finding rare and model-specific parts. Donor machines from estate sales and auctions can provide parts that are not available as reproductions. Standard electronic components like capacitors and resistors can be sourced from general electronics suppliers.
Wrapping Up Your Vintage Jukebox Restoration
Learning how to restore a vintage jukebox opens the door to one of the most satisfying hobbies in the coin-op world. The seven-step process I have outlined covers assessment, disassembly, cabinet work, mechanism restoration, amplifier rebuild, lighting and plastics, and final reassembly with testing.
No other guide combines all of these elements with realistic cost breakdowns, a complete tools checklist, troubleshooting for common problems, and practical safety guidance for working with high-voltage tube amplifiers.
If you are just starting, pick a common model with good parts availability like a Wurlitzer 1015 or a Seeburg Select-O-Matic. Document everything, take your time, and do not be afraid to ask questions on jukebox forums. The community is welcoming and the knowledge base is deep.
The moment you hear your restored jukebox play its first record, every hour of work becomes worthwhile. These machines were built to last, and with proper restoration, yours can keep the music playing for another 50 years.