
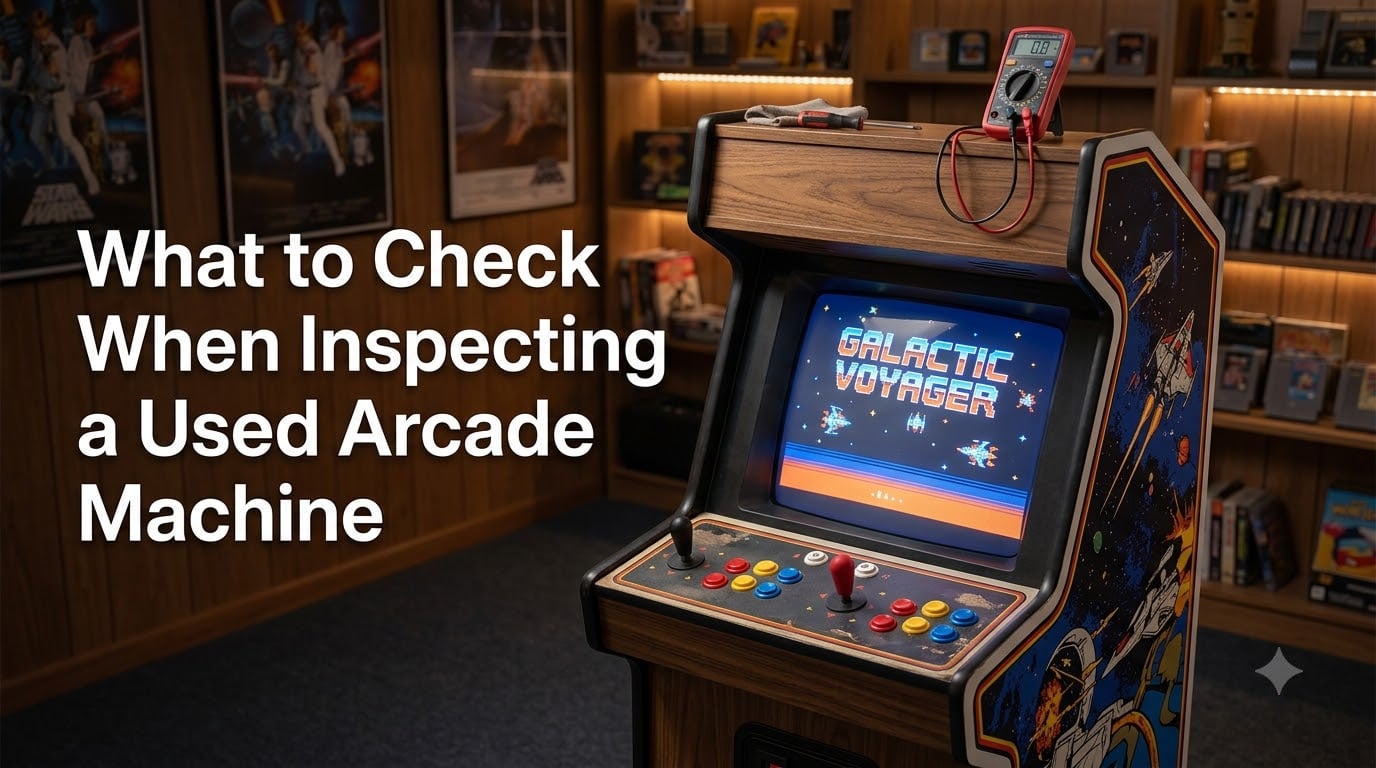
I have bought, restored, and flipped more arcade cabinets than I can count over the past fifteen years. Some were gems that still run perfectly today. Others taught me expensive lessons about what a thorough used arcade machine inspection should really cover. This guide walks through every check I run before money changes hands, from the cabinet exterior down to the battery on the PCB.
Whether you are buying your first cabinet for a home arcade or adding to a growing collection, knowing how to inspect arcade cabinet condition separates a great deal from a money pit. I will share the exact checklist I use, including the areas most buyers skip and most online guides gloss over.
The biggest mistake first-time buyers make is treating the inspection as a quick once-over. A proper pre-purchase arcade inspection takes 30 to 45 minutes minimum. You are looking for visible damage, testing every input, examining the display for defects, opening the cabinet to check internal electronics, and researching whether replacement parts are even available for the game you want.
By the end of this guide, you will have a repeatable inspection process you can take to every seller meetup. I cover the cabinet exterior, control panel, monitor, internal electronics, battery damage, JAMMA wiring, pinball-specific checks, red flags, and negotiation tactics backed by real repair cost data.
Table of Contents
- Pre-Purchase Research: Before You Show Up
- Cabinet Exterior Inspection Checklist
- Control Panel and Input Testing Procedure
- Monitor and Display Inspection Guide
- Internal Electronics: PCB, Power Supply, and Wiring
- Battery Inspection and Leak Prevention
- JAMMA vs Non-JAMMA: Why It Matters
- Pinball Machine-Specific Inspection
- Red Flags and Warning Signs
- Negotiation Leverage: Using Inspection Findings
- Transportation and Post-Purchase Maintenance
- FAQs
- Conclusion
Pre-Purchase Research: Before You Show Up
Inspection starts before you leave your house. The first step in any used arcade machine inspection is researching the specific game model and its parts availability. If the monitor dies six months from now, can you find a replacement chassis or a compatible CRT? If the control panel overlay is torn, does someone reproduce it?
Here is my pre-inspection research routine:
1. Look up the game on arcade parts retailers and community marketplaces. Check whether side art, control panel overlays, and T-molding are reproduced for that cabinet style.
2. Search collector forums for known issues with that specific boardset or monitor model. Some boards have chronic failure patterns that experienced collectors warn about.
3. Check recent sold listings for the same game in comparable condition to establish fair market value. This gives you a negotiation anchor before you inspect.
4. Find out whether the game uses a JAMMA harness (the standardized wiring format introduced in the late 1980s) or proprietary wiring. JAMMA games are far easier to repair and modify because parts and adapters are widely available.
5. Ask the seller specific questions before driving out. I always ask how long they have owned it, where it was stored, whether it has been opened for repair, and whether the batteries have been changed. Sellers who give vague answers to these questions often have something to hide.
One forum collector I spoke with put it bluntly: sellers who use proper arcade terminology like JAMMA, control panel overlay, or PCB typically know what they have. That cuts both ways. A knowledgeable seller may price fairly, but a vague seller may be unaware of problems you can find and leverage in negotiation.
Cabinet Exterior Inspection Checklist
The cabinet exterior tells you the machine’s life story. A cabinet that lived in a clean home gameroom looks very different from one that spent years on a commercial arcade route or in a damp garage. Here is the numbered checklist I run on every cabinet:
1. T-molding. Run your hand along the rubber edge trim around the entire cabinet. Look for nicks, cuts, chunks missing, or sections pulling away. T-molding is cheap to replace, but heavily damaged trim suggests the machine was dragged or abused.
2. Side art and paint. Check both sides for scratches, fading, peeling vinyl, and touch-up paint. Sun fading on one side often means the cabinet sat against a window. Reproduction side art exists for popular games but can run $100 to $300 and requires significant skill to apply.
3. Cabinet swelling and water damage. Press firmly on the bottom panels and lower back of the cabinet. Particle board that has absorbed moisture feels soft, swollen, or crumbly. Dark staining near the base is a red flag for water exposure. Swollen base panels can mean the cabinet will not sit level and may need partial reconstruction.
4. Control panel overlay. Examine the overlay art for wear-through around buttons and joysticks, peeling at edges, bubbling, or cigarette burns. Heavy wear above the controls is normal for a routed game, but deep gouges or liquid damage can mean the underlying wood is compromised.
5. Coin door and mechanism. Open the coin door and check for excessive rust, dents, or bent metal. Test whether coins feed through properly. Rust on the coin door often correlates with rust on internal metal components you cannot see.
6. Marquee and marquee light. Inspect the marquee artwork for fading, cracks, or moisture damage. Ask the seller to power on the marquee light. A dead fluorescent tube is a cheap fix, but a cracked marquee plexiglass can be hard to source.
7. Locks and keys. Check that all cabinet locks are present and functional. Missing locks mean anyone could have accessed the internals. Ask for keys to the back panel, coin door, and control panel latches.
8. Level and stability. Rock the cabinet gently. It should sit solid on all four levelers or casters without wobbling. Loose or missing levelers can cause the cabinet to lean, which stresses the monitor frame and internal mounts over time.
9. Overall cleanliness. Dust and cobwebs are normal for a stored machine, but visible mold, rodent droppings, or insect infestation inside or around the cabinet signals a poor storage environment. Mold especially can indicate humidity damage to electronics.
Control Panel and Input Testing Procedure
Controls are the part of the arcade machine you interact with every time you play. Sticky buttons and loose joysticks are common but fixable. What you are really testing for is whether the underlying wiring and input board are healthy. Here is my step-by-step input testing procedure:
Step 1: Test every joystick direction. Move each joystick slowly through all eight directions while watching the on-screen character or cursor. Feel for grinding, dead zones, or directions that register inconsistently. A joystick that clicks but does not register in-game points to a wiring or encoder issue, not just a worn actuator.
Step 2: Press every button individually. Test each button for clean actuation and audible microswitch click. Buttons that stick down or require excessive force need new microswitches or spring replacement. Buttons that feel fine but do not register point to wiring harness problems.
Step 3: Enter the test menu. Most arcade boards have a built-in input test accessible through a service switch or test button inside the coin door. This screen shows every input as on or off, letting you verify that no phantom presses or stuck inputs exist. If the seller will not let you access the test menu, that is a warning sign.
Step 4: Test the coin mechanism. Insert coins or tokens and confirm the game credits properly. If the machine is set to free play, ask how to toggle between free play and coin-op modes. A coin mechanism that jams or fails to register may need a simple cleaning or a full mech replacement.
Step 5: Check the player start buttons and service buttons. These are often overlooked because they get less use, but corroded contacts here can prevent the game from starting at all.
Document every input issue during testing. A single sticky button is a $3 part and five minutes of work. But multiple dead inputs across different areas of the panel suggest a failing wiring harness or ground issue that takes hours to diagnose.
Monitor and Display Inspection Guide
The monitor is the single most expensive component to replace in an arcade machine. A dead CRT can cost $200 to $500 to source and ship, and LCD conversions alter the authentic look. This is where I spend the most time during any inspection. Here is what to check:
Power on test. Watch the monitor from a cold start. It should fire up within 10 to 15 seconds. A monitor that takes a long time to warm up, flickers on, or requires the chassis to be tapped is showing capacitor failure symptoms.
Screen burn-in. Turn the brightness up and display a solid color or test pattern. Look for ghosted images of game elements permanently etched into the phosphor. Light burn-in is cosmetic and common on older games. Heavy burn-in that distracts from gameplay significantly reduces value.
Color and convergence test. Enter the monitor test screen or look at a game with vibrant colors. Check that red, green, and blue all render distinctly. Misaligned colors at the screen edges indicate convergence issues that require degaussing or adjustment, not necessarily repair.
Geometry and focus. Check that the image fills the screen properly without bowing, tilting, or excessive curvature at the edges. Look for sharp text in the score display. Blurry focus across the entire screen points to a failing flyback transformer or worn tube.
Flyback whine and monitor sounds. Listen for high-pitched whining from the monitor chassis. Some flyback whine is normal on CRTs, but loud or changing whine can indicate a failing flyback transformer, which is a $40 to $80 part but requires careful installation.
Physical monitor inspection. Open the back panel and visually inspect the monitor chassis board. Look for bulging or leaking capacitors, scorched areas on the PCB, cracked solder joints on the neck board, and dust buildup on high-voltage components. A recap kit for a common monitor chassis costs $15 to $30 but takes a few hours to install.
Voltage check at the tube. If you have a multimeter and the seller permits, verify the voltage feeding the monitor chassis matches the expected input. Monitors fed incorrect voltage from a failing power supply can display symptoms that look like monitor failure but are actually a power issue.
Monitor problems top the list of expensive repairs. Forum collectors consistently report that display issues are the costliest surprise after purchase. A cabinet with a healthy monitor is worth a premium, even if the exterior shows wear.
Internal Electronics: PCB, Power Supply, and Wiring
Opening the back panel separates a careful buyer from a careless one. The internal electronics are where hidden problems live, and where the most expensive failures originate. Here is what I check inside every cabinet:
PCB inspection. Locate the main game board, also called the PCB or boardset. Visually examine it for physical damage, burnt components, leaking capacitors, and corrosion on chip pins. Look for signs of poor repair work: cold solder joints, hot glue holding components, or heatsinks attached with non-standard methods. A clean board with original factory solder is ideal.
Verify original versus replacement board. Compare the PCB to reference photos for the game. Bootleg or replacement boards exist for popular titles, and they may have different reliability characteristics or lower collector value. Matching serial numbers on the board, cabinet, and documentation indicate an original, unmodified machine.
Power supply and voltage testing. This is a step almost no online guide covers in detail, yet it is critical. Using a multimeter, check the voltage output at the power supply terminals. Standard arcade logic runs on 5 volts DC, and the JAMMA standard also uses 12 volts DC and sometimes negative 5 volts.
Set your multimeter to DC voltage and place the probes on the 5-volt and ground test points on the JAMMA connector or power supply output. A healthy supply reads between 4.9 and 5.1 volts. Readings below 4.7 volts cause random resets and graphical glitches that masquerade as board failure. Readings above 5.25 volts can damage chips permanently.
Check the 12-volt line as well. This powers the audio amplifier, and low voltage here causes weak or distorted sound. If voltages are off, the power supply may need adjustment or replacement. A new switching power supply costs $25 to $40 and is a straightforward swap.
Isolation transformer check. If the cabinet has a CRT monitor, verify that an isolation transformer is present and wired correctly. The isolation transformer separates the monitor’s AC power from the main line. A cabinet where someone bypassed the isolation transformer is dangerous and can destroy the monitor chassis or cause electric shock.
Wiring harness integrity. Trace the wiring from the power supply to the JAMMA connector to the control panel. Look for frayed wires, electrical tape splices, melted insulation near heat sources, and modifications. A clean, original wiring harness is a strong sign the machine was maintained properly. A harness with random splices and mismatched wire colors suggests someone was troubleshooting problems and may not have finished the job.
Capacitor check on the PCB. Electrolytic capacitors on game boards dry out over 15 to 20 years. Look for domed or bulging capacitor tops, brown residue around capacitor bases, and corroded legs. A board with visibly bad capacitors may still work, but failure is imminent. Cap kits for popular boards are inexpensive but require soldering skill.
Battery Inspection and Leak Prevention
This is the inspection step that most guides skip completely, and it is one of the most important. Many arcade PCBs and all pinball MPUs from the 1980s and 1990s use a small battery to retain high scores, bookkeeping data, and game settings when powered off. These batteries have a finite lifespan, and when they leak, the corrosive electrolyte destroys traces and components on the board.
Battery leak damage is the number one killer of classic arcade and pinball boards. The damage is often irreversible and can render a boardset unfixable. Here is how to check:
Locate the battery. On arcade boards, look for a coin-cell battery (commonly a CR2032 in a holder) or a barrel-style soldered battery. On pinball machines, the battery is usually on the MPU board inside the backbox. Some boards use a capacitor-based memory retention system instead of a battery, which is ideal because it cannot leak.
Inspect for leak damage. Using a flashlight, examine the area around the battery holder or solder pads. Look for white, green, or blue crystalline residue, corroded traces, and discolored fiberglass. Even a battery that looks intact may have already leaked underneath. If you see corrosion creeping away from the battery area, the board may already have damaged traces.
Ask about replacement history. A seller who knows when the battery was last changed is a good sign. If the battery is original to a 30-year-old board and has never been changed, it is a ticking time bomb. I have seen boards where the battery leaked, ate through six traces, and turned a $200 board into scrap.
Post-purchase action. Even if the battery looks fine during inspection, plan to replace it immediately after purchase. Many collectors install a remote battery holder mounted away from the board, so any future leak cannot damage the PCB. This is a $5 part and 15 minutes of work that protects your investment permanently.
For machines that sat unused for 8 to 10 years or more, battery inspection is non-negotiable. Long storage periods are exactly when aging batteries fail and begin leaking. Forum collectors repeatedly share stories of pulling stored machines out of garages only to find destroyed boards.
JAMMA vs Non-JAMMA: Why It Matters
JAMMA stands for Japan Amusement Machinery Manufacturers Association, and it refers to a standardized wiring and connector format introduced in the late 1980s. Before JAMMA, every manufacturer used proprietary wiring. After JAMMA, a single standardized edge connector and pinout let you swap game boards between cabinets with minimal effort.
For a buyer, this matters for three reasons:
Parts availability. JAMMA wiring harnesses, connectors, and power supplies are mass-produced and inexpensive. Non-JAMMA cabinets require custom or reproduction wiring that is harder to source and more expensive.
Repairability. A JAMMA cabinet lets you test boards by swapping in a known-working PCB. If the game works with a different board, the problem is your original board, not the cabinet wiring. This isolation step is invaluable for diagnosis.
Future flexibility. JAMMA cabinets can run different games with a simple board swap. Some collectors install multi-game boards or emulation systems in JAMMA cabinets to run hundreds of titles. Non-JAMMA cabinets lock you into one game.
Games made before roughly 1987 are usually non-JAMMA. Games from the late 1980s onward are almost always JAMMA. When inspecting, verify which standard the cabinet uses by looking at the edge connector on the PCB. A JAMMA connector has a specific pinout with three sections for power, controls, and video.
If you are buying your first cabinet and want something easy to maintain, choose a JAMMA game. If you fall in love with a pre-JAMMA classic like Donkey Kong or Galaga, know that you are taking on a more demanding maintenance commitment.
Pinball Machine-Specific Inspection
Pinball machines share some inspection points with video arcade cabinets, but they add an entire mechanical layer that demands its own checklist. If you are inspecting a used pinball machine, these additional checks are essential:
Playfield wear. Examine the playfield surface under bright light. Look for ball trails (worn paths where the ball repeatedly travels), worn paint around high-traffic areas near flippers and pop bumpers, and wood exposed through the clearcoat. Playfield wear is the pinball equivalent of screen burn-in. It is permanent and expensive to fix. Full playfield restorations can cost thousands.
Flippers. Play the game and test every flipper for full strength and crisp return. Weak flippers indicate worn coils, broken flipper links, or dirty sleeve bushings. Test flipper catches and holds. Flippers that chatter or stutter may have driver board issues. Flipper rebuild kits are inexpensive and routine, but the underlying driver board problems can be costly.
Ramps and plastics. Inspect all ramps for cracks, broken mounting tabs, and cloudy or yellowed plastic. Check all playfield plastics for breaks, chips, and heat warping from bulbs. Reproduction plastics exist for popular games but are expensive and sometimes incomplete.
Ball shooter and plunger. Test the manual plunger for smooth travel and full spring tension. On auto-plunger games, verify the coil fires correctly. A weak shooter lane launch can indicate a worn plunger or a dirty shooter lane.
Score displays. Check every display segment on all player score panels and the backbox. On older machines, look for ghosting (segments that stay partially lit), missing digits, and flickering. DMD (dot matrix display) games should show a bright, even image without dead pixels or lines. LED display upgrade kits exist for many systems and are a moderate-cost improvement.
MPU board batteries. All the battery leak warnings above apply doubly to pinball machines. Williams System 11, WPC, and early Bally boards are notorious for battery damage. Check the MPU board in the backbox for the same corrosion signs, and verify that the battery has been relocated off-board or replaced with a non-leaking alternative.
Play the entire game. This is the best single test for a pinball machine. Start a game, play through multiple balls, trigger every mode you can, and listen for mechanical issues: clunks, grinding, or solenoids that buzz without firing. Pinball reveals its problems through play better than any visual inspection.
Red Flags and Warning Signs
Some findings during inspection should stop you in your tracks. Based on my experience and reports from collector forums, here are the red flags that indicate deeper problems:
1. Seller claims occasional glitches. When a seller says the game works but sometimes resets or shows garbled graphics, expect PCB or power supply failure. Buyers on collector forums report walking away from these deals. Intermittent issues are harder to diagnose and repair than total failures.
2. Rust on internal metal. Surface rust on brackets and monitor frames means humidity exposure. Heavy rust or rust on the transformer chassis suggests the machine sat in a damp environment. Humidity corrodes PCB pins, rusts transformer laminations, and shortens component lifespan across the board.
3. Swollen or crumbling cabinet base. Water damage to the particle board is structural. A cabinet with a rotted base may not be safe to transport or stand on, and repairs require carpentry skills.
4. Missing or mismatched PCB. If the board does not match the game title or is obviously a bootleg, the machine’s value drops significantly. Ask to see the board and compare it to references.
5. Seller refuses a playtest. If the seller will not let you power on and play the game, walk away. No exceptions. There is no legitimate reason to prevent a buyer from testing a machine.
6. Burning smell or scorch marks inside. Any evidence of electrical burning means a component failed catastrophically. Even if it works now, the damage may have weakened surrounding parts.
7. Heavy electrical tape or hot glue repairs. Amateur repairs inside the cabinet indicate someone was fixing problems without proper tools or knowledge. These repairs often mask the real issue.
8. Wiring that has been cut and spliced randomly. A harness with multiple tape splices and mismatched wire suggests someone was chasing a problem and may have introduced new ones.
9. No keys to any locks. A seller who lost all keys may not have had the cabinet open in years. That means no maintenance, no battery changes, and no internal inspection. Expect problems inside.
10. Visible battery corrosion. As covered above, this can mean irreversible board damage. If you see it, factor in the cost and feasibility of board repair or replacement.
Negotiation Leverage: Using Inspection Findings
Every defect you find during inspection is a negotiation tool. The key is translating problems into dollar amounts so the conversation stays grounded in repair costs, not feelings. Here is how I approach it.
Bring a written list of findings. After completing your inspection, organize the issues by repair cost. Minor issues like worn T-molding, a dead marquee light, or sticky buttons are inexpensive fixes and will not move the price much. Use them to show you did your homework and to set a collaborative tone.
Major issues are where real money lives. A CRT monitor that needs a cap kit and flyback replacement is a $50 to $120 parts cost plus labor. A failing power supply is $25 to $40. A torn control panel overlay is $80 to $150 for a reproduction. Board-level repair by a professional typically runs $75 to $200 plus shipping both ways.
Present these figures calmly. I say something like: The monitor needs a capacitor kit and likely a flyback, which is about $100 in parts. I would need to pull the chassis to confirm. Are you open to adjusting based on that? Most reasonable sellers respond well to specific, documented repair costs.
Battery damage is a powerful negotiating point because most sellers do not realize how serious it is. If you find corrosion, explain that it can destroy the board and ask whether the seller has tested the board traces. Even mild corrosion justifies a significant price reduction.
Be prepared to walk away. The strongest negotiating position is genuine willingness to leave without the machine. There are always more arcade cabinets for sale. Setting a maximum price before you inspect, based on your market research, keeps you disciplined.
On the other hand, if a machine passes inspection cleanly with original parts, documentation, and a cooperative seller, do not nickel-and-dime over cosmetic issues. A well-maintained machine at a fair price is a better deal than a fixer-upper that looks cheap but hides problems.
Transportation and Post-Purchase Maintenance
Getting the machine home safely is part of the inspection process. A perfect cabinet can be ruined in transit. Measure doorways, hallways, and your vehicle before pickup day. Bring a furniture dolly, moving blankets, and straps. Remove the control panel and marquee for transport if the cabinet design allows. Never lay a CRT cabinet face-down, as the monitor weight can crack the bezel and damage the chassis.
Bring a friend. Arcade cabinets weigh 200 to 350 pounds, and pinball machines are similar. One person should guide while the other supports. Secure the machine against the vehicle’s side wall and pad all edges. Drive carefully; sudden stops can shift the cabinet and crack internal mounts.
Once home, do not plug it in immediately. Let it acclimate to room temperature for a few hours if it came from a cold garage or hot storage unit. Condensation on cold electronics can cause shorts when powered on.
Here is my recommended post-purchase maintenance sequence:
1. Replace the battery. Do this first, before anything else. Install a remote battery holder or a non-leaking replacement to protect the board.
2. Inspect and reflow solder. Check the monitor chassis and PCB for cold solder joints. Reflow any that look cracked or dull.
3. Recap the monitor. If the cabinet is over 15 years old and the monitor has original capacitors, order a cap kit and install it. This prevents future failures and improves picture quality.
4. Clean the controls. Remove joystick shafts and buttons. Clean all contacts with contact cleaner. Replace worn microswitches.
5. Verify voltages. With the machine powered on, recheck the 5-volt and 12-volt lines at the JAMMA connector. Adjust the power supply if needed.
6. Clean the cabinet. Use mild soap and water on the exterior, glass cleaner on the monitor glass, and compressed air on internal components. Avoid spraying anything directly onto the PCB.
For ongoing maintenance, I recommend checking voltages every six months, keeping the cabinet in a climate-controlled space, and running the game for at least 30 minutes every few weeks. Electronics that sit unused degrade faster than those that run regularly.
FAQs
How to maintain an arcade machine?
Maintain an arcade machine by replacing the backup battery, checking power supply voltages every six months with a multimeter, recapping the monitor every 15 years, cleaning controls and contacts regularly, keeping the cabinet in a climate-controlled space, and running the game for at least 30 minutes every few weeks to keep capacitors healthy.
What is inside an arcade machine?
An arcade machine contains a power supply that converts wall AC to 5V and 12V DC, a main PCB (printed circuit board) that runs the game, a wiring harness connecting all components, a CRT or LCD monitor, a control panel with joysticks and buttons, a coin mechanism, a speaker and audio amplifier, and a marquee light. Pinball machines add a playfield with mechanical components.
How to buy an arcade cabinet?
Research the game’s parts availability and market value first, then inspect the cabinet exterior, test all controls, examine the monitor for burn-in and color issues, open the back to check the PCB and power supply voltages, look for battery leak damage, verify the board is original, and use any defects you find to negotiate a fair price.
How do you clean an arcade game?
Clean the cabinet exterior with mild soap and water, use glass cleaner on the monitor glass, blow dust from internal components with compressed air, clean joystick and button contacts with electronic contact cleaner, and wipe down the control panel overlay with a gentle non-abrasive cleaner. Never spray liquids directly onto the PCB or monitor chassis.
Conclusion
A thorough used arcade machine inspection protects your investment and gives you confidence at the negotiating table. The process comes down to five phases: research before you go, inspect the exterior and controls, test the monitor and internal electronics, check for battery damage, and use your findings to negotiate fairly.
The areas most buyers skip are the ones that matter most. Battery inspection prevents catastrophic board damage. Voltage testing with a multimeter catches power supply problems before they masquerade as board failure. Parts availability research tells you whether a beautiful cabinet is a viable long-term project or an expensive dead end.
My advice for what to check when inspecting a used arcade machine: take your time, bring a multimeter and flashlight, document everything, and never be afraid to walk away. The right machine is out there, and a careful inspection ensures you recognize it when you find it.