
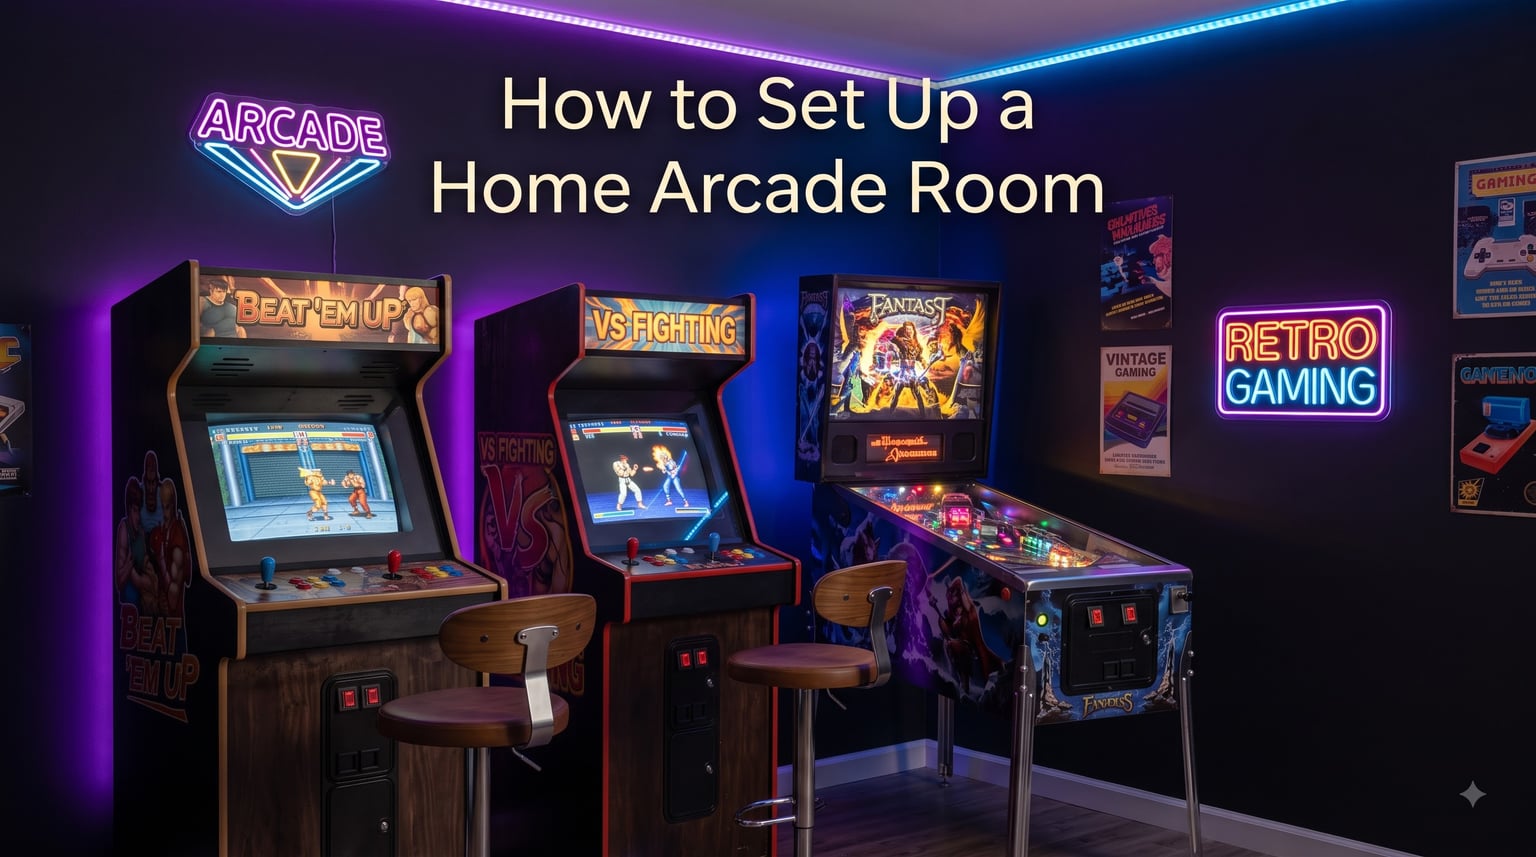
A home arcade room is more than a corner with a console. It is a dedicated space where classic arcade cabinets, pinball machines, and neon lighting recreate the magic of the golden age of gaming right inside your house. I have built arcade spaces in basements, spare bedrooms, and converted garages over the years, and the projects that turn out best all follow the same playbook.
Here is the short version for anyone skimming: set up a home arcade room by first measuring your space and checking doorway clearance, then set a realistic budget, choose your games, sort out the electrical needs, install the right lighting and flooring, and finish with seating, sound, and decor. The full guide below walks through each of these seven steps in detail so you can skip the expensive mistakes.
Table of Contents
- Step 1: Assess Your Space and Choose the Right Room
- Step 2: Plan Your Budget and Prioritize Purchases
- Step 3: Choose Your Games and Equipment
- Step 4: Handle Electrical Requirements and Cable Management
- Step 5: Design the Lighting and Atmosphere
- Step 6: Install Flooring and Wall Treatments
- Step 7: Add Seating, Sound, and Finishing Touches
- Climate Control and Maintenance Considerations
- Kid Safety and Family-Friendly Arcade Rooms
- FAQs
- Final Thoughts: Start With One Machine and Build From There
Step 1: Assess Your Space and Choose the Right Room
The room you pick determines everything else, from the size of cabinets you can fit to the electrical work you might need. I always tell people to start with a tape measure, not a shopping cart.
Measure the floor space, ceiling height, and doorway width. Most full-size arcade cabinets are about 29 inches wide, 33 inches deep, and 74 inches tall, and you want at least 3 feet of clearance in front for players to stand comfortably. A standard 32-inch door opening will let a cabinet through, but pinball machines are heavier and bulkier, so double-check before you buy.
Basement vs Spare Bedroom vs Garage
Basements are popular because they hide the noise from the rest of the house and usually have concrete floors that handle weight well. The downside is humidity, which can warp wood cabinets and corrode electronics over time. Run a dehumidifier and keep humidity below 50 percent if you go this route.
Spare bedrooms offer better climate control and easier electrical access, but they tend to be smaller. Garages are spacious but require insulation and climate control if you want year-round comfort. Whatever you choose, make sure the floor can handle the weight: a full pinball machine can weigh 250 to 350 pounds.
Plan for Future Expansion
When I help friends lay out their first arcade room, I always ask them to imagine the space with twice as many machines. Leave at least 30 percent of the floor empty on day one so you have room to grow your collection without having to rearrange everything later.
Step 2: Plan Your Budget and Prioritize Purchases
Setting up a home arcade room can cost anywhere from $1,500 for a basic multi-game setup to $25,000 or more for a serious collector’s dream room. The trick is knowing where to spend and where to save.
I learned this the hard way with my first build: I bought three cheap cabinets before realizing the controls were mushy and the monitors needed constant adjustment. Spending more on one quality machine almost always beats buying three flimsy ones.
New vs Used Machines
Used arcade cabinets and pinball machines often cost 40 to 60 percent less than new units, but they come with risks. Check the boards for battery corrosion, test all buttons and joysticks, and ask about the monitor’s age. CRT monitors are becoming harder to repair, so factor in a potential $200 to $400 conversion to LCD if you buy older electronics.
New machines from reputable manufacturers cost more but typically include warranties, modern LCD displays, and reliable components. If this is your first arcade room, starting with new or refurbished units from trusted sellers saves headaches.
Build Over Time
You do not need to buy everything at once. Start with one centerpiece machine that you will actually play, then add to the collection every few months. This approach also lets you learn what you enjoy most. Some collectors end up loving pinball more than arcade games, or vice versa, and would have spent differently if they had rushed the process.
Step 3: Choose Your Games and Equipment
This is the fun part, but it is also where budgets spiral out of control. A balanced home arcade room includes a mix of classic arcade cabinets, at least one pinball machine if budget allows, some table games, and modern consoles for variety.
Iconic Arcade Cabinets
Some games have earned permanent spots in the arcade hall of fame for good reason. Pac-Man, Galaga, Donkey Kong, Street Fighter II, and Mortal Kombat are the titles most players ask for first. A multi-game arcade cabinet that runs dozens or even hundreds of classic games is a smart buy if you want variety without filling your floor with single-game units.
Multi-game machines range from compact counter-top models to full-size arcade cabinets with rotating game libraries. They cost more upfront than a single-game cabinet but give you far more replay value per square foot.
Pinball Machines
Pinball adds a completely different feel to a home arcade room. The flashing lights, mechanical clatter, and physical feedback make pinball machines crowd favorites. New Stern pinball machines start around $7,000, while used machines from the 1990s can be found for $1,500 to $3,000 if you are patient.
Modern Stern models are reliable and supported by an active community, which matters when something breaks. Older Williams and Bally machines have more character but require more maintenance and a steeper learning curve.
Table Games and Add-Ons
Skee-Ball, foosball, air hockey, and shuffleboard tables round out the experience and give groups something to do while waiting for their turn on the main cabinets. These games also appeal to people who do not consider themselves gamers, which makes your arcade room more inclusive at parties.
Consider adding a modern gaming station with a PS5 or Xbox for the times when you want to play current titles. A 65-inch TV mounted on the wall with a couple of console controllers gives you flexibility without sacrificing floor space.
Step 4: Handle Electrical Requirements and Cable Management
Electrical planning is the step most people want to skip, and it is also the one that causes the most problems later. Skipping it can mean tripped breakers, fried machines, or even a fire hazard.
Count Your Outlets and Circuits
Walk through the room with a notepad and count every outlet, then check which circuit each one belongs to by flipping breakers. A typical 15-amp household circuit can handle about 1,800 watts. A vintage arcade cabinet draws around 150 to 200 watts, and a pinball machine can pull 300 watts or more when the solenoids fire.
If you plan to run four or more machines plus lighting and a sound system, you will likely need at least two dedicated 20-amp circuits. An electrician can add these for $300 to $800 per circuit depending on your panel capacity and how far the wires need to run.
Surge Protection Is Not Optional
Plug every machine into a quality surge protector. A single power spike can destroy a $500 arcade board in a heartbeat. I use industrial-grade surge protectors rated for at least 2,000 joules, and I replace them every three to five years because the protection wears out over time.
Cable Management for Safety
Loose power cables across an arcade room floor are a real trip hazard, especially when people are stepping backward during a game. Run cables along walls using cable raceways, or mount power strips to the back of cabinets so cords stay short and contained. Velcro cable ties let you bundle wires neatly without crimping them.
For the cleanest look, mount a power strip on a small shelf behind each row of cabinets and run a single extension cord to the wall outlet. This keeps the visible cable count low and makes it easy to cut power to a whole row when you need to service a machine.
Step 5: Design the Lighting and Atmosphere
Lighting makes the difference between a room with arcade machines and a true home arcade room. The right setup reduces eye strain, makes screens pop, and creates the nostalgic vibe you are after.
LED Strip Lighting and Neon Signs
RGB LED strips mounted behind cabinets, under bar tops, or along ceiling edges cost about $15 to $30 per roll and transform a room. Bias lighting behind monitors reduces eye fatigue and makes colors look more vivid. Many LED kits come with remote controls or smartphone apps so you can change colors to match the room’s mood or your favorite game.
Neon signs of classic game logos, characters, or beer brands double as decor and lighting. Vintage-style neon runs hot and uses more power, but modern LED neon signs give you the same look for less money and almost no heat output.
Blacklight and UV Effects
Blacklights make certain posters, paint, and pinball inserts glow in ways that regular lighting cannot match. A couple of UV strip lights along the ceiling cost under $30 and add a retro 1980s feel that players love.
Control the Brightness
Install dimmer switches or use smart bulbs so you can lower the lights during gameplay but raise them for cleaning or maintenance. Bright overhead lighting during a gaming session washes out the screens and kills the atmosphere. I keep a small LED work light on a shelf for when I need to see what I am doing.
Step 6: Install Flooring and Wall Treatments
The right flooring protects your machines, your floor, and your knees. I have seen too many beautiful arcade rooms ruined by carpet stains or hardwood scratches from sliding cabinets.
Flooring Options
Luxury vinyl plank (LVP) flooring handles spills, cleans easily, and looks great in a finished basement. Commercial carpet tiles are softer underfoot and let you replace individual stained squares instead of the whole floor. Rubber gym flooring absorbs sound and cushions the impact of dropped controllers, though it costs more.
Avoid wall-to-wall carpet if you can. Spilled drinks, dust from pinball machines, and the constant traffic will wear it out fast. Hard surface flooring with area rugs in seating zones gives you the best of both worlds.
Wall Art and Murals
Walls are free real estate for personality. Framed arcade marquees, vintage game posters, metal signs, and movie memorabilia turn blank drywall into a museum of gaming history. Custom murals featuring scenes from your favorite games cost more but become the visual centerpiece of the room.
If you want to reduce noise bleed into the rest of the house, add acoustic panels or heavy curtains to the walls. Pinball machines in particular are loud, and a few well-placed panels make the difference between a fun room and a complaint from the neighbors or your family.
Step 7: Add Seating, Sound, and Finishing Touches
The last 10 percent of the build is what makes the room feel finished. Seating, sound, and small details separate a half-finished project from the home arcade room you have been dreaming about.
Seating for Players and Spectators
Tall bar stools with backs work well in front of cabinets because they fit under the control deck when not in use. For spectators and people waiting their turn, a small couch or a few bean bags in a corner creates a comfortable hangout zone.
If you have room for a Skee-Ball lane or a foosball table, plan seating around it so people can sit and watch. Standing room only is fine for occasional use, but it gets old fast during longer gaming sessions.
Sound System Setup
No competitor guide I have read covers this in detail, which is a real gap. Arcade machines already make plenty of noise, so the goal of your sound system is background music and atmosphere, not more volume.
A pair of bookshelf speakers or a small soundbar connected to your phone or a streaming device gives you flexibility without dominating the room. Mount the speakers high on the walls so the sound spreads evenly and players do not bump them.
A jukebox-style Bluetooth speaker adds nostalgia and lets guests pick the soundtrack. Just keep the volume moderate so it does not compete with the machines. Some collectors run dedicated speakers for each cabinet so every game has its own authentic audio without overwhelming the room.
Snack and Drink Station
A small bar cart, mini fridge, or dedicated counter with a popcorn machine keeps everyone in the room without sending people to the kitchen. Avoid open drinks near the machines. One spilled soda into a control panel can mean a $200 repair and a week of downtime.
High Score Leaderboards
A simple whiteboard, a chalkboard, or a digital display showing high scores on each machine adds friendly competition. Rotate the categories monthly so casual players have a shot at the top spot. I have seen small laminated cards with marker pens work just as well as expensive digital setups.
Climate Control and Maintenance Considerations
Two topics that almost no competitor covers are climate and long-term care, and both matter more than most first-time builders realize.
Keep the room between 65 and 75 degrees Fahrenheit with humidity between 40 and 50 percent. Electronics last longer in stable conditions, and wood cabinets will not warp or crack. A small window AC unit or a mini-split system handles most home arcade rooms for under $500 installed.
Schedule a quick maintenance check every three months: vacuum dust from cabinet vents, check buttons and joysticks for responsiveness, test surge protectors, and inspect pinball machine playfield glass and rubber rings. Catching a worn rubber ring early costs $5 to fix. Waiting until it snaps can damage a $200 plastic ramp.
Kid Safety and Family-Friendly Arcade Rooms
If children will use the room, safety becomes a priority. Pinball machines have glass that can shatter, and vintage arcade cabinets often have sharp edges from decades of use. Add corner guards to sharp cabinet edges, secure tall machines to walls with anti-tip straps, and keep small parts like pinball balls out of reach of toddlers.
Set clear ground rules about food, drinks, and rough play around the machines. Most arcade repairs come from preventable damage, and a five-minute conversation with your kids saves hundreds of dollars over the life of the room.
FAQs
How much does it cost to set up a home arcade room?
A basic home arcade room with one or two quality cabinets, LED lighting, and basic decor starts around $1,500 to $3,000. Mid-range setups with multiple cabinets, a pinball machine, and finished flooring run $8,000 to $15,000. Premium rooms with several pinball machines, custom murals, and high-end sound systems can exceed $25,000.
Are home arcade machines worth the money?
Home arcade machines are worth the money if you actually play them regularly and choose quality over quantity. One well-built cabinet you use weekly delivers more entertainment value per dollar than three cheap machines that collect dust. Multi-game cabinets and used pinball machines from reputable sellers offer the best long-term value.
How much space do I need for arcade machines?
Each full-size arcade cabinet needs about 3 feet by 4 feet of floor space plus 3 feet of clearance in front for players. Pinball machines need similar clearance plus extra room behind for service access. For a comfortable room with two cabinets and seating, plan on at least 150 square feet. A serious multi-machine collection usually needs 300 square feet or more.
Should I buy new or used arcade cabinets?
Buy used arcade cabinets if you want vintage character and lower prices, but budget for potential repairs to monitors, buttons, and power supplies. Buy new cabinets if you want warranty coverage, modern LCD displays, and reliable components. Mid-1990s to 2000s machines from major brands often offer the best balance of price and dependability.
Do you need a license for a home arcade?
No license is required for a personal home arcade room used by family and friends. Licenses, business permits, and commercial insurance only apply if you charge admission, sell tokens, or operate the room as a public business. Some homeowner associations have rules about noise or signage, so check your local regulations if you live in a planned community.
Final Thoughts: Start With One Machine and Build From There
Building a home arcade room is one of the most rewarding projects I have ever tackled, and the seven steps above will save you from the most common headaches. Measure your space first, set a budget that lets you buy quality, choose games you will actually play, sort out the electrical needs before plugging anything in, layer in lighting that protects your eyes and sets the mood, pick flooring that survives spills and heavy cabinets, and finish with seating, sound, and small details that make the room feel complete.
Do not try to do everything at once. Pick one centerpiece machine, get it set up, and live with the room for a few weeks. You will quickly learn what you love, what you do not use, and where you want to expand. The home arcade room you build slowly over months will always beat the one you rushed to finish in a weekend.
Ready to start? Grab a tape measure, clear out that spare room, and treat yourself to the first machine. Your high score table is waiting.