
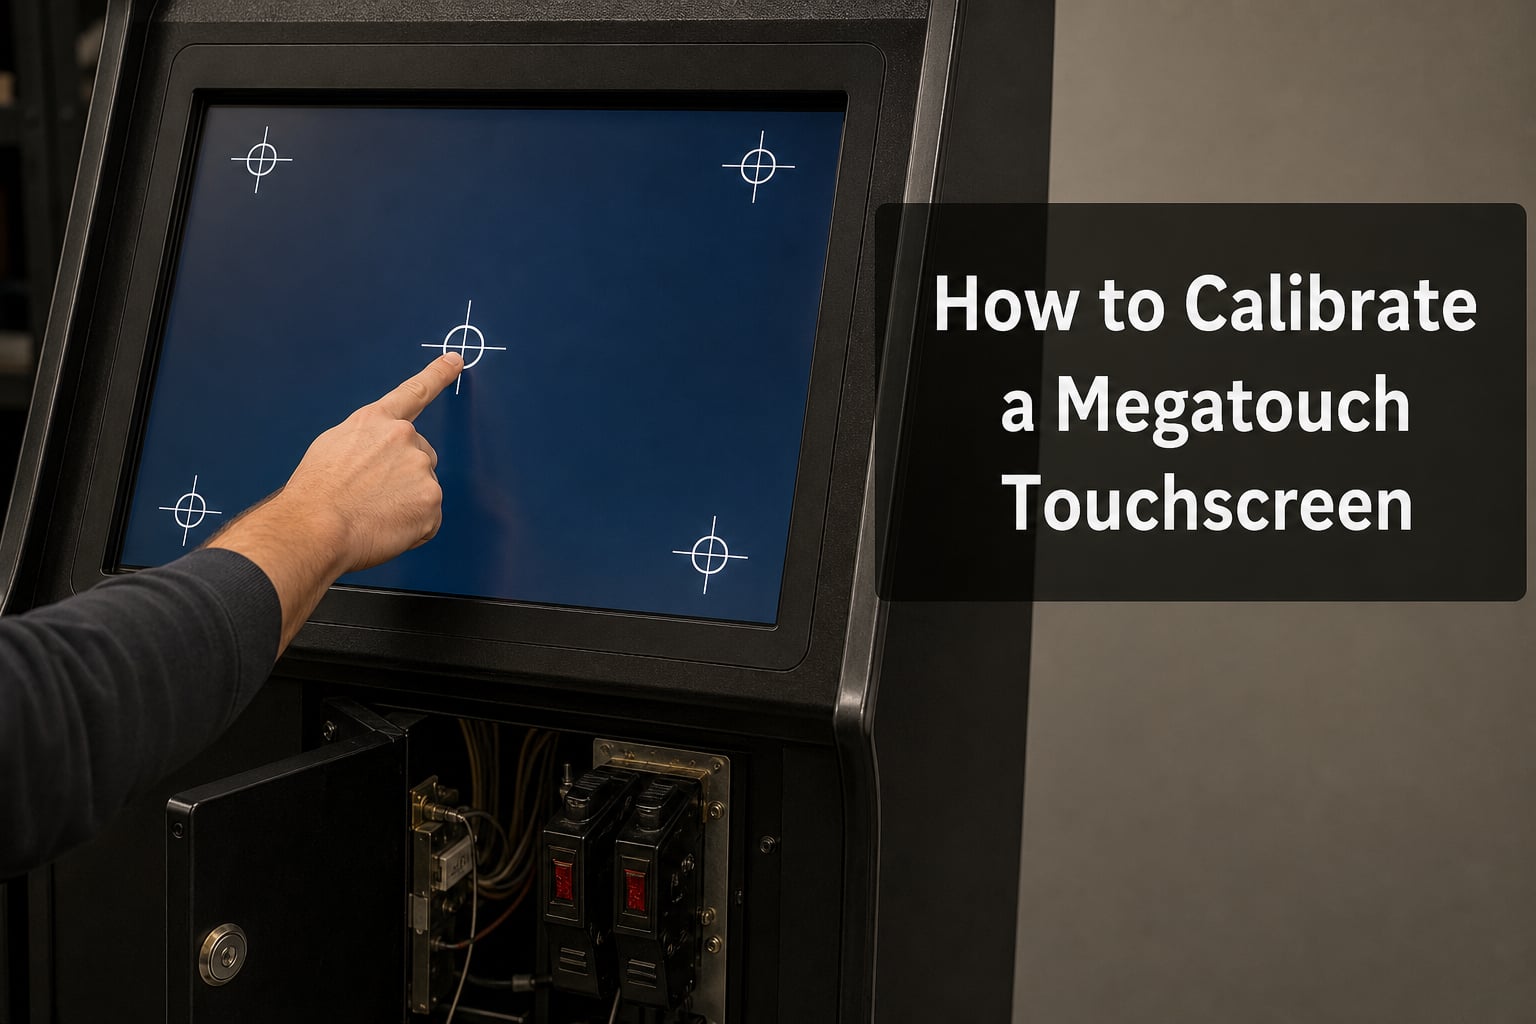
If your Megatouch machine starts registering taps in the wrong spots or menus won’t respond when you touch them, the fix is right at your fingertips. I’ll walk you through exactly how to calibrate a Megatouch touchscreen the same way we do it in our shop, including the model-specific quirks nobody else documents. By the end of this guide, you’ll know where the CALIBRATE button lives on your unit, the proper technique for getting accurate readings, and what to do when calibration just refuses to stick.
We’ve serviced dozens of Megatouch cabinets over the years, and I’ve lost count of how many times a “broken” touchscreen turned out to be a simple calibration issue. Most operators spend hundreds on a replacement when a 90-second procedure would have solved the problem.
Table of Contents
- What Is Megatouch Touchscreen Calibration?
- When Should You Calibrate Your Megatouch Touchscreen?
- Where Is the CALIBRATE Button? (Model-Specific Guide)
- Prerequisites Before Calibrating
- How to Calibrate a Megatouch Touchscreen: Step-by-Step Procedure
- Calibrating Different Megatouch Models (XL, Force, Ion, EVO, Maxx)
- Troubleshooting Calibration Failures
- How to Fix an Inverted or Drifting Touchscreen?
- When Calibration Is Not Enough: Replacing Your Touchscreen
- Preventive Maintenance Tips
- Frequently Asked Questions
- Wrapping Up
What Is Megatouch Touchscreen Calibration?
Megatouch touchscreen calibration is the process of aligning the touch sensor’s coordinate system with the LCD or CRT display so that finger touches register at the correct on-screen positions. When calibration drifts, you tap an icon and the system thinks you tapped three inches to the right. The fix is built into every Megatouch: a hidden CALIBRATE button that triggers a series of on-screen reference points. You touch the center of each point, and the machine stores the offset between where you tapped and where the point actually lives.
This matters because Megatouch games rely on precise touch input. A drifting touchscreen can make games unplayable, especially fast-paced titles like Solitaire, Trivia Whiz, or Snap Shot. Calibration is also a required step any time you install a replacement touchscreen, swap a controller board, or move the cabinet to a new location.
When Should You Calibrate Your Megatouch Touchscreen?
You should calibrate your Megatouch touchscreen whenever you notice touch input registering in the wrong location, after replacing the touchscreen or controller board, or as part of routine maintenance every 6 to 12 months. Here are the most common symptoms that signal it’s time:
Tapping one icon selects the icon next to it
Touch inputs are inverted (tapping the top of the screen registers as the bottom)
Buttons in the corners don’t respond or respond erratically
The screen works in some areas but not others
You just installed a new touchscreen or controller
The cabinet was recently moved or transported
If your touchscreen completely fails to respond, calibration won’t help. That’s a hardware problem, and you can jump ahead to our troubleshooting section.
Where Is the CALIBRATE Button? (Model-Specific Guide)
The CALIBRATE button is a small tactile switch hidden behind the coin mech or coin door on most Megatouch cabinets. On some models, it sits inside the cabinet on the control board. Pressing it launches the on-screen calibration routine. Because the location varies by model family, here’s a quick reference:
Megatouch CALIBRATE Button Location by Model
Megatouch XL: Behind the coin mech, accessible when the coin door is open
Megatouch Force: Inside the cabinet on the I/O board, near the coin harness
Megatouch Ion: Behind the coin door, mounted to the coin acceptor bracket
Megatouch EVO: Behind the coin mech; some units require entering SETUP mode via the SETUP button first
Megatouch Maxx / Full Maxx: Behind the lower service door on the control board bracket
Megatouch 5 / 6: Behind the coin mech on a small PCB
If you can’t find a physical CALIBRATE button, your model likely uses a SETUP button that opens an on-screen menu with a calibration option. The SETUP button is usually in the same general area (behind the coin door or on the control board).
Prerequisites Before Calibrating
Before you calibrate a Megatouch touchscreen, the machine must be in idle mode or game select mode, the screen must be clean, and your hands should be dry and free of lotion. Skipping any of these steps is the single most common reason calibration fails the first time. Here’s the prep checklist:
Power on the cabinet and wait for full boot. Let it sit at the attract loop for at least 30 seconds.
Enter idle or game select mode. Calibration won’t trigger from within a game.
Clean the touchscreen thoroughly. Use a soft microfiber cloth and isopropyl alcohol (90% or higher). Pay attention to the grooves etched around the screen edge where debris collects.
Dry your hands completely. Moisture on fingertips creates phantom touch points and ruins calibration.
Remove jewelry. Rings and bracelets can interfere with capacitive screens.
Locate the CALIBRATE button. Have the cabinet open and the button within reach before you start.
Tip from our shop: If the screen has visible grime in the etched grooves along the perimeter, the controller will read those particles as touch input. We clean the grooves with a soft toothbrush dipped in alcohol before every calibration job. It’s saved more touchscreens than I can count.
How to Calibrate a Megatouch Touchscreen: Step-by-Step Procedure
To calibrate a Megatouch touchscreen, open the coin door, press and hold the CALIBRATE button for 2 seconds, then touch the center of each on-screen reference point and hold for 2 seconds. The machine will save the new calibration data and return to idle mode automatically. Here’s the full procedure broken down step by step:
Power on the cabinet. Let it boot fully into idle mode (the attract loop where game demos play).
Open the coin door. This exposes the CALIBRATE button on most Megatouch models.
Press and hold the CALIBRATE button for 2 seconds. Don’t just tap it. A short press might not register. The screen should change to a calibration mode display.
Wait for the first reference point to appear. It’s usually a small crosshair or circle in the upper-left or center of the screen.
Touch the center of the first point and hold for 2 seconds. Don’t tap. Holding gives the controller a stable reading.
Repeat for each subsequent point. Most Megatouch models use 3 to 5 calibration points arranged across the screen.
Wait for confirmation. The machine will either flash a confirmation message, beep, or simply return to idle mode.
Test the calibration. Try tapping different areas of the screen. Inputs should now register where your finger actually touches.
If your model uses a SETUP button instead of a CALIBRATE button, the procedure is slightly different. Press SETUP to open the operator menu, navigate to “Touchscreen Calibration” using the on-screen arrow buttons (or the physical buttons behind the coin door), and select it. The on-screen calibration routine will begin the same way.
The “hold 2 seconds” technique isn’t in most official manuals, but it’s been confirmed by forum experts like megatouchmike, who services hundreds of Megatouch units a year. Tapping creates noisy data and leads to drift within days. Holding gives the controller a clean, stable sample.
Calibrating Different Megatouch Models (XL, Force, Ion, EVO, Maxx)
While the core procedure is the same across models, each Megatouch family has small variations that can trip you up. Here’s what we’ve learned from working on each one:
Megatouch XL
The Megatouch XL uses a CALIBRATE button behind the coin mech. The XL is one of the easier models to calibrate because the button is easy to reach and the calibration routine uses only 3 reference points. After pressing the button, hold each point for 2 seconds and the unit will save the data automatically.
Megatouch Force
The Force model uses an internal CALIBRATE button on the I/O board. You’ll need to unlock and open the upper service door to access it. Some Force units require a “two-button clear” before calibration will stick: hold both the SETUP and CALIBRATE buttons simultaneously for 5 seconds before pressing CALIBRATE alone to enter the routine.
Megatouch Ion
The Ion has a CALIBRATE button behind the coin door, but it also has a software path. You can reach calibration by entering operator mode (press SETUP, enter the operator PIN, then navigate to System Settings > Touchscreen Calibration). Use the software path if the physical button isn’t responding.
Megatouch EVO
The EVO is where most operators get stuck. The EVO uses a SETUP button to enter a hidden service menu, and the CALIBRATE option is buried two levels deep. Press SETUP, navigate to Diagnostics, then select Touchscreen Calibration. The EVO also has a known bug where calibration won’t save if the cabinet hasn’t completed its full boot cycle, so wait at least 60 seconds after power-on.
Megatouch Maxx and Full Maxx
The Maxx family places the CALIBRATE button behind the lower service door on the control board bracket. This means you’ll need to remove a panel to reach it. The Full Maxx uses a 5-point calibration routine instead of the standard 3 points, so be prepared for an extra step.
Troubleshooting Calibration Failures
If your Megatouch touchscreen calibration won’t save, registers touches in the wrong place, or fails to enter calibration mode at all, the cause is usually one of five things. We see these in our shop every week. Here’s how to diagnose and fix each one:
Common Calibration Failures and Fixes
Calibration won’t save: The touchscreen controller isn’t storing data. Try a “two-button clear” (hold SETUP and CALIBRATE for 5 seconds, then recalibrate). If that fails, the controller board likely has a failing EEPROM. Replace it.
Touch inputs are inverted or mirrored: The touchscreen cable is installed backward. Power off, remove the touchscreen ribbon cable, and reseat it with the correct orientation. On resistive screens, the side with the longer traces faces up.
Calibration drifts back within hours: Foam padding between the touch glass and bezel has degraded. The glass is touching metal and creating false signals. Replace the foam and recalibrate.
Touchscreen doesn’t respond at all: Check the ribbon cable connection at the controller board. If the cable is frayed or the connector pins are bent, the signal isn’t reaching the controller. Replace the cable.
Only part of the screen works: There’s debris in the etched grooves around the non-working area. Clean thoroughly with alcohol and a soft brush. If that doesn’t fix it, the touchscreen has dead zones and needs replacement.
Before you replace anything, try the forum-favorite workaround: power off the cabinet completely for 60 seconds (not just a reboot, a full power cycle), then power it back on and recalibrate. We’ve seen this resolve stubborn calibration saves more times than we can count, especially on EVO and Ion models.
How to Fix an Inverted or Drifting Touchscreen?
An inverted touchscreen, where tapping the top registers as the bottom and left becomes right, is one of the most frustrating Megatouch problems. It usually means the ribbon cable is reversed or the touchscreen has been installed backward. Start by checking the cable orientation first, because that’s the cheapest fix.
For a quick verification, power on the cabinet and try tapping each corner. If the inputs are inverted across both axes, the cable is flipped 180 degrees. If only one axis is inverted, the cable is on correctly but the controller needs to be re-flipped via the hardware detect menu (SETUP > Diagnostics > Hardware Detect).
There’s also a temporary workaround if you can’t get into calibration mode at all. Place a small dry-erase mark on the screen where you think the calibration point will appear, then touch the opposite corner when prompted. This gives the controller a wildly off-center reading and sometimes forces it to reset to defaults. It’s not a permanent fix, but it can buy you time until you can do a proper recalibration.
If the touchscreen keeps drifting back to its inverted state within hours or days of calibration, the touchscreen itself is likely worn out. Resistive touchscreens degrade as the ITO coating wears thin, usually after 5 to 10 years of heavy commercial use. At that point, replacement is the only real fix.
When Calibration Is Not Enough: Replacing Your Touchscreen
You should replace your Megatouch touchscreen when calibration no longer holds, when dead zones appear that cleaning can’t fix, or when the touch glass is physically cracked or scratched. Calibration is a software fix; it can’t repair worn-out hardware.
The good news is that replacement touchscreens are still available for most Megatouch models from eBay sellers (megatouchmike is a trusted source in the arcade community), parts suppliers like GameRoomRepair, and occasionally from Merit Industries directly for newer models. Expect to pay between $80 and $200 for a quality replacement touchscreen, depending on size and model. Replacing the entire glass assembly will run higher.
If you’re handy with a screwdriver, the swap is straightforward on most models. Power off, remove the bezel screws, lift out the old touchscreen (unplugging the ribbon cable from the controller), drop in the new one, plug in the cable, replace the foam padding, and reassemble. Plan on 30 to 60 minutes for your first swap. After installation, always recalibrate before using the machine.
Preventive Maintenance Tips
A well-maintained Megatouch touchscreen should hold calibration for 6 to 12 months under normal use. To maximize the time between calibrations and extend the life of your touchscreen, follow this preventive schedule:
Daily: Wipe down the screen with a dry microfiber cloth to remove fingerprints and oils.
Weekly: Clean with isopropyl alcohol and a microfiber cloth, paying attention to the etched edge grooves.
Monthly: Inspect the foam padding around the bezel for compression or crumbling.
Every 6 months: Recalibrate as preventive maintenance, even if you haven’t noticed drift.
Annually: Open the cabinet and check ribbon cable connections, foam condition, and grounding wires.
Keep drinks away from the cabinet. Spilled liquids are the single biggest killer of arcade touchscreens. Even a small amount of soda seeping into the etched grooves can cause permanent corrosion on the ITO coating. If a spill happens, power off immediately, dry the screen thoroughly, and let it sit for 24 hours before powering back on.
Frequently Asked Questions
How do I recalibrate my Megatouch screen?
Power on the cabinet and let it boot to idle mode. Open the coin door and press the CALIBRATE button (usually behind the coin mech) for 2 seconds. Touch the center of each on-screen reference point and hold for 2 seconds. The cabinet will save the new calibration and return to idle mode.
Why won’t my Megatouch screen calibration save?
Calibration that won’t save usually points to a failing touchscreen controller EEPROM, degraded foam padding causing the glass to contact metal, or a frayed ribbon cable. Try a full power cycle (60 seconds off), then a two-button clear (hold SETUP and CALIBRATE for 5 seconds), then recalibrate. If it still won’t save, the controller board needs replacement.
How do you clean a Megatouch touchscreen?
Power off the cabinet first. Use a soft microfiber cloth dampened with 90% or higher isopropyl alcohol. Wipe in gentle circular motions. Pay special attention to the etched grooves around the screen edge where debris collects, using a soft toothbrush if needed. Let the screen dry completely before powering back on.
What causes a Megatouch touchscreen to drift?
Touchscreen drift is caused by aged or worn resistive coating, degraded foam padding allowing metal-to-glass contact, ribbon cable connection issues, controller board failure, or environmental factors like temperature swings and humidity. Regular cleaning and annual recalibration prevent most drift issues.
How do you enter setup mode on Megatouch?
Press the SETUP button, usually located behind the coin door or on the control board inside the cabinet. On some models, you’ll be prompted for an operator PIN (default is often 1-2-3-4 or 1-1-1-1). The setup menu lets you access calibration, pricing, game settings, and diagnostics.
Wrapping Up
Knowing how to calibrate a Megatouch touchscreen saves you time, money, and frustration. Most touch issues come down to drift, grime in the etched grooves, or a cable that needs reseating, all of which a proper calibration routine can resolve in under five minutes. Use the model-specific CALIBRATE button location chart, follow the hold-2-seconds technique on each reference point, and run through the troubleshooting checklist if calibration doesn’t stick. For everything else, keep the cabinet clean, recalibrate every six months, and your Megatouch will stay tournament-ready for years to come.