
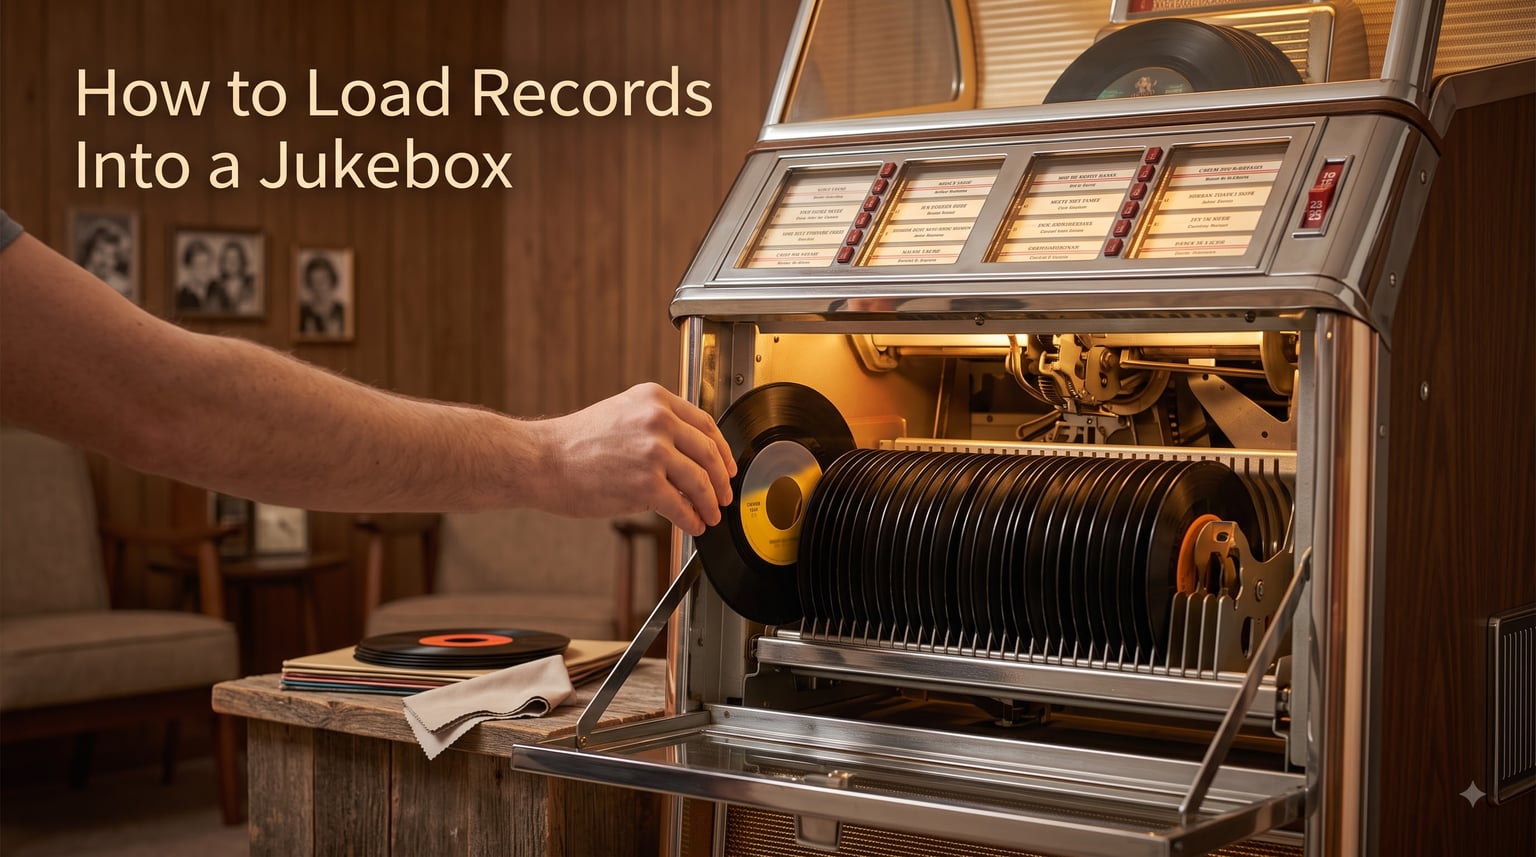
Yes, you can put your own records in a jukebox, and most modern home models and restored vintage machines are designed for exactly that. Whether you own a classic Seeburg Select-O-Matic, a Wurlitzer 1015, a Rowe, a Rock-Ola, or a modern digital jukebox, the loading process follows a familiar rhythm. I have spent weekends restoring and reloading several of these machines, and the truth is that learning how to load records into a jukebox is part mechanics, part vinyl care, and part patience.
Traditional jukeboxes play 7-inch vinyl 45 rpm singles, while modern digital jukeboxes play CDs, stream Bluetooth audio, or pull from a hard drive. This guide focuses on real vinyl, because that is where loading technique matters most. By the end, you will know how to load records into a jukebox the right way, regardless of brand.
Quick Answer: How to Load Records Into a Jukebox
Open the front or top panel to access the record rack.
Power the machine on and disengage transit mode if active.
Slide each 45 rpm record into a slot with the desired A-side facing up.
Match each title strip to its slot number on the selector panel.
Close the panel and test play a selection to confirm everything works.
Table of Contents
- At-a-Glance: Quick Steps to Load Records Into a Jukebox
- How a Jukebox Mechanism Works Before You Load?
- Step-by-Step: How to Load Records Into a Jukebox (General Method)
- Loading Records Into a Seeburg Jukebox
- Loading Records Into a Wurlitzer Jukebox
- Loading Records Into a Rowe Jukebox
- Loading Records Into a Rock-Ola Jukebox
- Loading Title Strips Correctly
- Record Orientation: A-Side vs B-Side Placement
- Record Capacity by Jukebox Type
- Comparison Table: Loading Methods by Jukebox Brand
- Maintenance Tips After Loading Records
- Common Mistakes to Avoid When Loading Records
- Troubleshooting: When Records Skip or Won’t Play
- Protecting Your Vinyl: Preventing Damage in a Jukebox
- Loading Music Into a Modern Digital Jukebox
- Best Practices for Curating Your Jukebox Playlist
- Frequently Asked Questions
- Conclusion: Mastering Jukebox Record Loading
At-a-Glance: Quick Steps to Load Records Into a Jukebox
If you just need to reload a working jukebox quickly, here is the short version. These five steps work for most vintage and modern home jukeboxes.
Open the cabinet. Most jukeboxes have a front panel that hinges open or a top lid that lifts, exposing the record rack.
Power on and exit transit mode. Vintage machines often ship with a transit screw, foam block, or shipping pin that locks the mechanism. Remove it before loading.
Choose clean 45 rpm records. Wipe each record with an anti-static cloth and inspect for scratches. Skip styrene records if your mechanism is heavy.
Slide records into magazine slots. Place each record with the side you want to hear (usually A-side) facing up. The label is visible from above when correctly oriented.
Install title strips and test. Slide each label strip into the selector card holder, then play a song to confirm the mechanism cycles correctly.
That covers the basics. The rest of this guide walks through the why behind each step, then dives into model-specific loading for Seeburg, Wurlitzer, Rowe, and Rock-Ola machines.
How a Jukebox Mechanism Works Before You Load?
Before you slide that first record into the rack, it helps to understand what happens after you press a selection button. Every jukebox, whether built in 1952 or last year, follows the same core sequence.
You press a letter and a number on the selection panel. Inside the machine, a carriage or tonearm assembly moves to the matching slot. The mechanism grabs the chosen record, lifts it onto the turntable, sets the stylus on the outer groove, and plays the song. When the record finishes, the mechanism returns it to its slot and resets for the next selection.
Here are the parts you will physically interact with when loading.
Record rack (or magazine): The rotating or sliding tray that holds all loaded records, usually 50 to 100 depending on the model.
Title strip: A small paper label printed with the song title and artist, placed in the selector card so you can find each record by its letter-number code.
Selection mechanism: The mechanical brain that finds and retrieves each record. Different brands use different designs (more on that below).
Turntable and stylus: Where records are actually played. The stylus (needle) is the contact point that reads the grooves.
Transit mode or lock pin: A shipping safety feature that locks the mechanism in place during transport. It must be released before the machine will run.
When you know how these parts fit together, loading records becomes a confident, repeatable process rather than a guessing game.
Step-by-Step: How to Load Records Into a Jukebox (General Method)
These steps work for most vintage jukeboxes. Specific quirks for Seeburg, Wurlitzer, Rowe, and Rock-Ola are covered in the brand sections below.
Step 1: Prepare the Jukebox and Records
Power on the jukebox so the mechanism is in its operating position. If the unit has been recently moved, check the service manual for the transit screw or foam block and remove it now. Have your anti-static cleaning cloth, replacement stylus, and a soft surface ready before you start handling records.
Step 2: Open the Cabinet and Inspect the Rack
Open the front panel or top lid. Look at the record rack. The slots should be empty, clean, and free of debris. Old paper, dead insects, and dust are common in machines that have been idle for years. Blow out loose debris with low-pressure compressed air, then wipe the rack with a dry microfiber cloth.
Step 3: Choose the Records You Want to Load
Start with records you know are in good condition. Older vinyl from the 1950s and 1960s will be more durable than newer pressings and styrene records. Pick a balanced mix: a few crowd-pleasers, some deep cuts, and at least one or two B-sides worth hearing.
Step 4: Clean Each Record Before Loading
Wipe each record with an anti-static cloth in a circular motion following the groove. Skip wet cleaners on jukebox-worn vinyl unless you have a proper cleaning machine. Even small dust particles can cause the mechanism to skip and accelerate stylus wear.
Step 5: Slide Records Into the Rack
Hold each record by its edges. Slide it into a slot in the record rack with the side you want to hear facing up. On most jukeboxes, the label side visible from above is the side that plays. Gently press the record flat against the back of the slot so it sits parallel to the others.
Step 6: Install Title Strips
Print or write each title strip clearly. Slide the strip into the matching letter-number slot on the selector card. Many jukeboxes have small plastic holders that grip the strip; others use a felt-lined slot. Make sure each strip is oriented so it reads correctly when the panel is viewed straight on.
Step 7: Test Play and Adjust
Close the cabinet. Make a few test selections. Listen for clean playback, watch the mechanism cycle, and confirm the carriage returns records to the correct slot. If a record is skipped or the carriage misses, re-rack that record and try again.
Loading Records Into a Seeburg Jukebox
Seeburg jukeboxes, including the legendary Select-O-Matic 100, used a horizontal rotating record rack that holds 50 records and plays both sides for 100 selections. The mechanism is feather-light but precise, which is why collectors love them, and why loading deserves a careful touch.
Seeburg Loading Steps
Open the cabinet door and rotate the record rack so an empty row is at the front.
Make sure the machine is on and the mechanism is not in cycle. On Select-O-Matic models, the cabinet light indicates cycle status.
Hold each 45 by its edges. Slide it into the slot with the A-side (or whichever side you want first) facing up.
Confirm the record sits flat and parallel in the rack. A crooked record will cause the carriage to misread.
Press the letter and number that matches the slot. For a test, classic Seeburg guides recommend pressing K-9 to verify the rack returns correctly.
One quick note from the Seeburg community: the Select-O-Matic uses a delicate “record reject” mechanism. If you press a letter-number combination that is already in use, the record will get gently returned. This is a feature, not a fault, and it actually protects your vinyl when loading.
Loading Records Into a Wurlitzer Jukebox
Wurlitzer jukeboxes like the 1015 “Bubbler” and the 1080 use a different mechanism from Seeburg. They use a vertical record rack, a record-grabbing carriage, and a turntable that rises to meet the record. Wurlitzer mechanisms are heavier than Seeburgs, so loading technique matters a lot here.
Wurlitzer Loading Steps
Open the front panel to expose the record rack, which is usually vertical on the left side of the cabinet.
Verify the mechanism is in the home position. The turntable should be fully lowered and the carriage should be parked.
Hold each 45 by its edges. Slide it into the rack slot with the A-side facing out toward the selector mechanism.
Make sure each record sits completely flat. Wurlitzer carriages are precise about record position, so a tilted record will jam the cycle.
Close the panel and make a test selection. Listen for any grinding or hesitation in the mechanism.
Wurlitzer owners on Reddit frequently report that empty turntable rises are a sign of bad loading, not just electrical failure. If your turntable rises empty, the carriage likely missed the record because it was tilted or not seated fully in the rack.
Loading Records Into a Rowe Jukebox
Rowe jukeboxes, especially the AMI and R-74 through R-94 series, used a horizontal rotating record rack similar to Seeburg but with a different carriage design. Rowe machines typically hold 100 records and play 200 selections (both sides of 100 records). They are popular in collectors’ circles because parts are still relatively available.
Rowe Loading Steps
Open the front or top panel. Rowe racks rotate smoothly, so position an empty row toward the front.
Power the machine on and let the mechanism complete its homing cycle.
Hold each 45 by its edges. Slide it into the slot with the A-side facing up.
Confirm the record sits flat in the slot. Rowe mechanisms are sensitive to crooked records, especially on the R-83 and R-84 models.
Test each record by selecting its letter-number code. Listen for clean playback and watch the return cycle.
Rowe machines sometimes play a B-side when you expect an A-side. This is almost always a solenoid issue, not a loading issue. If the side that plays is consistently wrong, have the mechanism serviced before loading more records.
Loading Records Into a Rock-Ola Jukebox
Rock-Ola jukeboxes, including the 1455 and 1493 series, use a vertical record rack and a more compact carriage than Wurlitzer. They were popular in diners and bars because the mechanism is rugged and forgiving. Record loading is straightforward, but the title strip system is a little different from other brands.
Rock-Ola Loading Steps
Open the cabinet. Most Rock-Olas have a hinged front panel that opens to expose the vertical rack.
Rotate the rack so an empty column is at the front.
Hold each 45 by its edges. Slide it into the slot with the A-side facing up.
Make sure the record sits flat. Rock-Ola mechanisms are forgiving, but a sharply tilted record will still cause the cycle to hesitate.
Insert the title strip into the matching slot on the selector card. Rock-Ola cards use a slightly different layout than Seeburg, so double-check which letter-number code corresponds to which physical slot.
Rock-Ola owners often report that the rack rotates more smoothly when records are evenly distributed. If you load only one side of the rack, you may notice the rack rotating slightly off-center during cycles. This is purely cosmetic and will not affect playback.
Loading Title Strips Correctly
Title strips are the small paper labels that tell you which record lives in which slot. They are easy to overlook, but they make a jukebox usable. Here is how to load them right the first time.
Print, don’t handwrite. Use a label printer or a fine-tip marker. Handwritten strips fade and look unprofessional.
Match the strip to the record. Walk through the rack one slot at a time and verify each strip matches the record physically loaded in that slot.
Slide the strip in correctly. Most jukeboxes have a small plastic holder or a felt-lined slot. The printed side should face the viewer, not the record.
Check orientation. Once the panel is closed, look at the selector card from the user’s perspective. Make sure all strips read upright, not rotated 90 or 180 degrees.
One overlooked detail: title strips can be reused, but the ink from old labels often bleeds onto the holder. If you are restoring a vintage jukebox, consider replacing the strips even if the originals are technically readable.
Record Orientation: A-Side vs B-Side Placement
Most jukeboxes play the side of the record that faces up when the record is loaded. The label is visible from above when correctly oriented. This is the A-side by convention, but you can flip a record to make the B-side the “A” slot if you want to hear the B-side first.
When deciding which side to face up, think about how the user will select songs. If the user picks letter-number code K-9, they expect the A-side of the record in slot K-9. If you flip the record so the B-side is up, you have effectively made the B-side the “A” of that slot. This is a common trick for featuring deep cuts in a jukebox playlist.
Some collectors deliberately load B-sides on the side facing up to surface songs that would otherwise be skipped. Just remember to update the title strip so users know what they are selecting.
Record Capacity by Jukebox Type
How many records can you put in a jukebox depends on the model. Here is a quick reference.
| Jukebox Brand/Model | Record Capacity | Selections (Both Sides) |
|---|---|---|
| Seeburg Select-O-Matic 100 | 50 records | 100 selections |
| Wurlitzer 1015 (Bubbler) | 24 records | 48 selections |
| Wurlitzer 1080 | 50 records | 100 selections |
| Rowe R-74 / R-83 | 100 records | 200 selections |
| Rowe AMI Continental 2 | 100 records | 200 selections |
| Rock-Ola 1455 | 50 records | 100 selections |
| Rock-Ola 1493 Princess | 100 records | 200 selections |
| Sound Leisure Vinyl Rocket | 70 records | 140 selections |
| Modern digital jukebox (CD) | 100 CDs typical | Up to 200 selections |
Capacity is a fixed hardware limit. You cannot load more records than the rack physically holds, and overloading will damage the mechanism.
Comparison Table: Loading Methods by Jukebox Brand
Different brands use different loading methods. This table compares how records are loaded into the four major vintage jukebox manufacturers.
| Brand | Rack Type | Loading Position | Mechanism Style | Key Loading Tip |
|---|---|---|---|---|
| Seeburg | Horizontal rotating | Label faces up (A-side) | Light carriage, record reject feature | Press K-9 to test cycle |
| Wurlitzer | Vertical | A-side facing out | Heavy carriage, rising turntable | Ensure records sit flat to avoid empty rises |
| Rowe | Horizontal rotating | Label faces up (A-side) | Precision solenoid carriage | Distribute weight evenly across the rack |
| Rock-Ola | Vertical | Label faces up (A-side) | Compact, rugged carriage | Verify title strip orientation after loading |
Notice the pattern: most jukeboxes play the side that faces up when loaded, but the Wurlitzer is a notable exception where the A-side faces out. Always check your model’s manual before loading the first record.
Maintenance Tips After Loading Records
Loading records is only half the job. Keeping the jukebox and vinyl in good shape after loading is what separates a working machine from a museum piece.
Replace the stylus every 500 to 1,000 plays. A worn stylus damages vinyl faster than anything else in the jukebox.
Wipe records every 25 to 50 plays. A quick pass with an anti-static cloth extends both record life and stylus life.
Vacuum the rack monthly. Dust in the rack migrates to the records and then to the stylus.
Check the transit lock before any move. Re-engage the transit screw or foam block before transporting the jukebox, even across a room.
Inspect the mechanism yearly. A service tech can replace belts, lubricate bearings, and adjust the carriage for a fraction of the cost of a major repair.
These habits add up. A jukebox that is loaded carefully and maintained regularly will outlast one that is loaded and forgotten by decades.
Common Mistakes to Avoid When Loading Records
I have watched new jukebox owners make the same handful of mistakes year after year. Here are the ones to avoid.
Loading styrene records into a heavy mechanism. Styrene is brittle and chips easily. Wurlitzer and Rowe carriages will destroy a styrene record in 5 to 10 plays.
Forgetting to remove the transit lock. This is the most common cause of “my jukebox is broken” complaints on day one.
Loading records with the wrong side up. The user expects the A-side, but the B-side plays. Always double-check orientation before closing the panel.
Skipping the cleaning step. Dust on the record becomes dust on the stylus, which becomes noise and skips.
Pressing wrong number combos mid-load. Selecting a song while the door is open can confuse the mechanism. Always finish loading before making selections.
Overloading one side of the rack. Uneven weight distribution causes premature wear on the rack rotation motor.
Most of these mistakes are easy to fix once you know about them. The hard part is unlearning the things you did on your first jukebox.
Troubleshooting: When Records Skip or Won’t Play
Even with careful loading, things go wrong. Here is how to diagnose the most common jukebox playback problems.
Records Skip After a Few Plays
This is the most common complaint on r/jukeboxes. If records play fine the first couple of times and then skip permanently, the cause is almost always tracking force that is too high. The stylus is grinding the groove deeper than it should.
Adjust the tracking force to the lightest setting that still tracks reliably. On Seeburg Select-O-Matics, this is usually around 2 to 3 grams. On Wurlitzer 1015s, you can find the adjustment under the turntable.
Turntable Rises Empty
The carriage moves to the right slot, but no record is on the turntable. This usually means the record was not seated fully in the rack, so the carriage missed it. Re-rack the record and confirm it sits flat against the back of the slot.
Wrong Side Plays
You selected the A-side, but the B-side played. This is usually a solenoid that fires in the wrong direction. It is a service issue, not a loading issue. Have the mechanism serviced before loading more records.
Record Reject Cycles Continuously
If the carriage keeps returning the record without playing it, the slot is probably misaligned. Remove the record, inspect the slot for bent metal, and reload the record. If the issue persists, the mechanism needs adjustment.
Stylus Sounds Harsh or Distorted
Replace the stylus. A worn stylus is the leading cause of harsh sound and record damage. Most jukeboxes use a standard styli that costs under $20 and takes about 10 minutes to swap.
Protecting Your Vinyl: Preventing Damage in a Jukebox
Jukeboxes are not gentle on records. The mechanism grabs the disc, the stylus tracks with several grams of force, and the same record may play dozens of times in a single weekend. Here is how to keep your vinyl safe.
Use vinyl records, not styrene. Vinyl is more durable and will outlast the stylus. Save styrene for collecting, not jukebox duty.
Set tracking force light. Tracking force is the pressure the stylus exerts on the record. The lighter you can go without skips, the longer your records will last.
Replace the stylus regularly. A worn stylus grinds grooves instead of tracking them. Replace every 500 to 1,000 plays.
Clean records before loading. Every dust particle that goes into the rack comes out embedded in the groove.
Rotate deep cuts in and out. A record that plays 100 times in a month will wear out faster than one that plays 10 times. Variety protects your vinyl.
Treat your jukebox vinyl like a working tool, not a museum piece. It is supposed to be played. Just play it with care, and it will last for decades.
Loading Music Into a Modern Digital Jukebox
Modern jukeboxes look vintage but play digital audio. They use Bluetooth, CD mechanisms, internal hard drives, or smart streaming for music. Loading them is very different from loading vinyl, but the result is the same: a player piano for music.
Bluetooth Jukeboxes
Pair your phone or tablet using the jukebox’s Bluetooth menu. Once paired, any audio from your device plays through the jukebox speakers. This is the easiest way to play your own music on a modern jukebox.
CD Jukeboxes
Open the CD magazine (usually a carousel that holds 50 to 100 CDs). Slide each CD into a slot with the label facing up. The magazine rotates the same way a vinyl rack does, and the selector buttons access CDs by letter-number code.
Hard Drive Jukeboxes
Connect the jukebox to your computer via USB or network. Drag and drop audio files into the jukebox’s library. Most modern hard drive jukeboxes accept MP3, FLAC, and WAV files. The selector panel then accesses digital files the same way a vinyl rack accesses records.
Streaming Jukeboxes
Some premium modern jukeboxes connect to services like Spotify or Apple Music. You link your account in the jukebox settings, build playlists in the app, and the jukebox plays your queue through its speakers. This is the most modern way to load a jukebox, and it works well for owners who want their full music library without loading physical media.
Best Practices for Curating Your Jukebox Playlist
Loading records is half technical, half artistic. Here are the rules I follow when curating a jukebox playlist.
Mix eras and genres. A jukebox should surprise people. Load some 1950s rock, some 1960s soul, some 1970s funk, and at least one or two modern tracks.
Include B-sides. B-sides are often better than the A-side and they show off your jukebox’s ability to play both sides.
Save favorite records for special occasions. If a record is irreplaceable, do not load it into the jukebox. Play it on your home turntable instead.
Rotate records seasonally. Swap out winter classics for summer hits. A jukebox with the same 50 records for a year feels stale.
Lead with crowd-pleasers. The most picked records should be the ones in the front of the rack. Save deep cuts for the back.
Loading records is a chance to share your taste with everyone who walks into the room. Take the time to make it count.
Frequently Asked Questions
Can you put your own records in a jukebox?
Yes, you can put your own records in a jukebox. Most vintage and modern jukeboxes are designed so owners can load and unload records freely. Just match the records to the jukebox format (typically 7-inch 45 rpm singles for vintage machines) and follow the loading steps in your model’s manual.
How do I add music to a jukebox?
For a vinyl jukebox, open the cabinet, slide each 45 rpm record into a slot in the record rack with the side you want to hear facing up, install the matching title strip, and close the panel. For a digital jukebox, you can pair via Bluetooth, load CDs into the magazine, or transfer audio files to the internal hard drive.
How many records can you put in a jukebox?
It depends on the model. Seeburg Select-O-Matic 100 holds 50 records (100 selections), Wurlitzer 1015 holds 24 records (48 selections), Rowe R-83 holds 100 records (200 selections), Rock-Ola 1493 holds 100 records (200 selections), and Sound Leisure Vinyl Rocket holds 70 records (140 selections). Most modern CD jukeboxes hold 100 CDs.
Does a jukebox play vinyl?
Traditional jukeboxes play vinyl 45 rpm singles. Modern jukeboxes may play CDs, stream Bluetooth audio, or pull from a digital hard drive. Some modern machines combine these features so you can play both vinyl and digital audio from the same cabinet.
Conclusion: Mastering Jukebox Record Loading
Knowing how to load records into a jukebox is the first step toward owning a machine you actually use. It is not complicated, but it rewards patience. Take time to clean your records, seat them flat in the rack, and double-check title strips before closing the cabinet. Those few extra minutes prevent skipping, protect your vinyl, and keep the mechanism running smoothly for years.
Whether you are loading a Seeburg Select-O-Matic, a Wurlitzer 1015, a Rowe R-83, a Rock-Ola 1493, or a sound leisure digital jukebox, the principles are the same: clean records, flat placement, matched title strips, and a quick test play. Follow that rhythm, and your jukebox will be the heart of your home, diner, or bar for decades to come.